
A good rolling pin should last decades. Most store-bought versions don’t. They warp, crack, or peel after a few years in a busy kitchen. You can do better with your own two hands. Learning how to make a wooden rolling pin gives you a tool that fits your grip, matches your kitchen, and outlasts anything off a big-box shelf.
The work is simpler than it looks. You shape a hardwood blank, smooth the grain, and seal it with a food-safe finish. No fancy machinery required for the basic version. This guide walks you through every step, from picking the right wood to applying the final coat, so you can build a rolling pin you’ll be proud to use.
Why Making a Wooden Rolling Pin Matters
Premium rolling pins cost real money. A solid maple or walnut pin from a specialty shop runs $40 to $80. You can build a better one for a fraction of that using a single hardwood blank.
The savings are only part of it. This project teaches core woodturning and finishing skills you’ll reuse on dozens of future builds. You learn how grain behaves under a blade. You learn how sanding grit progression creates a glass-smooth surface. You learn which finishes are safe for food contact.
It also builds confidence. A rolling pin is forgiving enough for a beginner but satisfying enough to feel like a real accomplishment. Finish one, and you’ll trust yourself with bigger projects — cutting boards, bowls, kitchen tools that last.
Tools and Materials You’ll Need
Gather everything before you start. A clean setup prevents mistakes mid-build.
- Shape the blank fast: wood lathe with a roughing gouge and spindle gouge
- Secure the stock: lathe drive center and live center
- Mark your cuts: pencil, ruler, and calipers
- Smooth the surface: sandpaper in 80, 120, 180, 220, and 320 grit
- Choose your stock: a kiln-dried hardwood blank in maple, walnut, beech, or cherry (roughly 3″ x 3″ x 20″)
- Seal it safely: food-safe finish such as mineral oil or a beeswax-mineral oil blend
- Apply the finish: clean lint-free cloths
- Protect yourself: safety glasses and a dust mask
- Optional for convenience: a parting tool to size your handle transitions cleanly
No lathe? You can hand-shape a simple straight pin with a spokeshave and patience, though a lathe makes the job far easier.
Step-by-Step Guide on How to Make a Wooden Rolling Pin
Step 1 – Choose and Inspect Your Hardwood Blank
Start with dense, kiln-dried hardwood. Maple is the classic choice — tight grain, no strong odor, and it won’t stain dough. Walnut and cherry look stunning but cost more. Avoid softwoods like pine; they dent and absorb moisture.
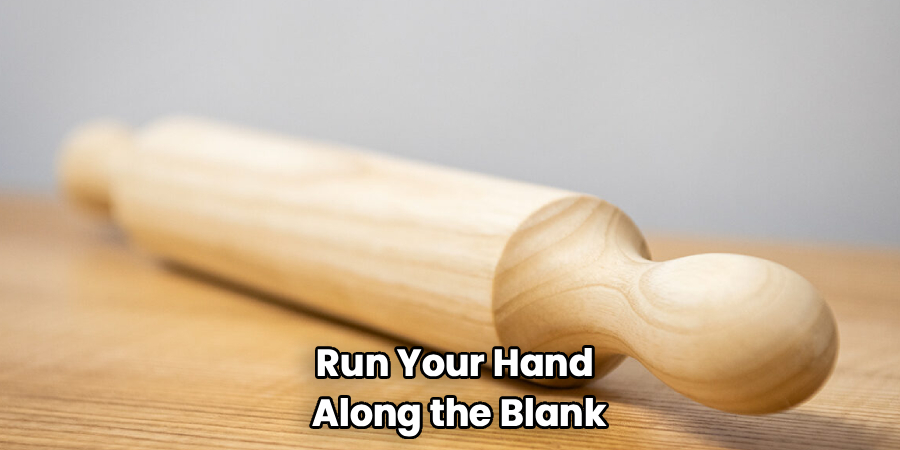
Run your hand along the blank. It should feel solid and dry, with no sticky resin or rough cracks. Hold it to the light and check the grain. Straight, even grain turns clean and resists splitting. Wild or knotty grain catches your tools and tears out.
Knowing how to make a wooden rolling pin starts here, with good stock. A flawed blank fights you at every step. Tap it lightly — a clear ring means sound wood, a dull thud can signal hidden rot.
Step 2 – Mark Your Center Points
Accurate centering keeps your pin balanced. An off-center blank wobbles violently on the lathe and ruins your shape.
Find the center on each end. Draw two diagonal lines corner to corner. Where they cross is your center point. Press a pencil dot there, then deepen it slightly with an awl so your drive center bites cleanly.
Do this on both ends. Eyeball the marks against each other to confirm they line up through the length of the blank. Sloppy centering here shows up later as a lopsided pin that rolls dough unevenly.
Take your time. Two minutes of careful marking saves an hour of frustration once the lathe is spinning.
Step 3 – Mount the Blank on the Lathe
Seat the blank between the drive center and the live center. Drive the headstock spur into your marked center, then bring the tailstock up and snug the live center into the opposite end. Tighten until the blank holds firm but still spins freely by hand.
Spin it slowly with your hand first. Watch for wobble. A centered blank turns in a clean, tight circle. A wobble means you need to remount.
Position your tool rest about an eighth-inch from the wood and just below center height. Spin the blank by hand one full turn to confirm nothing strikes the rest. This quick check prevents a nasty catch when you power up.
Step 4 – Rough the Blank Into a Cylinder
Set a slow speed and put on your safety glasses. Take your roughing gouge and ride the bevel against the spinning square blank.
At first you’ll hear a rhythmic thumping as the corners slap the gouge. That’s normal. Keep light, steady pressure and move along the length. The thumping smooths into a steady whoosh as the square becomes round.
Watch the silhouette. A true cylinder shows a crisp, unbroken line at the edge. Ragged spots mean you’ve missed material. Long, curling shavings peeling off the gouge tell you the tool is sharp and your angle is right. Fine dust instead of shavings means your edge is dull — stop and sharpen it.
Step 5 – Shape the Body and Handles
Now you design the pin. For a classic shape, leave the center thick and taper toward two handles. Mark your transition points with a pencil while the lathe spins.
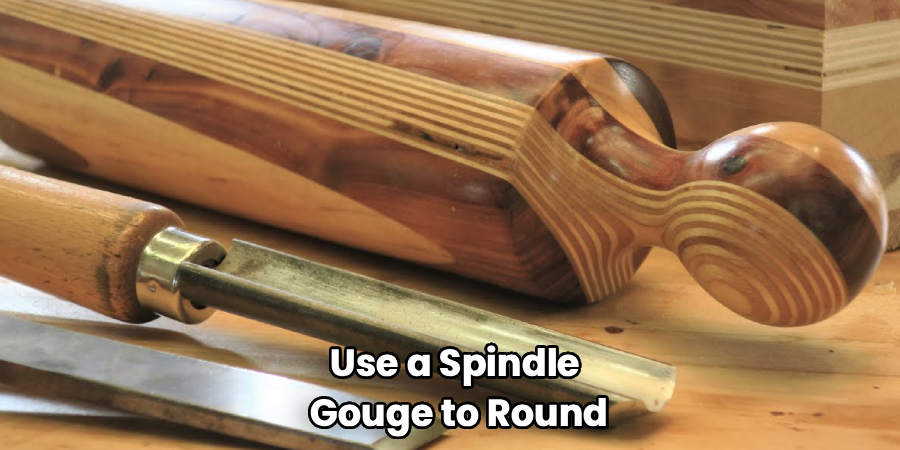
Use a spindle gouge to round the body and shape the handles. Cut downhill, from larger diameter to smaller, to keep the grain from tearing. Check the body diameter with calipers as you go — most rolling pins land around 2 to 2.5 inches across the barrel.
This is the heart of how to make a wooden rolling pin that feels right in the hand. Roll the unfinished pin against your palm. The handles should feel comfortable, the body even. Stop the lathe and sight down the length to confirm a smooth, consistent profile before you sand.
Step 6 – Sand Through the Grits
Sanding turns a decent pin into a beautiful one. Skipping grits leaves scratches that show up the moment you apply finish.
Start with 80 grit if your tool marks are deep, otherwise begin at 120. Hold the paper lightly against the spinning wood and move it side to side — never park it in one spot or you’ll burn a groove. You’ll hear the pitch change from a harsh scratch to a soft hiss as the surface smooths.
Step up through 180, 220, and 320. Stop the lathe between grits and sand a stroke along the grain to remove circular scratches. Run your fingertips over the surface. When it feels like cool, polished stone with no drag, you’re done.
Step 7 – Apply a Food-Safe Finish
Raw wood soaks up moisture and stains. A food-safe finish seals the pores and protects your work.
Mineral oil is the simplest choice. Pour a generous amount onto a lint-free cloth and rub it along the grain while the pin is off the lathe. The wood drinks it in fast, deepening the color and waking up the grain. You’ll see the figure pop — walnut darkens richly, maple gains a warm glow.
Let it soak 20 minutes, then wipe off the excess. Apply two or three coats, waiting between each. For extra protection, finish with a beeswax-mineral oil blend buffed to a soft sheen. Never use vegetable oils — they turn rancid.
Step 8 – Cure and Final Inspection
Patience pays off at the end. Let the finished pin cure overnight before its first use. This gives the oil time to penetrate and set.
Inspect your work in good light. The surface should feel smooth and slightly waxy, with no sticky spots. Roll it across a flat counter — a well-balanced pin tracks straight without rocking. Spin it on its handles and watch the body; a true pin spins without visible wobble.
Check the handle transitions one last time. They should feel rounded and comfortable, with no sharp edges that bite your palm. If anything feels rough, a quick pass with 320 grit and a touch more oil fixes it. Now your rolling pin is ready for the kitchen.
Common Mistakes to Avoid
The biggest mistake beginners make is starting with the wrong wood. Green or unseasoned stock looks fine on the lathe but warps and cracks as it dries, ruining a finished pin in weeks. Always use kiln-dried hardwood with tight grain.
Rushing the sanding ruins more pins than any other error. Jumping from 80 grit straight to 220 leaves deep scratches that hide until you oil the wood — then they show up dark and ugly. Work through every grit in order, and sand along the grain between steps.
Many makers grab the wrong finish. Olive oil, vegetable oil, and other cooking oils seem convenient, but they go rancid and leave your pin smelling sour. Stick to mineral oil or a beeswax blend rated food-safe.
Poor centering causes endless frustration. An off-center blank wobbles, catches your tools, and produces a lopsided pin. Mark your centers precisely and confirm balance before powering up.
Finally, dull tools tear the grain instead of slicing it. If you see dust instead of clean shavings, stop and sharpen. A sharp edge does the work for you.
Expert Tips
Sand the wood, then wet it lightly with a damp cloth before your final grit. This raises the grain — tiny fibers stand up. Knock them down with 320 grit, and your finish stays glassy even after washing. Beginners skip this and wonder why their pin feels rough after the first wipe-down.
Match your wood to your climate. In humid kitchens, dense maple resists moisture better than open-grained woods. In dry climates, almost any hardwood works.
Reapply mineral oil every few months. A well-oiled pin shrugs off stains and won’t crack. Treat it like a cast-iron pan — a little maintenance keeps it alive for generations.
And weigh your blank before cutting. Heavier hardwood gives you a pin with momentum, so the dough does the work, not your arms.
Frequently Asked Questions
What Is the Best Wood for a Rolling Pin?
Hard maple is the top choice. It has tight grain, no odor, and won’t stain your dough. Beech and cherry also work well. Walnut looks beautiful and turns cleanly, though it costs more. Avoid softwoods like pine and any open-grained wood like oak, since they trap moisture and dough particles that are hard to clean out.
Do I Need a Lathe to Make a Rolling Pin?
A lathe makes the job fast and precise, but you don’t strictly need one. You can hand-shape a straight pin using a spokeshave, hand plane, and plenty of sanding. The result takes longer and demands more patience. For a beginner who wants tapered handles and a smooth, balanced body, a lathe is worth the investment or a rental.
What Finish Is Safe for a Wooden Rolling Pin?
Mineral oil is the safest and simplest option. It’s food-safe, odorless, and easy to reapply. A beeswax-and-mineral-oil blend adds extra water resistance and a soft sheen. Never use vegetable, olive, or other cooking oils — they go rancid and ruin the pin. Always confirm any product is rated food-safe before it touches surfaces that contact dough.
How Long Does It Take to Make a Wooden Rolling Pin?
Plan on two to four hours of active work for a first attempt with a lathe. Shaping takes under an hour once you’re comfortable, but sanding and finishing eat up the rest. Add overnight curing time before first use. As you gain experience, you can turn and finish a basic pin in well under two hours.
How Do I Care for My Finished Rolling Pin?
Wipe it clean with a damp cloth after each use — never soak it or run it through the dishwasher. Standing water cracks wood fast. Reapply mineral oil every few months, or whenever the surface looks dry or dull. Stored properly and oiled regularly, a well-made hardwood pin lasts for decades.
Conclusion
You now have everything you need to build a rolling pin that outperforms anything from a store. Pick a solid kiln-dried hardwood, center it carefully, and shape it with sharp tools. Sand through every grit in order, then seal it with a food-safe finish. Cure it overnight, and you’ve got a kitchen tool built to last generations.
The skills you picked up here carry far beyond this one project. You learned how grain behaves, how grit progression works, and which finishes keep food safe. Those lessons feed directly into cutting boards, bowls, and dozens of future builds.
Mastering how to make a wooden rolling pin proves you can take raw stock and turn it into something useful and beautiful. Start with one blank, follow these steps, and trust your hands. Your first pin won’t be perfect — but it’ll be yours, and it’ll roll out dough long after the cheap ones have cracked and gone to the trash.
