

Smoke clings to wood. Cigarette smoke, fireplace soot, and fire damage all leave a stale odor that sinks deep into the grain and refuses to leave on its own. You can air the piece out for weeks and still catch that sour, ashy smell every time you open a drawer.

The good news? You can fix it. Knowing how to get rid of smoke smell in wood furniture saves you from tossing a solid piece or paying for a costly replacement. Most odor problems respond to the right cleaning and neutralizing routine, even on antiques and inherited dressers. This guide walks you through every step, from inspection to final refinishing, so you can pull lasting odor out of wood and bring your furniture back to life.
Why Removing Smoke Odor Matters
A smoke-soaked dresser is not trash. It is a project. Solid wood furniture costs hundreds to replace, and quality vintage pieces are nearly impossible to match at retail. Restoring one yourself protects that value.
You also build real skill. Each cleaning, sealing, and refinishing pass teaches you how wood absorbs and releases odor, knowledge you reuse on the next find. That confidence turns flea-market bargains into upgrades for your home.
There is a health angle too. Lingering cigarette smoke and fire residue carry chemicals you do not want in a bedroom or nursery. Removing the odor removes the source. You save money, salvage character, and end up with a piece that smells clean and lasts decades. That is a strong return on a weekend of work.
Tools and Materials You’ll Need
Gather everything before you start so you work without interruption.
- Protect your lungs and skin: nitrile gloves, N95 mask, safety glasses.
- Clean the surface: white vinegar, dish soap, warm water, microfiber cloths.
- Neutralize odor: baking soda, activated charcoal, white vinegar in open bowls.
- Reach deep grime: soft-bristle brush, cotton swabs, vacuum with brush attachment.
- Seal trapped smell: stain-blocking shellac-based primer (such as a clear sealer).
- Refinish if needed: fine-grit sandpaper (220), tack cloth, wood stain, polyurethane.
- Dry and protect: drop cloths, clean rags, a well-ventilated space or fan.
- Optional for convenience: an ozone generator or air purifier to speed deep deodorizing in a sealed room.
Buy the stain-blocking primer early. It is the single product that locks in odor you cannot scrub out, and skipping it is the top reason smell returns.
Step-by-Step Guide on How To Get Rid Of Smoke Smell In Wood Furniture
Step 1 – Inspect the furniture and find the source
Start by reading the piece. Open every drawer, flip it over, and pull out shelves. Run your hand across the wood and note where the smell spikes — drawer interiors and unfinished undersides absorb the most smoke.
Look for yellow-brown staining, sticky residue, or a dull film on the finish. These are visual cues that smoke oils have settled into the surface. Sniff the joints and back panel, since raw wood there soaks up odor faster than sealed faces.
Press a clean white cloth against suspect areas. If it picks up tan discoloration, you have tar buildup. Knowing exactly where the odor lives tells you how to get rid of smoke smell in wood furniture without wasting effort on clean spots.
Step 2 – Move it outdoors and air it out
Carry the piece to fresh air. A garage with open doors, a covered porch, or a shaded yard all work. Sunlight and moving air pull surface odor out faster than any sealed room.
Open all drawers and doors fully so air circulates through every cavity. Set up a fan if the day is still. You want a steady breeze crossing the wood, not stagnant air trapping the smell back in.
Leave it for at least a full day, longer if weather allows. You will notice the sharp, ashy top notes fade first. The stubborn, deep odor stays — that is what the next steps target. Airing out first means you scrub a cleaner surface.
Step 3 – Vacuum out loose soot and debris
Smoke leaves fine ash and dust in corners, drawer tracks, and carved details. Vacuum it before you add any liquid, or you will turn that powder into stubborn gray paste.
Fit the brush attachment and work slowly across every surface. Run the nozzle along seams, inside drawer slides, and across the back panel. Listen for the rattle of grit getting pulled up — that sound tells you the vacuum is reaching trapped debris.
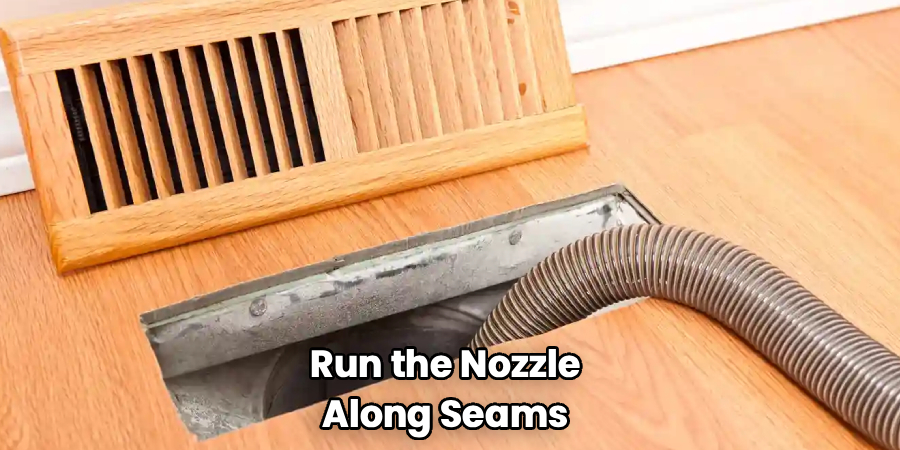
Use cotton swabs for tight corners and decorative grooves. Drag them through carved edges and watch the tip turn brown. Empty the vacuum outside when you finish so the captured smoke particles leave with it. A dust-free surface lets your cleaning solution reach the wood directly.
Step 4 – Wash the surface with a vinegar solution
Mix one part white vinegar with one part warm water and a small squirt of dish soap. Vinegar cuts through smoke oils and neutralizes odor at the same time, making it your workhorse cleaner.
Dampen a microfiber cloth, wring it nearly dry, and wipe with the grain. Never soak the wood. You want a damp cloth, not a dripping one, because standing water swells joints and lifts veneer.
Watch the cloth. It will come away yellow-brown with dissolved tar. Rinse and re-wet often, switching to clean cloths as they load up. Wipe down drawer interiors, backs, and undersides too. The faint vinegar smell disappears as it dries and takes a layer of smoke odor with it.
Step 5 – Apply baking soda to draw out odor
Baking soda is a proven odor neutralizer that pulls smell out of porous wood. Once the piece is dry, put it to work.
Sprinkle a generous layer across drawer bottoms and shelf surfaces. For vertical faces, set open bowls of baking soda inside cabinets and closed compartments. The powder absorbs odor molecules instead of just masking them.
Leave it in place for 24 to 72 hours. The longer it sits, the more it captures. You will not see dramatic change, but you will smell it — open a treated drawer and the staleness reads noticeably softer.
Vacuum the powder away completely when time is up. Run your hand across the wood to confirm no gritty residue remains before moving on.
Step 6 – Deodorize with activated charcoal
For odor that survives baking soda, switch to activated charcoal. It traps smoke particles more aggressively and works best in enclosed spaces.
Place charcoal bags or open containers inside every drawer and cabinet, then close them up. Seal the whole piece under a plastic sheet or inside a large bag if you can. Trapping the air forces the charcoal to scrub it clean.
Leave it sealed for several days. Check progress by opening the cover and taking a slow breath near the wood. Fresh, neutral air means the charcoal is winning.
This is also where an ozone generator or air purifier earns its keep in a sealed room, breaking down odor molecules the charcoal misses. Run it only in an empty, vented space.
Step 7 – Seal the wood with stain-blocking primer
Some smoke odor hides too deep to scrub out. Seal it in. A shellac-based stain-blocking primer creates a barrier that traps remaining smell inside the wood permanently.
Stir the primer well and apply a thin, even coat with a brush or foam applicator. Cover raw interiors, drawer bottoms, and undersides — the unfinished areas that hold the most odor. The primer dries fast and smooth, with a slightly glossy, sealed feel under your fingertips.
Let it cure fully, then sniff. The difference is usually dramatic. This single step is what permanently solves how to get rid of smoke smell in wood furniture when cleaning alone falls short. One coat is often enough; add a second to stubborn interiors.
Step 8 – Refinish or repaint for a fresh finish
With odor sealed, restore the look. Lightly sand visible surfaces with 220-grit paper until the gloss dulls, then wipe clean with a tack cloth.
Apply your chosen stain or paint with the grain in thin coats. Smooth, streak-free strokes signal even coverage; pooling or drag marks mean you loaded the brush too heavy. Let each coat dry before recoating.
Finish with polyurethane to protect the wood and lock the primer beneath it. The fresh topcoat smells clean and seals the whole restoration together. Step back, run your hand across the surface, and you will feel — and smell — a piece reborn.
Common Mistakes to Avoid
The biggest mistake is rushing. Smoke odor lives deep in the grain, and one quick wipe-down never reaches it. People clean the surface, smell improvement for a day, then watch the staleness creep back. Give each step the full time it needs, especially the baking soda and charcoal phases.
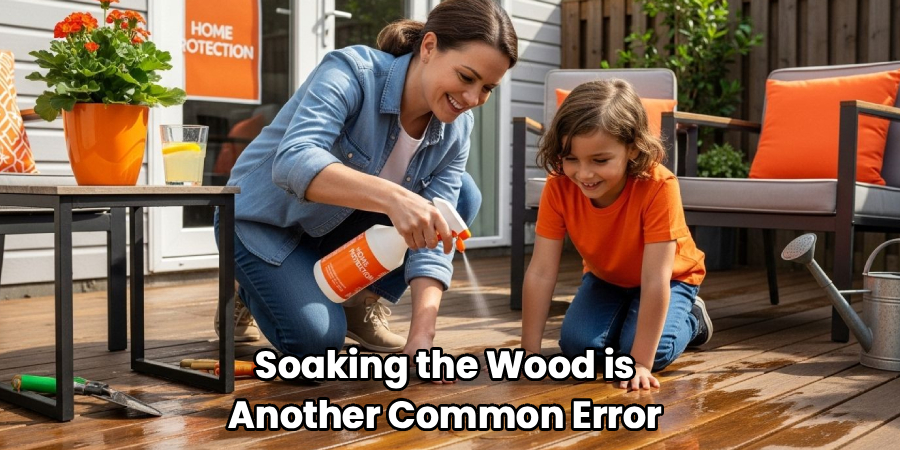
Soaking the wood is another common error. Drenched cloths and standing water swell joints, lift veneer, and raise the grain into a rough, fuzzy texture. Always wring your cloth nearly dry and wipe with the grain, not against it.
Many beginners skip the stain-blocking primer because the piece smells fine after cleaning. Then the odor returns weeks later from deep inside the wood. Sealing is not optional on heavily smoked furniture — it is the step that makes results permanent.
Some people mask instead of neutralize. Air fresheners, scented oils, and dryer sheets only cover smoke smell temporarily. They fade, and the original odor returns. Use real neutralizers like vinegar, baking soda, and activated charcoal that remove odor at the source.
Finally, do not ignore drawer interiors and undersides. Raw, unfinished wood holds the most smoke, and a beautiful refinished face means nothing if the inside still reeks.
Expert Tips
Treat the inside before the outside. Pros know unfinished interiors and drawer bottoms hold most of the smoke odor, so they clean and seal there first. Fix the source and the visible surfaces fall in line.
Work in stages and re-test between each. Do not stack vinegar, baking soda, and primer in one afternoon. Let the wood dry and judge the smell before deciding the next move. Sometimes vinegar and charcoal alone finish the job.
Control humidity while you work. Damp air slows drying and reactivates trapped odor. A dehumidifier or fan keeps the piece curing on schedule.
For antiques, test every product on a hidden spot first. Old finishes react unpredictably, and you protect both the value and the patina by checking before you commit.
Frequently Asked Questions
How long does it take to remove smoke smell from wood furniture?
Plan on three to seven days for most pieces. Airing out takes a day, baking soda and activated charcoal each need one to three days to absorb deep odor, and sealing plus refinishing adds drying time. Heavily smoked or fire-damaged furniture may need a second round. Patience between steps matters more than speed for lasting results.
Will vinegar damage my wood furniture?
No, when used correctly. A diluted vinegar solution cleans and neutralizes smoke odor safely on sealed wood. The key is a nearly dry cloth and wiping with the grain — never soaking the surface. Test a hidden spot first on antiques or delicate finishes. Standing water, not vinegar itself, causes swelling and veneer damage.
Can I remove smoke smell without refinishing the furniture?
Often, yes. Many pieces respond fully to airing out, vinegar cleaning, baking soda, and activated charcoal. Refinishing is only necessary when the finish is stained or when you want a fresh look. Sealing interiors with stain-blocking primer handles deep odor without touching the visible surface, so you keep the original face intact.
Why does the smoke smell keep coming back?
The odor returns because it lives deep in raw, unfinished wood that cleaning never fully reaches. Surface washing improves the smell briefly, then trapped odor seeps back out. The fix is a shellac-based stain-blocking primer on interiors and undersides. It locks remaining smell inside the wood permanently and stops the cycle.
Does an ozone generator really work on wood furniture?
Yes, in a sealed, empty room. An ozone generator breaks down odor molecules that charcoal and baking soda miss, which helps with stubborn cigarette smoke and fire damage. Never run it around people, pets, or plants, and ventilate the space fully afterward. Treat it as a finishing tool, not a replacement for cleaning and sealing.
Conclusion
Smoke odor in wood furniture is fixable. You inspect the piece, air it out, vacuum the debris, and wash with a vinegar solution. Then you pull deep odor with baking soda and activated charcoal, seal what remains with stain-blocking primer, and refinish for a clean, lasting result. Each step targets the smell at its source instead of masking it.
The payoff is real. You save a solid piece from the landfill, protect its value, and build skills you reuse on the next restoration project. A weekend of work turns a stale, smoke-soaked dresser into furniture you are proud to keep.
Knowing how to get rid of smoke smell in wood furniture means no piece is beyond saving — not an inherited antique, not a flea-market find, not a fire-damaged heirloom. Gather your supplies, work through the steps in order, and give each phase the time it needs. Start with one piece this weekend, and you will trust your hands with the next one.
