
Ever sanded a board until it felt glass-smooth, applied your finish, and watched the surface turn rough and fuzzy? That fuzz is raised grain, and it ruins otherwise perfect work. The good news: you can beat the wood at its own game. Learning how to raise the grain on wood means you deliberately lift those fibers, knock them down, and lock in a finish that stays silky.
It’s one of the simplest prep tricks in woodworking, and it separates amateur results from professional ones. This guide walks you through the entire process step by step, so your next stained or sealed project comes out smooth, even, and built to last.
Why Raising Wood Grain Matters
Skip grain raising and your finish pays the price. Water-based stains and topcoats swell wood fibers, leaving a rough surface that feels like fine sandpaper. You sand it back, but by then the finish is already in. The fix wastes time and material.
Raise the grain first and you control the outcome. You smooth the swollen fibers before any stain touches the wood. The result: better finish adhesion, even color absorption, and a surface that stays smooth coat after coat.
For DIYers, this skill saves money. You buy less stain, fewer sandpaper sheets, and you avoid redoing entire projects. It also builds confidence. Once you nail wood grain raising, every furniture build, floor refinish, and trim job improves. Small step, big payoff.
Tools and Materials You’ll Need
Gather everything before you start. A smooth workflow keeps fibers from drying unevenly.
- Clean water — distilled works best for raising wood fibers without minerals.
- Sandpaper — 120, 150, and 220 grit for progressive smoothing.
- Sanding block — keeps pressure even across the wood surface.
- Lint-free cloth or sponge — applies water without leaving debris.
- Tack cloth — removes dust between sanding passes.
- Dust mask — protects your lungs during sanding.
- Spray bottle — delivers a fine, even mist over large surfaces.
- Work gloves — keep oils off bare wood.
- Foam brush — spreads water on detailed or carved areas.
- Optional: a household iron — speeds drying and lifts stubborn grain whiskers on dense hardwoods.
That’s it. No specialty gear, no expensive chemicals. Just water, grit, and patience.
Step-by-Step Guide on How to Raise the Grain on Wood
Step 1 – Sand the Surface Smooth
Start with dry sanding. Work through your grits in order: 120, then 150, then 220. Sand with the grain, never across it, using steady pressure and a sanding block. Listen for a consistent, smooth scratch—an uneven, gritty sound means you’re skipping spots.
Run your fingertips across the wood between grits. You want it to feel uniformly smooth, with no ridges or rough patches. Wipe away dust with a tack cloth after each pass so old grit doesn’t scratch the surface.
This baseline matters. Learning how to raise the grain on wood starts with clean, even sanding, because water reveals every flaw you leave behind. Get this right and the rest goes fast.
Step 2 – Prepare Your Water
Pour clean, room-temperature water into your spray bottle or bowl. Distilled water is ideal because it carries no minerals that could stain or discolor the wood. Tap water works fine on most projects, but skip it on light woods like maple or birch where spotting shows.

Don’t add anything. No soap, no additives—just water. The goal is to swell the wood fibers, not treat them.
Test your sprayer first. You want a fine, even mist, not heavy droplets. Big drops soak in unevenly and create dark spots that take longer to dry. A light, consistent spray gives you uniform fiber lift across the entire wood surface. Keep the bottle within reach for the next step.
Step 3 – Dampen the Wood Evenly
Mist the surface with a thin, even layer of water. The wood should look damp, not soaked. Aim for a satin sheen across the board—if you see puddles or runs, you’ve used too much. Wipe those back with a barely damp cloth.
For carved details or tight corners, switch to a foam brush. It controls the water better than a spray in tricky spots.
You’ll see the magic happen within seconds. The fibers absorb moisture, swell, and stand up like tiny hairs. Run your hand over it—the surface that felt smooth now feels rough and fuzzy. That texture is exactly what you want. Those raised grain whiskers are your target for the next stage.
Step 4 – Let the Wood Dry Completely
Patience pays here. Set the wood in a well-ventilated spot and let it dry fully. Most boards need two to four hours at room temperature. Thicker hardwoods or humid conditions push that longer.
Resist the urge to sand early. Damp fibers tear instead of cutting cleanly, leaving a fuzzy mess that defeats the whole process. The wood must feel completely dry and cool to the touch before you move on.
Want to speed things up? Pass a warm iron lightly over the surface, keeping it moving to avoid scorching. The heat dries the fibers and pops them upright fast. This is the core of how to raise the grain on wood efficiently—lift the fibers, dry them hard, then cut them off.
Step 5 – Knock Down the Raised Grain
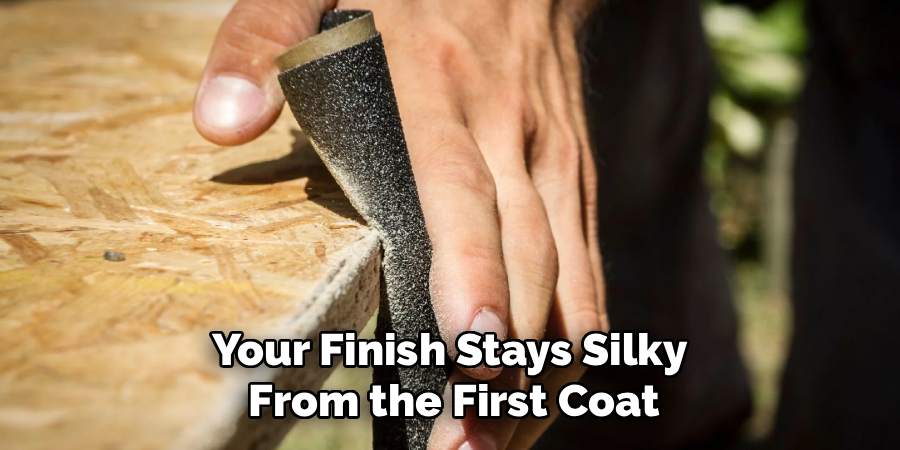
Now sand off those raised fibers. Use 220-grit or finer—anything coarser cuts too deep and reopens the grain. Sand with the grain in light, even strokes. You’re shaving the whiskers, not reshaping the wood.
Listen for the sound shift. Rough fibers make a soft, dragging noise at first. As they snap off, the sound turns crisp and clean. That change tells you the surface is smoothing out.
Check your progress by touch. Wipe the dust and run your fingers across the board. It should feel as smooth as before you wet it—maybe smoother. Use a light hand. Heavy pressure removes good wood and creates new low spots that absorb stain unevenly.
Step 6 – Repeat If Needed
One pass works for most softwoods. Dense hardwoods like oak or walnut often need a second round. Inspect the surface in raking light—hold a lamp low and look across the grain for any remaining fuzz catching the beam.
If you spot rough patches, mist, dry, and sand again. Each cycle lifts fewer fibers because you’ve already removed the loosest ones. By the second or third pass, the wood stops fuzzing entirely.
Don’t overdo it. Two passes handle nearly every project. Endless cycles waste time and risk over-sanding. When water no longer raises noticeable whiskers, you’re finished. The wood has given up its hidden roughness, and your surface stays stable under any water-based finish.
Step 7 – Clean the Surface
Remove every speck of dust before finishing. Wipe the wood down with a tack cloth, working with the grain. Get into corners, edges, and any profiles where dust hides.
For carved or detailed pieces, follow up with a soft brush or compressed air. Leftover dust ruins finish adhesion and shows up as gritty bumps under stain or topcoat.
Run a clean hand over the surface one last time. It should feel completely smooth and free of grit. Hold it up to the light and check for streaks or residue. A spotless surface means your stain absorbs evenly and your topcoat lays down flat. Clean wood is the foundation of a flawless finish—never rush this final wipe.
Step 8 – Apply Your Finish
Now your wood is ready. Apply stain, sealer, or topcoat knowing the grain won’t surprise you. Water-based products especially will go on smooth because you’ve already swelled and cut the fibers that would otherwise rise.
Work with the grain in thin, even coats. The stain absorbs uniformly now, with no blotchy patches where raised fibers grabbed extra pigment. You’ll notice richer, more consistent color.
Between coats, you may feel a faint roughness—that’s normal dust nibs, not raised grain. A light pass with 320-grit handles it. The hard work is done. Because you prepped properly, your finish stays silky from the first coat to the last, with the durability and depth that define professional wood finishing.
Common Mistakes to Avoid
The biggest mistake is over-wetting the wood. Drenching the surface instead of misting it creates dark water spots, uneven swelling, and drying times that stretch into days. Worse, soaked wood can warp or cup, ruining your board before you even reach the finish. Always apply a thin, even layer—damp, not wet.
Sanding too soon trips up plenty of beginners. Damp fibers don’t cut, they tear. You end up with a fuzzy, torn surface that needs even more work. Wait until the wood is bone dry and cool before touching it with sandpaper.
Using coarse grit to knock down raised grain backfires. Anything below 220 digs into fresh wood and reopens the grain you just smoothed. Stick to fine grit and a light touch.
Skipping grain raising on water-based projects causes the very problem you’re trying to prevent. Your first coat swells the fibers, and now you’re sanding through wet finish. Do the prep first.
Finally, rushing the final cleanup leaves dust that wrecks finish adhesion. Wipe thoroughly every time.
Expert Tips
Pros know a few tricks that save hours. Raise the grain in the same humidity you’ll finish in—wood reacts to moisture in the air, and matching conditions keeps your surface stable.
On end grain, expect more fuzz. End grain drinks water and swells aggressively, so plan for an extra pass there. Sand it a little finer than the face for even stain absorption.
For large surfaces like tabletops, work in sections so the water dries uniformly. Patchy drying leads to patchy results.
Keep a piece of scrap from the same board for testing. Raise the grain on it first, then stain it. You’ll see exactly how your wood reacts before committing to the real piece. This single habit prevents costly do-overs and gives you total control over the final look.
Frequently Asked Questions
Do You Have to Raise the Grain Before Staining?
Yes, especially with water-based stains. Water-based products swell wood fibers on contact, leaving a rough surface in your finish. Raising the grain first lets you smooth those fibers before any stain touches the wood. Oil-based stains raise grain less, so it’s optional there—but doing it still gives you a smoother, more even result every time.
How Long Should Wood Dry After Raising the Grain?
Allow two to four hours at room temperature for most boards. Dense hardwoods and humid conditions need longer—sometimes overnight. The wood must feel completely dry and cool before you sand. Damp fibers tear instead of cutting cleanly, undoing your work. A warm iron speeds drying if you’re short on time, but never rush this step.
What Grit Should You Use to Knock Down Raised Grain?
Use 220-grit or finer. Coarser paper cuts too deep, reopens the grain, and forces you to start over. Fine grit shaves off the raised whiskers while leaving the smooth wood underneath untouched. Sand with the grain using light, even pressure. Heavy pressure removes good wood and creates uneven spots that absorb stain inconsistently.
Can You Raise the Grain With Anything Besides Water?
Water is best and cheapest, but you can use the first coat of a water-based finish or a dedicated grain-raising solution. Mineral spirits and oil-based products barely lift fibers, so they won’t work for this purpose. Plain distilled water gives you reliable, predictable results without any risk of discoloring or staining the wood surface.
Does Raising the Grain Work on All Wood Types?
It works on every wood, but results vary. Softwoods like pine raise grain easily and often need just one pass. Dense hardwoods like oak and maple may need two passes for full smoothness. End grain always fuzzes more because it absorbs more water. Adjust your number of cycles to the wood you’re working with.
Conclusion
Smooth, professional finishes don’t happen by accident. They start with proper prep, and knowing how to raise the grain on wood is one of the most reliable ways to get there. Sand clean, dampen lightly, dry fully, then knock down the fibers with fine grit. Repeat if your wood demands it, clean thoroughly, and finish with confidence.
This simple process solves the fuzzy-finish problem before it starts. You’ll save money on wasted stain and sandpaper, avoid frustrating do-overs, and produce surfaces that look and feel like a pro made them. Every furniture build, floor, and trim project benefits.
Start with a scrap piece, follow the steps, and trust the results. Once you’ve raised and smoothed grain a few times, it becomes second nature—a quick habit that pays off on every project you touch. Grab your water, your sandpaper, and get to work. Your next finish will be your best one yet.
