

Resin turns plain wood into something people stop and stare at. A dull tabletop becomes glass-clear. A cracked slab becomes a river of color. The good news? You don’t need a workshop full of gear to get there. You need the right steps, the right ratio, and a little patience.

This guide breaks down exactly how to use resin on wood, from prepping the surface to pouring a flawless epoxy coat. You’ll learn what a clean pour looks like, what a ruined one feels like, and how to land on the first side every time. By the end, you’ll have a repeatable process you can use on cutting boards, tabletops, coasters, and live-edge slabs. Let’s get your first project right.
Why Using Resin on Wood Matters
A botched resin pour costs you time, money, and a piece of wood you can’t replace. Learning the process first saves all three.
Resin protects wood. A cured epoxy coat shrugs off water, scratches, heat rings, and daily wear. That cutting board or desk lasts years longer than an oiled finish.
Resin also adds value. A live-edge slab with a clean river pour sells for more than the raw board. Coasters and trays you make at home rival what you’d pay for in a store.
Most important, this skill builds confidence. Once you nail your first pour, you’ll trust yourself with bigger projects. You’ll stop guessing on mixing ratios and start planning ambitious builds. That’s the real payoff — competence you keep.
Tools and Materials You’ll Need
Gather everything before you mix. Resin starts curing the second you combine it, so you won’t have time to hunt for supplies.
- Two-part epoxy resin — the casting or coating type that matches your project depth
- Graduated mixing cups — for an exact mixing ratio
- Wooden or silicone stir sticks — to blend without whipping in air
- Nitrile gloves — uncured resin irritates skin
- Sandpaper — grits from 80 up to 320 for surface prep and finishing
- Painter’s tape and sealant — to dam edges and block leaks
- A propane or butane torch — to pop surface bubbles
- Drop cloth or plastic sheeting — to protect your work area
- Mica powder or liquid pigment — for color, if you want it
- A level work surface — uneven tables ruin pours
- Optional: a dedicated resin pressure pot — for crystal-clear, bubble-free casts
Step-by-Step Guide on How to Use Resin on Wood
Step 1 – Prepare Your Workspace
Set up before you open a single can. Resin doesn’t wait, and a messy space ruins good work.
Pick a room between 70 and 80°F. Cold air thickens resin and traps bubbles. Warm, stable air keeps your pour smooth and your curing time predictable.
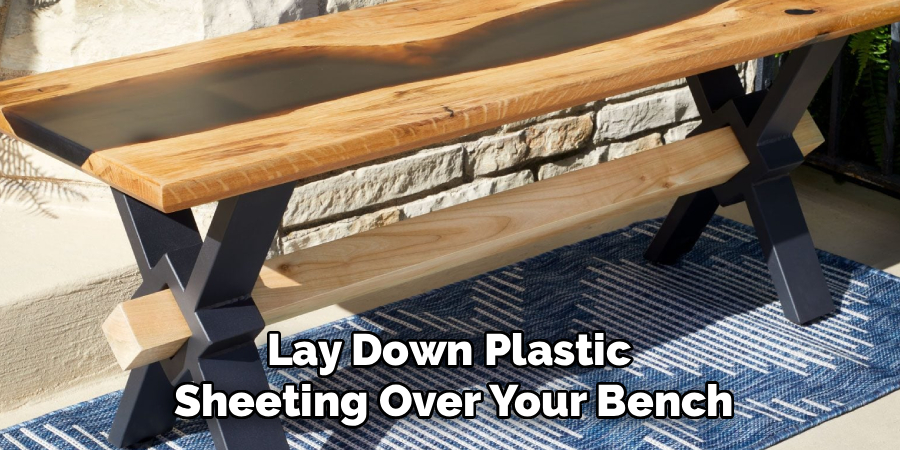
Lay down plastic sheeting over your bench. Spills happen, and cured resin bonds to almost anything it touches. Check your surface with a level — even a slight tilt sends resin pooling to one side.
Cut off drafts and dust. Close windows and shut off fans. Dust settling into a wet epoxy coat shows up as tiny specks once it hardens. You want clean, still air and a flat, protected base. Get this right and the rest gets easier.
Step 2 – Sand and Clean the Wood
Resin grips a rough surface better than a slick one. Start with 80-grit sandpaper to flatten high spots, then work up to 220.
Run your palm across the wood. It should feel smooth but not polished. You’ll hear the grit bite the grain on the first passes, then quiet down as the surface evens out.
Vacuum every speck of dust. Then wipe the wood with a clean cloth and a little denatured alcohol. Skip soap and water — moisture is the enemy of a clean bond.
Look for stray fibers or sawdust in the grain. Hold the board to the light at an angle. A clean surface reflects evenly. A dusty one looks hazy. Learning how to use resin on wood starts with a surface the resin can actually hold onto.
Step 3 – Seal the Wood
Wood breathes. Trapped air escapes during your pour and rises as bubbles right when you don’t want them.
Brush a thin seal coat of resin over the wood first. Use a small amount, spread it tight, and push it into the grain. This locks down the pores before the main pour.
Watch the surface for the next 10 minutes. You’ll see pinprick bubbles rise as air leaves the wood. Hit them with a quick pass of your torch, holding the flame two inches away and moving constantly. The bubbles pop with a faint snap.
Let this coat get tacky, not fully cured. A sticky seal coat bonds to your next layer chemically. A fully hardened one needs sanding first. Time it right and the layers fuse seamlessly.
Step 4 – Build Your Dam or Mold
Resin flows like syrup and finds every gap. Without barriers, it pours straight off your table.
Build walls with melamine boards or use a silicone mold for casting. Melamine works because resin won’t stick to its slick face. Press the pieces tight against your slab.
Seal every seam with painter’s tape and a bead of silicone or hot glue. Run your finger along each joint. Any gap you can feel is a leak waiting to happen.
For river tables, clamp the dam hard. Resin pressure builds as the pour deepens, and a weak wall bows outward. You’ll know it failed when you see a slow drip underneath. Catch leaks before you mix, because once resin’s flowing, you can’t stop to fix a wall.
Step 5 – Measure and Mix the Resin
This step makes or breaks your project. The mixing ratio isn’t a suggestion — it’s chemistry.
Pour resin and hardener into separate graduated cups. Match the exact ratio on your label, usually 1:1 or 2:1 by volume. Guessing here leaves you with a sticky surface that never fully cures.
Combine both parts into one cup. Stir slow and steady for at least three minutes. Scrape the sides and bottom — unmixed resin in the corners stays soft forever.
The mixture turns from cloudy to clear as it blends. That shift is your signal it’s ready. Stir too fast and you’ll whip in a storm of bubbles. Slow, deliberate stirring keeps it clean. Add pigment now if you want color, and mix until it’s even.
Step 6 – Pour the Resin
Pour in a thin, steady stream from a few inches up. The height helps small bubbles burst on the way down.
Start at one end and let the resin spread on its own. For deep pours, follow your epoxy’s maximum thickness per layer — usually a quarter to half inch for coating resin. Overpour and it overheats, yellows, and cracks.
Watch it self-level. A good pour flattens into a smooth sheet within minutes. Use a stir stick to guide resin into corners and tight spots.
You’ll see the surface settle glassy and even. If it stays lumpy, your room’s too cold. This is the moment all your prep pays off, and it’s the part of how to use resin on wood that feels almost like magic.
Step 7 – Remove Bubbles
Bubbles are normal. Trapped ones aren’t — they harden into cloudy dots you can’t fix later.
Wave your torch across the surface in slow sweeps, two to three inches above the resin. The heat thins the surface tension and pops bubbles instantly. You’ll hear faint crackles and see the surface clear.
Keep the flame moving. Hold it in one spot and you’ll scorch the resin into a yellow burn mark. Steady, light passes are all it takes.
For deeper casts, repeat after 10 minutes as more air rises. A heat gun on low works too, though it’s gentler and slower. Look down the surface at a low angle to spot any stragglers. When it reads crystal clear, you’re done.
Step 8 – Cure and Finish
Patience finishes the job. Cover your project with a box or sheet to keep dust off the wet surface.
Most epoxy reaches a soft cure in 24 hours and full hardness in 72. Don’t rush it. A surface that feels firm can still dent under a thumbnail. Wait for the full curing time before sanding.
To finish, sand through the grits from 320 up to 1000 or higher. The surface will look frosted at first — that’s normal. Each pass smooths the haze.
Polish with a buffing compound for a mirror shine, or apply a matte topcoat if you prefer a softer look. Run your hand over the finished piece. It should feel like glass, with the wood grain glowing underneath.
Common Mistakes to Avoid

The biggest mistake beginners make is rushing the mixing ratio. Eyeballing the resin and hardener leaves you with a tacky surface that stays soft for weeks. Measure by volume every time, and stir for the full three minutes. A few extra seconds of patience saves you a ruined project.
Pouring too thick is the next trap. Coating resin generates heat as it cures. Pour past the recommended depth and it overheats, turns yellow, cracks, or even smokes. Build deep casts in layers and let each one set first.
Skipping the seal coat causes endless bubbles. Bare wood releases trapped air for hours, and those bubbles surface in your final pour. A thin seal coat locks the grain and gives you a clean finish.
Working in a cold or dusty room sabotages good prep. Cold resin traps bubbles and cures unevenly. Airborne dust settles into the wet surface and hardens into permanent specks. Keep your space warm, still, and clean.
Finally, sanding before full cure wrecks the surface. It gums up your paper and leaves drag marks. Wait the full 72 hours.
Expert Tips
Warm your resin before mixing. Set the sealed bottles in a bowl of warm water for 10 minutes. Warm resin pours thinner, releases bubbles faster, and self-levels better. Just dry the bottles completely before opening them.
Mix in two cups, not one. Combine your resin and hardener in the first cup, then pour the blend into a second clean cup and stir again. This catches any unmixed resin clinging to the first cup’s walls — the most common cause of soft, sticky spots.
Keep a heat gun nearby for stubborn bubbles in deep pours. It works gentler than a torch and won’t scorch detailed edges.
Save leftover resin for test pieces. Pour the dregs onto scrap wood to preview how a pigment cures or how a finish polishes. You’ll learn your materials without risking the real project.
Frequently Asked Questions
How Long Does Resin Take to Cure on Wood?
Most epoxy resin reaches a soft cure in 24 hours and full hardness in 72. Curing time depends on temperature, depth, and brand. Warmer rooms speed it up; cold rooms slow it down and can leave it tacky. Don’t sand or use your piece until it’s fully cured, even if the surface feels firm to the touch after a day.
Do You Need to Seal Wood Before Applying Resin?
Yes. Seal the wood with a thin resin coat first. Bare wood traps air in its pores, and that air escapes during your main pour as bubbles. A seal coat locks the grain, blocks those bubbles, and creates a stronger bond. Let the seal coat get tacky, then pour your main layer directly on top for the cleanest finish.
Why Is My Resin Still Sticky After Curing?
Sticky resin means a measuring or mixing error. You either got the mixing ratio wrong or didn’t stir long enough to blend both parts fully. Cold temperatures slow curing too. Fixing it usually means sanding off the soft layer and pouring a fresh, properly measured coat. Always measure by volume and stir for at least three minutes.
Can You Pour Resin Over Any Type of Wood?
Almost any wood works, as long as it’s clean, dry, and sanded. Oily woods like teak or rosewood resist bonding, so wipe them with denatured alcohol first and add a seal coat. Wood moisture content should sit below 12 percent. Damp wood causes bubbles and weak adhesion. Dry, prepped hardwoods and slabs give you the best results.
How Thick Can You Pour Resin in One Layer?
It depends on the resin type. Coating epoxy handles a quarter to half inch per layer. Deep-pour casting resin allows up to two inches or more in a single pass. Check your product label. Pour coating resin too thick and it overheats, yellows, and cracks. For deep projects, build up thin layers and let each one set before adding the next.
Conclusion
You now have a complete roadmap for turning raw wood into a finished piece that looks professional. Prep your surface, seal the grain, measure your ratio exactly, pour in thin layers, and torch out the bubbles. Then let it cure fully before you sand and polish. Each step builds on the last, and skipping one shows in the final result.
The first pour teaches you the most. You’ll feel the texture of properly sanded wood, hear bubbles pop under the torch, and watch resin level into glass. Once you’ve done it, you’ll trust yourself with bigger, bolder projects.
Knowing how to use resin on wood opens up tabletops, river slabs, cutting boards, and coasters you’ll be proud to show off — or sell. Start small. Pour a set of coasters this weekend, learn your materials, and build from there. Your next project starts with a single clean pour. Go make it.
