
Curved hardwood looks impossible to make at home. It isn’t. With steam, patience, and a simple wooden form, you can bend solid oak, ash, or walnut into smooth arcs without cracking a single fiber. Steam softens the wood’s internal structure so it bends instead of breaking. Once it cools and dries, the curve holds for decades.
Learning how to steam bend hardwood opens doors to projects you thought required factory machines — chair backs, rocker runners, instrument rims, and oval boxes. The technique is old, proven, and surprisingly forgiving once you understand the basics.
This guide walks you through every step, tool, and common pitfall so you can bend your first piece with confidence and get clean, repeatable results.
Why Steam Bending Hardwood Matters
Steam bending saves money and expands what you can build. Curved components bought from suppliers cost a premium, and many shapes simply aren’t available off the shelf. Bend your own, and you control the species, grain, and dimensions exactly.
You also build real skill. Steam bending teaches you how wood behaves under heat and moisture — knowledge that improves every other project you tackle. You learn to read grain direction and pick boards that won’t fail.
It prevents waste, too. A bent piece keeps its grain running along the curve, so it’s far stronger than a curve cut from a wide board. That means fewer weak points, fewer breakages, and longer-lasting furniture. For DIYers, that’s confidence and durability in one technique.
Tools and Materials You’ll Need
Gather everything before you start. Steam bending moves fast once the wood is hot, so you can’t pause to hunt for clamps.
- Steam box — a sealed enclosure long enough to hold your workpiece with room to spare.
- Steam source — a wallpaper steamer or kettle that pushes continuous steam into the box.
- Bending form — a rigid plywood or MDF jig cut to your target curve.
- Steam-bending strap — a thin metal band with end stops that supports the wood’s outer face.
- Clamps — at least four strong F-clamps to hold the piece against the form.
- Heat-resistant gloves — thick leather or welding gloves to handle scalding stock.
- Air-dried hardwood — straight-grained, defect-free, ideally green or air-dried, not kiln-dried.
- Thermometer (optional) — confirms your box holds steam near 212°F (100°C).
Step-by-Step Guide on How to Steam Bend Hardwood
Step 1 – Select the Right Hardwood
Your bend lives or dies on wood choice. Pick straight-grained, knot-free stock from species known to bend well — white oak, ash, hickory, beech, and walnut all perform reliably. Avoid kiln-dried lumber when possible; air-dried or green wood holds the moisture content that steam needs to work.
Inspect each board against the light. Run your eye along the edge and watch how the grain travels. Grain that runs off the edge will snap under tension, no matter how long you steam it. You want lines that flow parallel to the length.
Knock on the board. Dense, healthy hardwood sounds solid, not hollow. This is the foundation of learning how to steam bend hardwood, so don’t rush it.
Step 2 – Prepare Your Stock
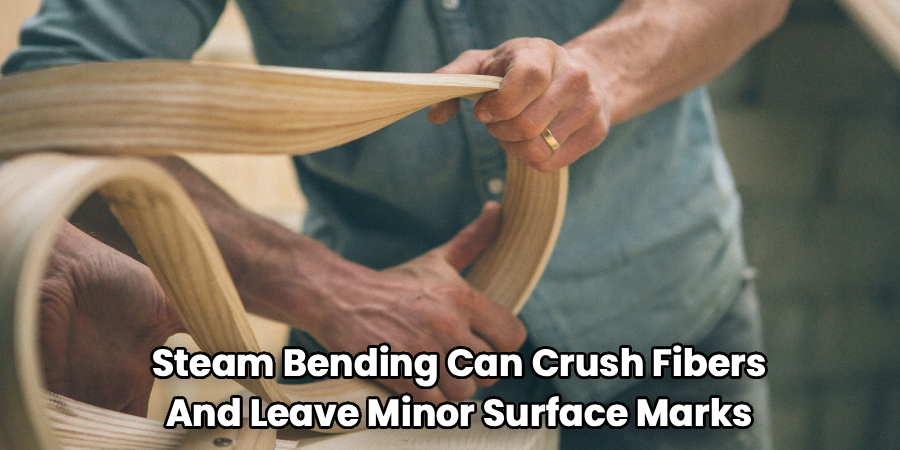
Mill your workpiece slightly oversized. Steam bending can crush fibers and leave minor surface marks, so leave extra thickness to clean up later. Square the edges and remove any rough spots that could turn into stress points during the bend.
Check the moisture content if you own a meter. Aim for 15–25 percent. Too dry, and the wood resists; too wet, and it can collapse or honeycomb inside.
Sand away splinters and sharp corners. A clean, smooth blank slides into the strap without catching and bends more evenly. Mark the center of your piece with a pencil — you’ll line it up with the form’s centerline once it comes out hot. Smell matters too: fresh, slightly sweet wood usually steams better than old, musty stock.
Step 3 – Build and Set Up the Steam Box
Your steam box doesn’t need to be fancy. A length of foam insulation board, plywood, or PVC pipe works fine, as long as it seals well and drains condensation. Drill a few small holes so excess water escapes without dumping all your heat.
Mount the box at a slight angle so dripping water runs out the low end. Connect your steamer and let the box fill. You’ll hear a steady hiss and see white vapor curl from the seams — that’s your cue it’s working.
Hold the temperature near 212°F. Slide in dowels or racks so steam circulates around every face of the wood. Wood resting flat on the floor steams unevenly and bends poorly.
Step 4 – Steam the Wood Thoroughly
Timing is simple: steam roughly one hour per inch of thickness. A ¾-inch board needs about 45 minutes; thicker stock needs proportionally more. Set a timer and resist the urge to peek, since opening the box dumps heat and resets your progress.
While it cooks, listen and watch. A properly running box hisses constantly and stays foggy inside. If the steam thins out, top up your water before it runs dry.
The wood is ready when it feels hot, pliable, and slightly rubbery. Test a scrap first if you can. Over-steaming weakens fibers and causes wrinkling on the inside of the curve, so pull the piece the moment your time is up. Work fast — you have only a couple of minutes.
Step 5 – Position the Wood in the Bending Form
Speed wins here. Pull the hot wood with gloved hands, drop it into your steam-bending strap, and seat it against the form’s centerline. The strap supports the outer face and stops the fibers from stretching and tearing apart.
You’ll feel the wood give as you press it into the curve. It should move with firm, steady hand pressure — not violent force. If it fights you hard, it needs more steam.
Line up your pencil mark with the form’s center and begin pulling both ends down together. Work smoothly and evenly. Rushing one side creates a lopsided bend. Mastering how to steam bend hardwood comes down to this calm, deliberate moment of shaping the curve.
Step 6 – Clamp and Secure the Bend
Once the wood hugs the form, lock it down fast. Start clamping from the center and work outward toward each end. This pushes any slack toward the tips and keeps the curve tight against the jig.
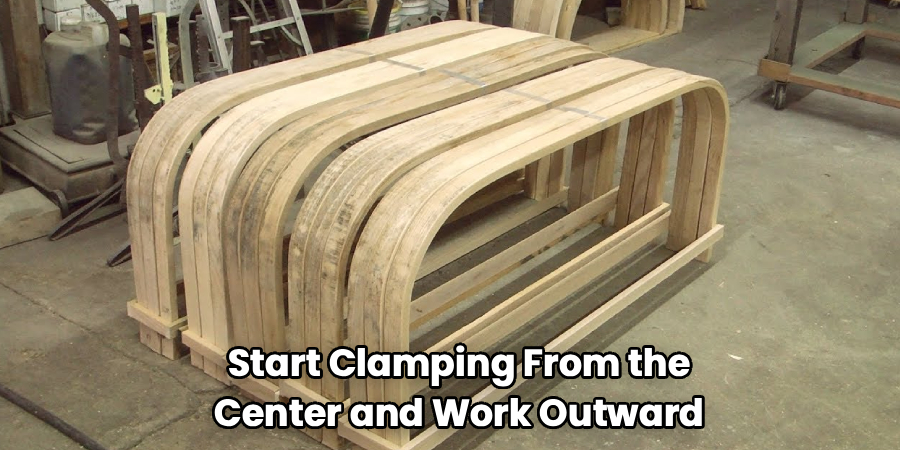
Snug each clamp firmly, but don’t crush the fibers — you want contact, not damage. Watch the inside face for tiny ripples or buckling. A few faint compression lines are normal; deep wrinkles mean you forced it too fast.
Wipe away condensation and check that the piece sits flush along the entire form. Gaps now become permanent flaws later. The wood will steam and tick as it cools against the cold jig. That sound means the fibers are locking into their new shape.
Step 7 – Let the Wood Cool and Set
Patience pays off now. Leave the clamped wood on the form for at least 24 hours, longer for thicker stock or humid conditions. The fibers need time to cool, dry, and accept the curve as their new normal.
Don’t unclamp early. Wood released too soon springs back and loses some of its bend. A small amount of springback is natural, so many woodworkers over-bend slightly to compensate.
Keep the setup in a warm, dry spot with good airflow. You’ll know it’s ready when the surface feels cool and dry to the touch and no moisture beads on the inside face. Resist the temptation to test the curve repeatedly — every flex while it’s still damp weakens the final hold.
Step 8 – Release, Dry, and Finish
Unclamp slowly and watch the curve. Expect a little springback as the wood relaxes — that’s normal and predictable. Let the piece air-dry fully for several more days until it reaches your shop’s ambient moisture content.
Now clean it up. Scrape or sand away any strap marks, raised grain, or minor surface crushing. The wood will feel firm and set, holding its shape without support.
Finish as you would any project. Oil, lacquer, or wax all work well on bent hardwood, and the curved grain often catches light beautifully. Run your hand along the arc — a successful bend feels smooth, even, and solid, with no cracks telegraphing through the surface.
Common Mistakes to Avoid
The biggest mistake is using kiln-dried lumber and expecting it to bend like green wood. Kiln drying drives out the internal moisture that steam relies on, so the fibers stay stiff and snap under tension. Choose air-dried or green stock, and your success rate climbs immediately.
Ignoring grain direction ruins more bends than any other error. Grain that runs off the edge of the board creates a built-in fracture line. Under the stress of a tight curve, that line splits wide open. Always pick boards with grain flowing parallel to the length.
Moving too slowly during the bend is a classic beginner trap. Hot wood cools fast, and a cooled fiber resists shaping. Once you pull the piece from the box, you have roughly two minutes before it stiffens. Have your form, strap, and clamps staged and ready.
Skipping the metal strap leads to cracked outer faces. The strap keeps the outside fibers in compression instead of letting them stretch and tear. For tight radii especially, never bend without one.
Finally, unclamping too early undoes your work. The curve isn’t permanent until the wood cools and dries completely. Give it a full day at minimum.
Expert Tips
Over-bend slightly to beat springback. Every piece relaxes a little when released, so build your form with a tighter radius than your target — often by 5 to 10 percent. The wood settles right into your intended curve.
Soak end stops in mind: position the strap’s end blocks snug against the wood’s tips so they take the load, not the fibers. This single detail prevents most outer-face cracks.
Keep a few extra blanks steaming. Even pros lose pieces, and a backup in the box saves you from waiting another hour. Steam them together, bend them in sequence.
Finally, choose white oak for your first attempt. It bends tighter than almost any other domestic hardwood, tolerates small errors, and forgives slow hands better than walnut or maple.
Frequently Asked Questions
What Is the Best Hardwood for Steam Bending?
White oak tops the list. It bends to tight radii, resists cracking, and forgives beginner mistakes. Ash, hickory, beech, and elm also perform well. Avoid brittle species like hard maple for tight curves. Whatever you choose, prioritize straight grain and air-dried stock over kiln-dried lumber, since moisture content matters far more than the species name alone.
How Long Should I Steam the Wood?
Steam about one hour per inch of thickness. A ¾-inch board needs roughly 45 minutes; a full inch needs an hour. Keep your box near 212°F the entire time, and don’t open it to check, since that dumps heat and resets the clock. The wood is ready when it feels hot, pliable, and slightly rubbery to the touch.
Why Did My Wood Crack While Bending?
Cracks usually trace back to three causes: kiln-dried wood, poor grain direction, or skipping the metal strap. Dry wood lacks the moisture steam needs. Grain running off the edge creates fracture lines. Without a strap, the outer fibers stretch and tear. Fix all three, and your cracks largely disappear.
Can I Steam Bend Without a Steam Box?
A dedicated steam box gives the best, most consistent results, but alternatives exist. Some woodworkers wrap stock in steaming towels or use boiling water for thin pieces. For thicker hardwood, though, you need sustained, even steam, which a sealed box delivers reliably. Building one from foam board or PVC takes an afternoon and costs very little.
How Much Springback Should I Expect?
Expect 5 to 10 percent springback on most hardwoods, depending on species, thickness, and radius. Thicker pieces and tighter curves spring back more. The simple fix is to build your bending form with a slightly tighter radius than your final target. When the wood relaxes, it settles into the exact curve you wanted.
Conclusion
Steam bending turns flat boards into flowing curves with nothing more than heat, moisture, and a solid form. You now know how to steam bend hardwood from start to finish — choosing straight-grained stock, steaming it to the right pliability, shaping it against a form, and letting it cool into a permanent curve.
The technique rewards preparation. Stage your tools, pick the right species, respect the grain, and move quickly once the wood comes out hot. Get those fundamentals right, and your bends come out clean and strong every time.
Start small. Bend a simple arc in white oak before you tackle a chair back or an oval box. Each piece teaches you something the last one couldn’t. Soon you’ll shape curves with the confidence of a pro, building furniture and projects that look like they came from a factory floor — except you made them yourself.
Grab a board, fire up the steam, and bend your first curve today.
