
Fall decor adds up fast. Store-bought wood pumpkins cost $20 to $40 each, and they all look the same on every porch. You can do better with a scrap board and an afternoon.
Wood pumpkins are simple to build, cheap to make, and last for years. You cut the shape, round the edges, add color, and finish with a stem. No fancy tools required—just basic cuts and a little patience.
This guide shows you exactly how to make wood pumpkins from start to finish, even if you’ve never run a saw. You’ll learn which wood to pick, how to shape clean curves, and how to seal them so they survive season after season. By the end, you’ll have a set of pumpkins worth displaying front and center.
Why This Matters
You save real money. One sheet of scrap wood yields a whole grouping of pumpkins for the price of a single store-bought version. Multiply that across a porch, a mantel, and a few gifts, and the math wins every time.
This project builds confidence fast. The cuts are forgiving, the shapes are loose, and small mistakes blend into the rustic look. You practice saw control, sanding, and finishing—skills that carry into bigger builds.
You also control the result. Pick your colors, your sizes, your wood texture. Match them to your home instead of settling for whatever the store stocks.
Best of all, wood pumpkins outlast every foam or plastic version. Seal them once and they hold up to weather, handling, and storage for years. Build them once, decorate every fall.
Tools and Materials You’ll Need
Gather everything before you start. A clear bench keeps the work fast and clean.
- Cut the shapes — scrap pine, plywood, or reclaimed boards (¾” to 1½” thick)
- Trace the curves — pencil and a round object or template
- Make the cuts — jigsaw or band saw
- Round the edges — sandpaper in 80, 120, and 220 grit
- Add color — acrylic paint, wood stain, or milk paint
- Build the stem — a small branch, dowel, or wood scrap
- Attach the stem — wood glue and a drill with bit
- Seal the finish — clear polyurethane or wax
- Add charm — twine, raffia, or burlap for accents
- Clear the dust — tack cloth or shop vacuum
- Speed up shaping — a random orbital sander (optional, but it rounds edges in seconds)
Reclaimed barn wood gives the best rustic texture. New pine takes paint cleanest.
Step-by-Step Guide on How to Make Wood Pumpkins
Step 1 – Choose and Prep Your Wood
Wet or split wood ruins the project before it starts. Pick dry, stable boards.
Select scrap pine, plywood, or reclaimed lumber between ¾” and 1½” thick. Thicker boards stand on their own and feel substantial. Thin plywood works for flat, leaning pumpkins.
Run your hand across each board. You want a surface free of deep cracks, soft rot, or warping. A board that rocks on a flat table will rock as a pumpkin too.
Knock the boards together. Dry wood gives a sharp, hollow knock. A dull thud means moisture—set those aside to dry.
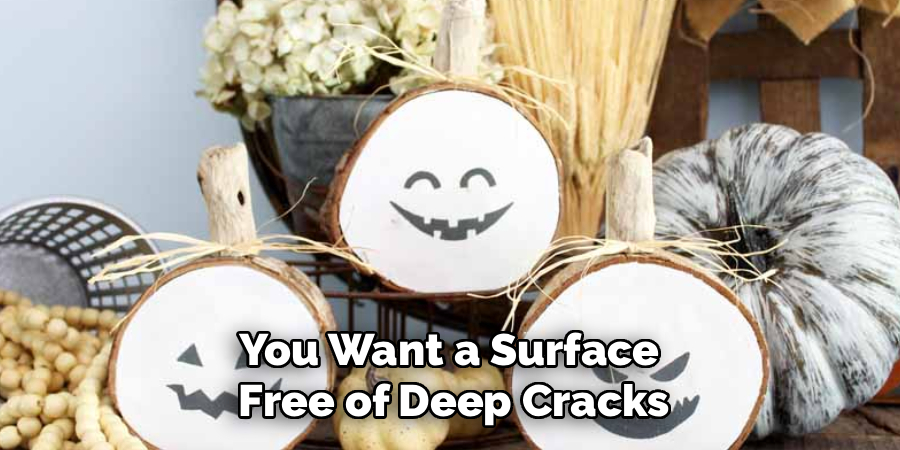
Wipe off dirt and old debris with a rag. Clean wood traces and cuts cleaner, and that’s the foundation of how to make wood pumpkins that look intentional.
Step 2 – Draw the Pumpkin Shape
A flat, lopsided outline makes a flat, lopsided pumpkin. Trace a full, rounded shape.
Grab a round object—a plate, a bowl, a paint can lid—and trace a circle or a slightly squat oval. Real pumpkins sit wider than they are tall, so flatten the curve a little at the top and bottom.
Vary your sizes. A grouping of three different heights looks far better than three matching twins. Sketch a few before you commit.
Step back and check the outline against the wood grain. Curves that follow the grain cut smoother and resist splitting. Mark the top center where the stem will sit. A clear, confident pencil line guides a clean, confident cut.
Step 3 – Cut Out the Body
Rushed cuts wander off the line and leave jagged edges. Slow, steady pressure wins.
Clamp the board to your bench so it can’t shift. Fit your jigsaw or band saw with a fine-tooth blade for smooth curves. Line up the blade just outside your pencil mark.
Squeeze the trigger and let the blade reach full speed before you push. Feed slowly and follow the line, turning the board into the cut on tight curves. Listen for a steady hum—straining or burning means you’re pushing too hard.
Watch the edge as it forms. Clean cuts leave a crisp, light-colored line. Burned or fuzzy edges mean a dull blade or too much speed. Keep your pace even and the curve stays true.
Step 4 – Sand the Edges Smooth
Raw cut edges feel sharp and catch paint unevenly. Sanding fixes both at once.
Start with 80-grit to knock down saw marks and round the hard corners. Move to 120-grit to smooth the curves, then finish with 220-grit for a soft, even surface. An orbital sander speeds this up, but hand sanding gives you control on tight spots.
Round the front edges slightly so the pumpkin looks plump instead of flat. This small detail reads as depth from across the room.
Run your fingers over every edge. A finished surface feels smooth and continuous, with no splinters or ridges. Tilt the piece to the light—even sheen means you’ve sanded evenly. Wipe off all dust before painting.
Step 5 – Apply Your Base Color
Bare wood soaks up paint unevenly and looks patchy. A clean base coat fixes the tone.
Brush on your first coat of acrylic paint, stain, or milk paint, following the grain in long strokes. Classic orange reads as pumpkin instantly, but white, sage, and dusty blue give a modern farmhouse look.
Watch the wood drink the first coat. Soft areas darken faster—that’s normal on pine. Let it dry fully, usually one to two hours, then check coverage.
Apply a second thin coat for even color. Two light coats beat one heavy coat, which drips and hides the grain. For a rustic finish, thin your paint so the wood texture shows through. That blend of color and grain is what makes good wood pumpkins.
Step 6 – Add the Stem
A missing or flimsy stem makes a pumpkin look unfinished. Build one with character.
Cut a small branch, dowel, or wood scrap to length—roughly one-fifth the height of the body. A crooked branch reads as natural; a straight dowel reads as clean and modern. Pick the style that fits your decor.
Drill a hole in the top center of the body, matching your stem’s diameter. Test-fit the stem before gluing. It should slide in snug with a little resistance.
Add wood glue to the hole and the stem base, then press it in and hold for a minute. Wipe away any squeeze-out with a damp rag. Let it cure fully before handling. A solid stem turns a flat shape into a real pumpkin.
Step 7 – Distress for a Rustic Look
Brand-new paint can look flat and store-bought. Light distressing adds age and warmth.
Once the paint dries, rub 120-grit sandpaper along the edges and high spots where natural wear would happen. Go light—you want hints of bare wood, not bald patches. Corners, the stem base, and raised grain are perfect targets.
Wipe a thin coat of dark wax or watered-down brown paint into the recesses for extra depth, then buff off the excess. The color settles into the grain and ages the piece instantly.
Step back often. Good distressing looks accidental and balanced. Overdoing it looks deliberate and busy. Stop while it still feels subtle—knowing when to quit is half the skill of how to make wood pumpkins that look authentic.
Step 8 – Seal and Finish
Unsealed paint chips and fades, especially outdoors. A topcoat locks in your work.
Brush on a thin coat of clear polyurethane for hard protection, or rub in wax for a soft, matte glow. Use polyurethane on outdoor pumpkins and wax on indoor ones.
Follow the grain with smooth, even strokes. Watch the surface—the finish should go on clear and thin, not pooled or cloudy. Let each coat dry, then add a second for outdoor durability.
Wrap twine or raffia around the stem base for a finishing touch. Tie a small bow or leave the ends loose for a natural feel.
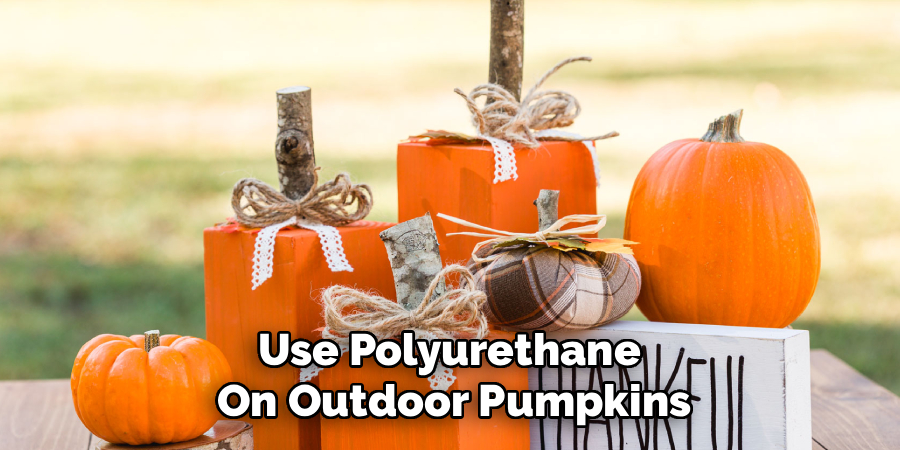
Run your hand over the cured surface. It should feel smooth and sealed, ready for years of seasonal display.
Common Mistakes to Avoid
The biggest mistake is using wet or warped wood. Damp boards split as they dry, crack your paint, and refuse to sit flat. Always start with dry, stable lumber. Knock two boards together—dry wood gives a sharp ring, while wet wood thuds. Set questionable pieces aside until they fully dry.
Skipping sanding grits is another common error. Jumping straight to fine paper leaves saw marks and sharp edges that grab paint unevenly and feel rough to the touch. Work through 80, 120, and 220 grit in order. Each grit removes the scratches from the last, leaving a smooth surface that takes color cleanly.
Rushing the paint is a trap too. One thick coat drips, hides the grain, and dries gummy. Two thin coats build even color and dry faster. Let each coat cure fully before adding the next, and resist the urge to pile it on.
Many beginners overdo the distressing. Heavy sanding strips too much paint and looks deliberate instead of aged. Go light and step back often—subtle wear reads as authentic.
Finally, skipping the sealer dooms your pumpkins to chips and fading. A clear topcoat protects all your work and keeps the colors sharp for years.
Expert Tips
Pros cut several pumpkin bodies at once from a single board to save setup time and keep sizes consistent. Trace them edge to edge, then cut them all in one session.
Use a forstner bit instead of a twist bit for the stem hole. It drills a clean, flat-bottomed hole that grips the stem tighter and looks neater.
For weatherproof outdoor pumpkins, switch to exterior-grade paint and spar urethane. Standard polyurethane breaks down in direct sun and rain within a season.
Mix your own custom colors by adding a few drops of brown or gray to bright acrylics. This mutes the tone instantly and gives that aged, farmhouse look without distressing.
Always test your paint and finish on a scrap from the same board first. Wood varies, and a two-minute test saves a ruined pumpkin.
Frequently Asked Questions
What Kind of Wood Works Best for Wood Pumpkins?
Pine, plywood, and reclaimed barn wood all work well. Pine is cheap, easy to cut, and takes paint cleanly. Reclaimed wood gives the best rustic texture with natural weathering built in. Choose boards ¾” to 1½” thick so the pumpkins stand on their own. Avoid wet, warped, or rotted wood, which splits and refuses to sit flat.
Do I Need Power Tools to Make Wood Pumpkins?
No, but they help. A jigsaw or band saw cuts curves fast, and an orbital sander rounds edges in seconds. You can manage with a hand saw and sandpaper if you’re patient, though curves take more effort by hand. For a first project, even a basic jigsaw and a sanding block produce clean, attractive results.
How Do I Make Wood Pumpkins Last Outdoors?
Use exterior-grade paint and seal with spar urethane, which resists sun and rain. Standard indoor polyurethane breaks down within a season outside. Round and seal every edge, since exposed wood absorbs moisture first. Store them inside during heavy storms or freezing weather, and your pumpkins will survive multiple fall seasons looking sharp.
What Colors Should I Paint Wood Pumpkins?
Classic orange reads as a pumpkin instantly, but white, sage green, dusty blue, and cream give a modern farmhouse look. Mix a few drops of brown or gray into bright colors for a muted, aged tone. Group several colors and sizes together for the best display. Test your color on scrap from the same board first.
How Long Does It Take to Make Wood Pumpkins?
Plan for two to three hours of active work, plus drying time between coats. Cutting and sanding take about an hour. Painting needs two thin coats with dry time in between, usually one to two hours each. Sealing adds another round of drying. Spread across an afternoon and evening, a full set finishes in a single day.
Conclusion
Building wood pumpkins comes down to a clear sequence: pick dry wood, trace a full shape, cut clean curves, sand smooth, paint, add a stem, distress, and seal. Follow that order and plain scrap turns into decor worth displaying every fall.
The payoff is real. You save money over store-bought versions, control every color and size, and end up with pieces that last for years instead of one season. Each pumpkin you build teaches saw control, sanding, and finishing—skills that carry into bigger projects.
Learning how to make wood pumpkins gives you a reusable fall tradition. Build a grouping for your porch, gift a set to friends, or sell a few at a craft fair. The shapes are forgiving and the results look better than anything off a shelf.
Grab a scrap board this weekend and cut your first shape. Round the edges, brush on your color, and set the stem. Once you see how good they look, you’ll be building a whole patch.
