
A scratched wood door drags down the look of your whole room. The good news? You can fix it yourself in an afternoon. Learning how to repair scratched wood door surfaces saves you the cost of replacement and gives you a skill you’ll use again and again. Whether the damage is a shallow scuff from a pet or a deep gouge from moving furniture, the repair follows the same logic: clean, fill, sand, color, and protect.
You don’t need a workshop or years of practice. You need the right tools, a little patience, and a clear plan. This guide walks you through every step, from sizing up the scratch depth to laying down a finish coat that blends like the damage never happened.
Why This Matters
Replacing a solid wood door costs hundreds of dollars. Repairing one costs a fraction of that and takes less time than you’d expect. That math alone makes the skill worth learning.
But the savings go deeper. Every scratch you fix yourself builds confidence for the next project. You start to read wood the way a pro does — spotting grain direction, judging stain color, knowing when sanding helps and when it hurts. That knowledge transfers to furniture, trim, cabinets, and floors.
A well-maintained door also protects your home’s value. Buyers notice details. Crisp, undamaged woodwork signals a house that’s been cared for. Master this one repair, and you extend the life of your wood products while sidestepping costly mistakes that come from guessing.
Tools and Materials You’ll Need
Gather everything before you start. A complete setup keeps the work smooth and prevents half-finished repairs from drying wrong.
- Wood filler or wood putty — matched to your door’s tone
- Sandpaper — 120, 220, and 320 grit for staged smoothing
- Putty knife — flexible, for pressing filler into the scratch
- Tack cloth — removes dust before staining
- Wood stain — chosen to match your existing finish
- Clear finish coat — polyurethane, lacquer, or matching topcoat
- Soft cloths — for applying stain and wiping excess
- Painter’s tape — protects hinges, glass, and hardware
- Mineral spirits — cleans the surface and removes residue
- Foam brush or fine artist’s brush — for precise application
- Wood touch-up marker (optional) — quick fix for hairline scratches
Step-by-Step Guide on How to Repair Scratched Wood Door
Step 1 – Inspect the Scratch Depth
Run your fingernail across the scratch. If your nail catches, the damage cuts through the finish into the wood — that’s a deep scratch needing filler. If your nail glides over it, you’re dealing with a surface scuff that polish or a touch-up marker can handle.
Look at the door under bright, angled light. Shallow scratches show as faint white lines. Deep ones reveal raw, lighter wood at the bottom. Knowing scratch depth before you start tells you exactly which repair path to follow.
This first read saves you from over-working a minor mark or under-treating a serious gouge. Take thirty seconds here, and the rest of the job goes faster. When you learn how to repair scratched wood door surfaces, accurate diagnosis is half the battle.
Step 2 – Clean the Damaged Area
Skip cleaning, and your filler or stain won’t bond. Dust, grease, and old polish all block adhesion.
Dampen a soft cloth with mineral spirits and wipe the scratch and the wood around it. You’ll feel the surface go from slightly tacky to clean and dry. The cloth may pick up a faint stain color — that’s normal, just old finish lifting away.
Let the area dry fully, usually five to ten minutes. The wood should look matte and feel cool to the touch, with no oily sheen. Tape off nearby hardware and glass now so stray filler or stain doesn’t reach them.
A clean surface is the foundation. Rush it, and every later step suffers.
Step 3 – Apply Wood Filler
Load a small amount of wood filler onto your putty knife. Press it firmly into the scratch at a slight angle, working across the gouge rather than along it. This forces the filler deep and packs it tight.
Drag the knife flat to scrape away the excess, leaving the filler slightly proud of the surface — it shrinks a little as it cures. You’ll hear a soft scrape and feel the knife glide once the scratch is full.
For deep gouges, apply in thin layers, letting each dry before adding the next. A single thick blob cracks as it dries. Match the filler tone as closely as you can now; perfect color comes later with stain.
Step 4 – Let It Cure Completely
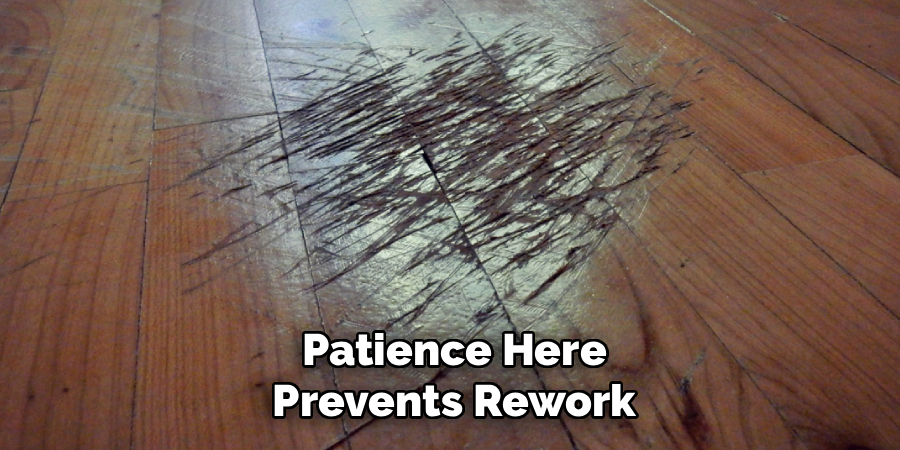
Patience here prevents rework. Filler that’s still soft tears under sandpaper and ruins the repair.
Check the product label for cure time, usually one to two hours for surface fillers, longer for deep applications. The filler darkens slightly and hardens as it sets. Press a fingernail at the edge — if it dents, wait longer.
Resist the urge to sand early. A properly cured patch feels solid, sounds hollow-free when tapped, and holds its shape under light pressure. Cold or humid rooms slow drying, so give yourself extra time in winter or damp weather.
Use the wait to clean your tools and prep your sandpaper grits. The repair rewards a steady hand and a clear head.
Step 5 – Sand the Surface Smooth
Start with 220-grit sandpaper. Sand the filled area in the direction of the wood grain, never across it — cross-grain scratches show through stain and ruin the blend.
Use light, even pressure. You’ll feel the raised filler level off until it sits flush with the door. The surface turns from rough to smooth under your fingertips. Wipe with your hand often to check progress.
Switch to 320-grit for the final pass. This polishes the patch and feathers its edges into the surrounding wood, so no ridge remains. Hold the door at an angle to the light — a perfect blend shows no bump or dip.
Stop the moment the area feels seamless. Over-sanding thins the surface and creates new low spots.
Step 6 – Match and Apply Wood Stain
Test your stain on a hidden spot first — the bottom edge or the back of the door. Stain color shifts once it soaks in, so the bottle label rarely tells the full story.
Dip a cloth or fine brush and apply the stain to the repaired area in thin coats. Follow the grain. Wipe excess with a clean rag after a minute or two. The wood drinks the color and the patch starts to disappear into the surrounding tone.
Build color gradually. One light coat blends better than one heavy coat that looks blotchy. Grain matching takes a careful eye — squint at the door and adjust until the repair vanishes. Let each coat dry before judging the match.
Step 7 – Apply the Finish Coat
Protect your work with a clear finish coat. This step seals the stain and matches the sheen of the rest of the door.
Use a foam brush to lay down a thin, even layer of polyurethane or matching topcoat. Brush with the grain in long, smooth strokes. You’ll see the surface gain a subtle wet shine that dries to gloss, satin, or matte depending on your product.
Avoid drips and pooling — they dry into hard ridges. If the door’s existing finish is satin, don’t use gloss, or the patch will stand out under light.
Let it dry fully, then apply a second coat if needed. Two thin coats outlast one thick one every time.
Step 8 – Inspect and Touch Up
Step back and view the door from several angles in natural light. A successful repair shows no color mismatch, no ridge, and no dull patch where the finish thinned.
Run your fingers across the repaired spot. It should feel as smooth as the surrounding wood, with the same temperature and texture. Any roughness means you need a light sand and another finish coat.
If the color is slightly off, a wood touch-up marker corrects small variances fast. Catch problems now, while fixes are easy.
Once the repair blends cleanly, remove your painter’s tape and reinstall any hardware. Stand back and enjoy a door that looks whole again — proof you’ve mastered door restoration.
Common Mistakes to Avoid
The biggest mistake is skipping the cleaning step. Filler and stain need a grease-free surface to bond. When you apply them over dust or old polish, the repair lifts, flakes, or refuses to take color evenly. Wipe with mineral spirits every single time, no exceptions.
Sanding across the grain ranks a close second. Cross-grain scratches stay invisible on bare wood but jump out the moment stain hits them. Always sand in the direction of the grain, and your blend stays clean.
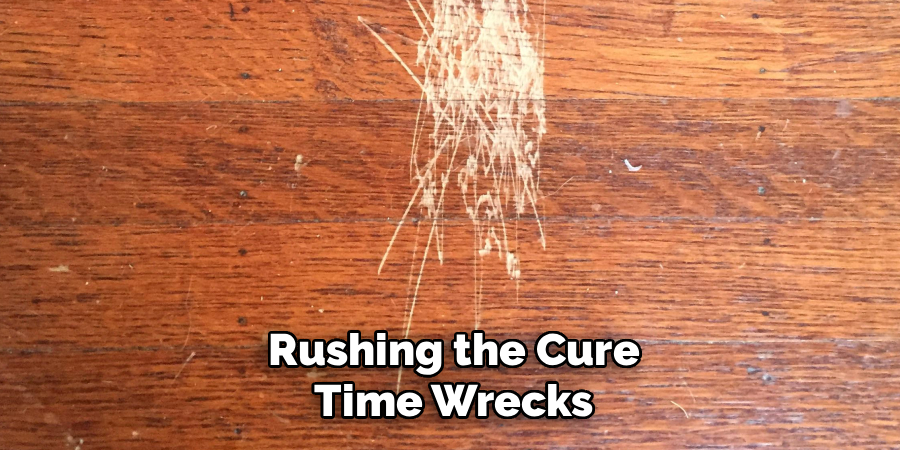
Rushing the cure time wrecks more repairs than any other error. Soft filler tears under sandpaper, and wet stain smears under the finish coat. Wood doesn’t care about your schedule — give each layer the time the label demands.
Color matching trips up many beginners. Applying stain straight from the bottle without a test often produces a patch that’s too dark or too red. Test on a hidden spot first, and build color in thin coats rather than one heavy pass.
Finally, mismatching the sheen of the finish coat undoes good work. A glossy patch on a satin door catches the eye instantly. Match the existing sheen, and the repair disappears.
Expert Tips
Work in the same light you’ll live with. A repair that blends under shop lighting can look off under warm evening bulbs. Judge your color and sheen in the room’s normal light.
For stained doors, blend two or three stain shades to hit an exact match. Single bottles rarely match aged wood, which shifts tone over years of sun exposure. Mix small batches and test until the patch vanishes.
Warm your filler slightly in a cold room — it spreads smoother and packs tighter. And always feather your sanding well past the scratch edges, not just over the filler. A wide, gradual blend hides the repair far better than a tight patch.
Finally, keep leftover stain and finish in a labeled jar. The next scratch is a matter of when, not if, and a perfect match waits on your shelf.
Frequently Asked Questions
Can You Fix a Deep Scratch in a Wood Door?
Yes. Deep scratches need wood filler applied in thin layers, with each layer drying before the next. Once cured, sand the patch flush, match it with wood stain, and seal it with a finish coat. The repair holds permanently and blends invisibly when you follow the grain and match the sheen.
How Do You Match Stain to an Existing Wood Door?
Test stain on a hidden area first, since color shifts as it soaks in. Aged doors often need two or three stain shades blended together to match years of sun exposure. Apply thin coats, wipe the excess, and build color gradually until the repaired patch disappears into the surrounding wood.
Do You Need to Sand a Scratched Wood Door?
For shallow scuffs, no — a touch-up marker or polish often works. For deep scratches filled with wood putty, yes. Sand the cured filler with 220 then 320 grit, always in the grain direction, until the patch sits flush. Sanding feathers the edges so no ridge remains under the finish coat.
What’s the Best Filler for Wood Door Scratches?
Choose a stainable wood filler matched close to your door’s tone. Stainable filler accepts color evenly, so the repair blends after staining. Avoid hardware-store putty that resists stain — it leaves a visible patch. For tiny hairline scratches, a wood touch-up marker beats filler and skips the sanding entirely.
How Long Does a Wood Door Scratch Repair Last?
A properly sealed repair lasts as long as the door’s original finish — years, often decades. The finish coat protects the stain and filler from moisture, wear, and UV fading. Reapply a topcoat if the area dulls over time. Keep leftover stain on hand for quick touch-ups down the road.
Conclusion
Fixing a scratched door comes down to five clear moves: clean the surface, fill the gouge, sand it smooth, match the color, and seal it with a finish coat. Master that sequence, and you can tackle damage from hairline scuffs to deep gouges with confidence.
Knowing how to repair scratched wood door surfaces saves you real money, protects your home’s value, and builds skills you’ll carry into every future woodworking project. The work isn’t hard — it just rewards patience. Let each layer cure, sand with the grain, and test your stain before you commit. Those habits separate a repair that vanishes from one that stands out.
Gather your tools, pick an afternoon, and start with the first scratch that’s been bothering you. Once you see how cleanly the damage disappears, you’ll never look at a marked-up door the same way again. Save your leftover stain and finish — the next repair will go even faster.
