
You have a crack, gouge, or nail hole to fix—and no sawdust on hand. Good news: you don’t need it. Sawdust is just one filler ingredient, and it’s often the messiest, least reliable one.
You can build a strong, sandable, paintable patch from materials already sitting in your shop or kitchen. Glue, flour, baking soda, joint compound, and epoxy all work. Each gives you a different finish, drying time, and strength.
This guide shows you how to make wood filler without sawdust using four proven methods. You’ll learn which binder to pick, how to mix it to the right consistency, and how to apply it for a repair that disappears under paint or stain. By the end, you’ll patch any imperfection without hunting for fine wood dust first.
Why This Matters
Sawdust-free filler solves a real problem: you rarely have the right sawdust when you need it. Matching dust to your project’s wood species and grain is tricky, and coarse dust leaves a gritty, uneven patch.
Mixing your own filler saves money. A small tub of store-bought wood putty costs more than a batch you whip up from glue and flour for pennies. You also control the color, thickness, and strength.
It builds confidence fast. Once you nail one repair, you stop fearing dings and dents in your projects. You fix them on the spot.
Most important, it extends the life of your work. A sealed crack keeps moisture out. A filled gouge restores a smooth surface for finish. Learn this, and every wood repair becomes routine instead of a setback.
Tools and Materials You’ll Need
Gather your materials before you start. A scramble mid-mix lets your filler skin over before you apply it.
- Bind the patch — wood glue (PVA), white glue, or two-part epoxy
- Thicken the mix — all-purpose flour, cornstarch, or baking soda
- Patch wide cracks fast — premixed joint compound or spackle (for indoor, paintable repairs)
- Mix and measure — small disposable cup or palette
- Apply cleanly — putty knife or flexible plastic scraper
- Smooth the surface — sandpaper in 120 and 220 grit
- Match the color — wood stain, acrylic paint, or coffee grounds for tint
- Protect your work area — painter’s tape and a drop cloth
- Speed up small fills — a syringe or fine-tip applicator (optional, but it pushes filler deep into tight cracks)
Choose your binder based on the repair. Glue-based filler suits small holes. Epoxy handles structural gouges and outdoor wood.
Step-by-Step Guide on How to Make Wood Filler Without Sawdust
Step 1 – Clean and Prep the Damaged Area
A clean cavity holds filler. A dirty one lets it pop out later.
Brush loose debris from the crack, hole, or gouge. Use a stiff brush or a vacuum to clear dust and chips. Wipe the area with a dry cloth to lift any remaining grit.
Check the edges. Snip away splinters or loose fibers with a utility knife so the opening has clean, solid walls. Filler grips firm wood far better than ragged edges.
Run your finger around the cavity. It should feel dry, smooth, and free of grease or old finish. If the surface feels waxy, scuff it lightly with sandpaper. That texture gives your patch something to bite into and keeps it from lifting.
Step 2 – Choose Your Binder and Filler Base
The right pairing decides how strong and sandable your patch turns out. Match the recipe to the job.
For small interior holes, mix wood glue with flour. It dries hard, sands clean, and takes stain reasonably well. For a fast, paintable fill, reach for joint compound straight from the tub. For structural damage or outdoor wood, choose two-part epoxy thickened with baking soda or cornstarch.
Learning how to make wood filler without sawdust starts with this decision. Each base behaves differently under a knife and under finish.
Set your chosen materials side by side. Glue and flour for hardness. Epoxy for strength. Spackle for speed. Pick one path before you mix, and you avoid a soupy, useless batch.
Step 3 – Mix the Filler to the Right Consistency
Consistency makes or breaks the repair. Too thin, and it sags. Too thick, and it won’t spread.
Pour a small amount of binder into your cup. Add your powder a pinch at a time, stirring as you go. Aim for the texture of stiff peanut butter—thick enough to hold a peak, smooth enough to spread without crumbling.
Watch how it moves on the stick. A correct mix folds over slowly and clings to the knife. A runny one drips and slides off; add more powder. A crumbly one cracks at the edges; add a few drops of binder.
Mix only what you can use in five minutes. Glue and epoxy both start curing the moment you blend them, so small batches keep your filler workable.
Step 4 – Tint the Filler to Match Your Wood
A patch that matches the wood disappears. One that doesn’t draws every eye.
Add color before you apply, not after. Stir in a few drops of wood stain, a dab of acrylic paint, or a sprinkle of used coffee grounds for warm brown tones. Blend until the color runs even through the whole batch.
Test it first. Smear a thin sample on scrap or a hidden edge and let it dry. Filler always dries a shade or two different from its wet color—usually lighter for water-based mixes, darker for epoxy.
Compare the dried sample to your wood in good light. Adjust the tint until they sit close. Slightly lighter beats too dark, since stain over the patch can deepen it later.
Step 5 – Apply the Filler in Firm Layers
Pressure pushes filler deep and locks out air pockets. Light dabbing leaves gaps that crack and fall out.
Load a small amount onto your putty knife. Press it into the cavity at a low angle, forcing it into every corner. Drag the knife across the opening to pack it tight, then scrape off the excess.
Listen and feel for resistance. Well-packed filler meets the knife with a firm, smooth drag. Air pockets make a hollow, skipping sound—work those spots again.
Leave the patch slightly proud of the surface. Filler shrinks a little as it cures, and that extra height gives you material to sand flush. For deep holes, build in two thin layers instead of one thick glob.
Step 6 – Let the Patch Cure Fully
Patience here saves you a do-over. Sanding too soon smears soft filler and ruins your work.
Set the piece somewhere dry and undisturbed. Glue-and-flour mixes need a few hours; epoxy sets in 20 to 30 minutes but cures fully overnight. Joint compound dries fast on the surface but stays soft underneath in deep fills.
Check by touch and color. Most water-based fillers lighten as they dry. Press a fingernail at the edge—a cured patch resists with no give, while a soft one dents easily.
Don’t rush it with a heat gun. Forced drying cracks the surface and traps moisture below. Give it the full cure time, and your patch sands smooth instead of gumming up your paper.
Step 7 – Sand the Repair Flush
This step blends the patch into the wood. Sand it level, and the repair vanishes.
Start with 120-grit to knock down the proud filler. Sand with the grain in steady strokes until the patch sits flush with the surface. Switch to 220-grit to smooth the area and feather the edges into the surrounding wood.
Run your palm across the spot with your eyes closed. A finished repair feels seamless—no ridge, no dip. Any bump means more sanding; any hollow means you sanded too far and need a thin second fill.
Wipe away dust and check in raking light. Knowing how to make wood filler without sawdust means nothing if the patch sits proud, so take your time leveling it before you finish.
Step 8 – Seal and Finish the Surface
The final coat protects your patch and ties it to the wood. Skip it, and the repair stands out under wear.
Wipe the area clean of all sanding dust. Apply your finish—stain, paint, or clear sealer—over the whole surface, not just the patch. A spot finish leaves a visible halo.
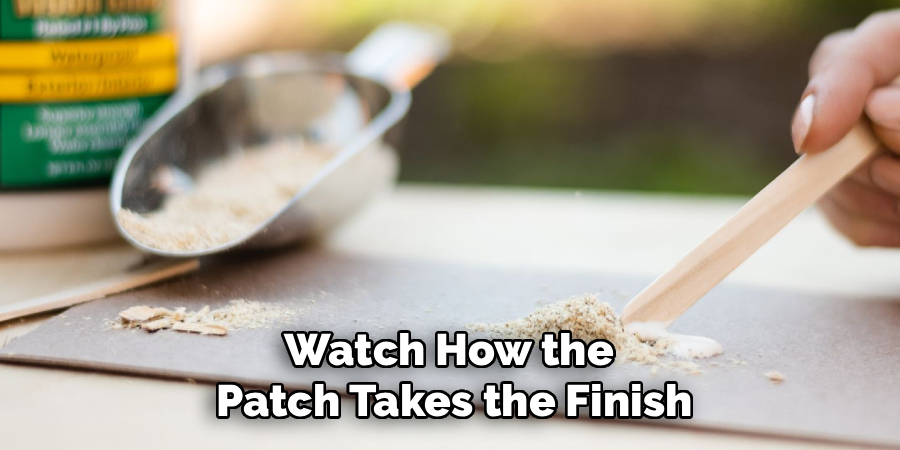
Watch how the patch takes the finish. A well-mixed filler absorbs stain close to the surrounding grain. If it drinks stain unevenly and shows a pale blotch, seal it first with a thin wash coat, then restain.
Let each coat dry before adding the next. Two thin coats beat one heavy one. When the finish cures, run your hand over the spot—it should feel and look like solid, unbroken wood.
Common Mistakes to Avoid
The biggest mistake is mixing too much filler at once. Glue and epoxy start curing the instant you blend them, and a large batch skins over before you finish applying it. You end up tossing half a cup of hardened paste. Mix small, work fast, and blend a fresh batch if you need more.
Getting the consistency wrong ruins the patch before it starts. A runny mix sags out of the cavity and shrinks into a sunken pit. A dry, crumbly mix won’t bond and falls out within weeks. Add your powder gradually and stop at stiff peanut butter—thick enough to hold a peak, smooth enough to spread.
Skipping the tint test leads to mismatched repairs. Filler dries a different shade than it looks wet, so judging color by the wet mix fools you every time. Always dry a sample on scrap first and compare it in natural light before you commit.
Sanding too early is a classic rush job. Soft filler smears across the wood, clogs your paper, and tears out of the cavity. Wait for a full cure. Press a fingernail at the edge—if it dents, give it more time before you touch the sandpaper.
Expert Tips
Pros tint a hair lighter than the target color, then let the finish darken the patch into a perfect match. Going darker leaves you no way to correct it.
Mix glue-and-flour filler with a few drops of stain built right in, not just on top. The color runs all the way through, so sanding never exposes a pale layer underneath.
For outdoor or high-moisture wood, always choose epoxy over glue-based mixes. Epoxy ignores water and won’t soften, crack, or wash out the way water-soluble fillers do.
Keep a syringe in your kit for hairline cracks. It forces thin filler deep into gaps your putty knife can’t reach, and it sets a stronger, fuller patch.
Finally, seal end grain and porous patches with a thin glue wash before staining. It stops blotchy absorption and keeps your repair invisible.
Frequently Asked Questions
What Can I Use Instead of Sawdust in Wood Filler?
Use flour, cornstarch, or baking soda as your thickener instead of sawdust. Blend any of these with wood glue or epoxy to build a strong, sandable paste. Joint compound and spackle also work for indoor, paintable repairs. Each option gives you a smoother, more consistent fill than sawdust, and you likely already have one in your kitchen or shop.
Does Homemade Wood Filler Take Stain Well?
Glue-based fillers take stain unevenly because the glue resists absorption. Tint the filler before you apply it for the best match, then seal the patch with a thin wash coat before staining the whole surface. Epoxy fillers barely absorb stain at all, so always color those in the mix. Test on scrap first—dried filler shifts shade and rarely matches the wet color.
How Long Does DIY Wood Filler Take to Dry?
Drying time depends on your binder. Glue-and-flour mixes need a few hours for small fills and overnight for deep ones. Two-part epoxy sets in 20 to 30 minutes and cures fully overnight. Joint compound surfaces fast but stays soft underneath in thick patches. Never force-dry with heat—it cracks the surface. Wait for a full cure before sanding.
Is Homemade Wood Filler as Strong as Store-Bought?
For small holes and cosmetic repairs, yes—glue-and-flour filler dries hard and sands clean. For structural damage or outdoor wood, epoxy-based homemade filler matches or beats many commercial putties. Glue-based mixes soften in moisture, so keep those indoors. Match your recipe to the job: glue for light fills, epoxy for strength and weather resistance.
Can I Use Flour to Make Wood Filler?
Yes. Flour is one of the best sawdust substitutes. Mix it gradually into wood glue until you reach a stiff, spreadable paste. It dries hard, sands smooth, and accepts tint well. Use it for interior holes, dents, and nail marks. Avoid flour-based filler on outdoor or damp surfaces, since moisture softens it over time—reach for epoxy there instead.
Conclusion
You now have four reliable ways to patch wood without a speck of sawdust. Clean the cavity, pick your binder, mix to stiff peanut butter, tint before applying, pack it firm, cure it fully, sand it flush, and finish over the whole surface. Follow that order and your repairs disappear under paint or stain.
The payoff is real. You fix dings and gouges with materials already in your home, save money on store-bought putty, and control the exact color and strength of every patch. Glue and flour handle small holes. Epoxy tackles structural and outdoor damage. Joint compound covers fast interior fixes.
Knowing how to make wood filler without sawdust turns every imperfection into a quick, confident repair instead of a project-ending flaw. The skill carries into furniture, trim, flooring, and beyond.
Mix your first batch this weekend. Grab some glue and flour, find a scrap to test on, and patch that nagging gouge. A flawless repair is closer than you think.
