
A splash of paint lands on your beautiful stained banister. Your stomach drops. You think the wood is ruined.
It isn’t.
Stained wood is tougher than it looks. The paint sits on top. The stain lives beneath. With the right approach, you can lift one and protect the other. That is the whole game.
Most beginners panic and grab sandpaper first. That’s the costly move. Learning how to remove paint from stained wood the right way saves your project, your money, and your weekend. You don’t need years of experience. You need patience, a few simple supplies, and a clear plan.
This guide walks you through every step — from testing the surface to restoring the finish — so you can lift paint cleanly without stripping the stain you love.
Why This Matters
Here is the hidden truth. One wrong move ruins the wood underneath.
Sand too hard, and you blow through the stain. Use the wrong stripper, and you bleach the color. Rush the job, and you face hours of refinishing you never planned for.
Learning this skill protects you from all of that.
You save money. A professional refinish on a single door can cost hundreds. You build confidence. Once you remove paint from one surface, every future project feels smaller. You extend the life of your wood. Trim, furniture, floors, doors — they last longer when you maintain them instead of replacing them.
This isn’t just cleanup. It’s a core DIY skill. Master it once, and you carry it forward to every wood project you touch.
Tools and Materials You’ll Need
Gather everything before you start. Stopping mid-job to find a tool is how mistakes happen.
- Chemical paint stripper (gel-based works best on vertical surfaces)
- Plastic putty knife or scraper (metal scratches; plastic protects the stain)
- Denatured alcohol for testing and gentle lifting
- Mineral spirits for cleaning residue
- Fine-grit sandpaper (220-grit) for light touch-ups
- Clean cotton rags and a few old toothbrushes for detail work
- Chemical-resistant gloves and safety glasses
- Drop cloth or plastic sheeting to protect your floor
- A small disposable container for the stripper
- A respirator mask rated for fumes
- Heat gun (optional) — speeds up paint removal on thick layers without chemicals
One reliable setup beats five rushed trips to the hardware store. Lay it all out first.
Step-by-Step Guide
Step 1 – Test a Hidden Spot First
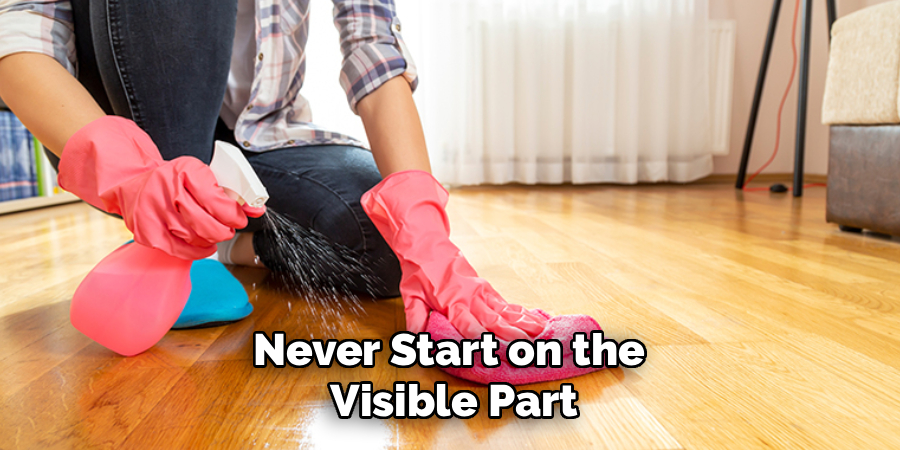
Never start on the visible part. Find a hidden corner — the back of a leg, the underside of a rail. Dab a little denatured alcohol on a rag and rub gently.
Watch the wood closely. If the paint softens but the stain holds, you’re clear to continue. If the stain smears onto your rag, stop. That stain is water-based or fragile, and chemicals will lift it too.
This single test saves you from a disaster. It tells you how the surface will react before you commit. Spend two minutes here. It protects the next two hours of work. Knowing how to remove paint from stained wood always begins with this quiet, careful check.
Step 2 – Protect Your Space and Yourself
Paint strippers are strong. The fumes hit fast, and the chemicals burn skin.
Open every window. Turn on a fan. Move air through the room. Lay your drop cloth down and tape the edges so it stays put. Slip on your gloves, glasses, and respirator before you open the can.
You’ll smell a sharp, chemical bite when the stripper opens — that’s normal, but it tells you why ventilation matters. Your eyes shouldn’t sting. If they do, you need more air.
Set your tools within arm’s reach. A clean, safe workspace lets you focus on the wood instead of scrambling. Comfort here means precision later. Take the extra five minutes.
Step 3 – Apply the Chemical Stripper
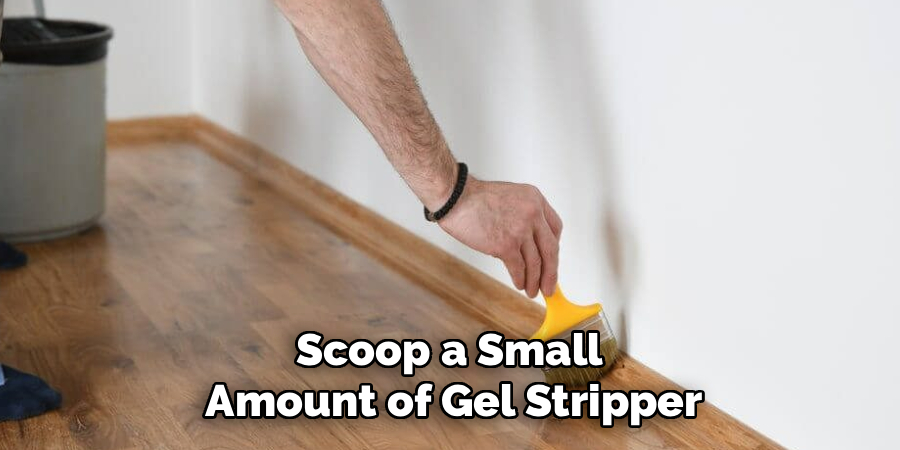
Scoop a small amount of gel stripper into your container. Using an old brush, spread a thick, even coat over the painted area. Work in one direction.
Don’t be shy with the layer. A thin coat dries too fast and barely works. A generous coat stays wet and does the real job. You’ll see the surface glisten and go glossy.
Now wait. Within minutes, the paint starts to bubble, wrinkle, and lift away from the wood. That crinkling texture is your signal. It means the chemical has broken the paint’s grip.
Follow the product’s timing. Some need ten minutes, others thirty. Don’t let it dry on the surface — that turns easy scraping into a fight.
Step 4 – Scrape the Loosened Paint
Once the paint wrinkles and curls, grab your plastic scraper. Hold it at a low angle. Push gently in the direction of the wood grain.
The paint should peel up like wet wallpaper — soft, sticky, satisfying. You’ll feel almost no resistance. If it fights back, the stripper needs more time. Reapply and wait.
Never dig or gouge. Metal tools and hard pressure scratch the stain right off. Let the chemical do the work; your scraper just guides it away.
Wipe the gunk onto old newspaper as you go. Keep your blade clean. Working through how to remove paint from stained wood means trusting the softened paint to release on its own — patience beats muscle every time.
Step 5 – Tackle the Corners and Details
Flat surfaces are easy. Grooves, carvings, and corners are where beginners get stuck.
Dip an old toothbrush in a little stripper and scrub gently into the tight spots. The bristles reach where your scraper can’t. You’ll see paint flecks lift out of the grain and crevices.
For stubborn ridges, a wooden skewer or plastic dental pick works wonders. They clear the lines without scratching.
Take your time here. Detailed areas hold paint longest, and rushing leaves white specks trapped in the grain. Those specks ruin the final look.
Work slow. Check your angle in good light. When the wood color shows clean and even in every groove, you’re ready for the next step.
Step 6 – Neutralize and Clean the Surface
Leftover stripper keeps eating at the wood long after you scrape. You have to stop it.
Soak a clean rag in mineral spirits and wipe the entire surface. This neutralizes the chemical and lifts the last bits of softened paint and residue. The wood will look damp and slightly darker — that’s the solvent doing its job.
Change rags often. A dirty rag just smears gunk back onto the surface. Keep wiping until the cloth comes away clean.
Let the wood dry fully. Touch it. It should feel cool and dry, not tacky. Run your fingers across the grain — smooth means clean. Any sticky patch means more residue hides there. Wipe again before moving on.
Step 7 – Light Sanding for Touch-Ups
Most of the paint is gone, but you might spot faint stains or rough patches. This is where a gentle hand matters most.
Fold your 220-grit sandpaper and sand only the trouble spots. Use feather-light pressure. Go with the grain, never against it.
You’re not stripping the stain — you’re polishing the surface. The goal is smooth, not bare. If you see fresh, pale wood appearing, stop immediately. You’ve gone too deep, and that spot will need re-staining.
Wipe away the dust with a dry cloth. Run your palm over the surface. It should feel like satin. A clean, even sheen tells you the wood is ready to be sealed and protected again.
Step 8 – Restore and Protect the Finish
The paint is gone. Now you guard your work.
If the stain looks slightly faded, dab a matching wood stain on a rag and blend it into the lighter areas. Work in thin layers. Let each one dry before adding more.
Once the color matches, seal it. Brush on a thin coat of polyurethane or wipe-on finish, following the grain. You’ll see the wood deepen and glow as the finish soaks in.
Let it cure fully — usually 24 hours. Don’t rush this. A proper seal locks in the color and shields the wood from the next splash, spill, or scuff.
Step back. The paint is gone, the stain is intact, and the wood looks whole again. That’s the win.
Common Mistakes to Avoid
The biggest mistake is reaching for sandpaper first. Sanding looks fast, but it cuts straight through paint and stain. You end up with bare wood and a refinishing job you never wanted. Always strip first; sand only for tiny touch-ups.
The second mistake is skipping the test patch. Different stains react differently to chemicals. Some hold firm, others dissolve on contact. Without testing, you gamble your whole project on a guess. Two minutes of testing prevents hours of regret.
The third mistake is using metal scrapers with heavy pressure. Metal gouges. Hard pressure digs. Together they leave deep scratches that no finish can hide. Use plastic, and let the chemical loosen the paint for you.
The fourth mistake is rushing the stripper. People wipe it off before it works, then wonder why the paint won’t budge. Give it the full dwell time. When the surface wrinkles, it’s ready.
The last mistake is forgetting to neutralize. Leftover stripper keeps damaging the wood underneath. A mineral spirits wipe-down stops it cold. Skip this, and your fresh finish won’t bond properly later.
Expert Tips
Here’s what the pros know that most beginners miss.
Work in small sections. A pro never coats the whole piece at once. Stripper dries out, and dried stripper is useless. Cover an area you can scrape in ten minutes, then move on.
Keep the surface wet while you work. If the stripper starts drying before you scrape, lay a sheet of plastic wrap over the gel. It traps moisture and keeps the chemical active longer.
Match your finish to the original. Before you seal, check whether the old coat was oil-based or water-based. Mixing the two causes peeling and cloudy spots.
And always strip in the shade. Direct sun dries the chemical too fast and weakens its bite. Cool, steady conditions give you the cleanest lift every time.
Frequently Asked Questions
Can I Remove Paint Without Damaging the Stain Underneath?
Yes, in most cases. The key is using a gentle gel stripper and a plastic scraper instead of sanding. Paint sits on top of the stain, so a careful chemical lift removes it while leaving the stain intact. Always test a hidden spot first, and work slowly. Rushing or using metal tools is what usually damages the stain below.
What’s the Best Paint Remover for Stained Wood?
A gel-based chemical stripper is your safest choice. It clings to vertical surfaces, stays wet longer, and lifts paint without aggressive scraping. For thin paint splatters, denatured alcohol on a rag often works alone. Avoid heavy-duty caustic strippers on delicate stains — they can bleach or darken the wood. When in doubt, start mild and only move stronger if needed.
Will Sanding Ruin My Stained Wood?
Heavy sanding will. Sandpaper removes the stain along with the paint, leaving bare patches that need refinishing. Save sanding for light touch-ups only, using fine 220-grit paper with feather-light pressure. Strip the paint chemically first. If you see pale, fresh wood appearing while sanding, stop immediately — that’s the stain coming off, and that spot will need re-staining to match.
How Long Does the Stripper Need to Sit?
It depends on the product and paint thickness, but most need ten to thirty minutes. Watch for the paint to bubble, wrinkle, and curl — that’s your signal it’s ready to scrape. Don’t let the stripper dry on the surface, or scraping becomes much harder. If the paint still grips after the recommended time, apply a fresh coat and wait a little longer.
Do I Really Need to Neutralize After Stripping?
Yes. Leftover stripper keeps reacting with the wood, which can damage the stain and stop new finishes from bonding. Wipe the surface with mineral spirits using a clean rag until it comes away clean. Then let the wood dry fully. This simple step protects your work and ensures any stain or sealer you apply afterward adheres properly and lasts.
Conclusion
Paint on stained wood looks like a disaster. It isn’t.
You now know the truth. The paint sits on top. The stain stays safe underneath. Your job is simply to lift one without harming the other.
Test first. Protect your space. Apply the stripper thick. Scrape gently. Clean the residue. Touch up with care, then seal your work. Follow that order, and the wood comes back whole.
Knowing how to remove paint from stained wood turns a stressful accident into a simple afternoon project. You save money. You skip the cost of replacement. You build a skill you’ll use again and again.
The tools are cheap. The steps are clear. The only thing left is your patience.
So pick one painted spot this weekend. Test a hidden corner. Apply a small coat of stripper. Watch the paint wrinkle and lift. Once you see it work, you’ll trust the process for every project that follows.
Your wood is worth saving. Will you give it the chance?
