
A loose metal bracket on a wooden shelf ruins the whole project. A drawer pull that wobbles makes solid furniture feel cheap. Joining two materials that expand, flex, and react differently takes the right method—not luck. That’s where knowing how to adhere metal to wood changes your results. Metal and wood bond beautifully when you prep both surfaces, pick the correct adhesive or fastener, and give the joint time to cure.
Get it wrong, and you’ll fight squeaks, gaps, and failures for years. This guide walks you through every step, from surface prep to final cure, so your metal-to-wood connections hold tight and look clean. By the end, you’ll know exactly which technique fits your project and how to execute it with confidence.
Why This Skill Matters
Strong metal-to-wood joints save you money. You stop replacing failed furniture, re-gluing trim, and re-mounting hardware that pulled loose. One solid bond outlasts a dozen quick fixes.
This skill also builds confidence fast. Once you nail your first clean joint—say, a steel handle on an oak drawer—you trust yourself to tackle bigger builds. Floating shelves, metal table legs, signage, and repairs all rely on the same core principles.
You also dodge expensive mistakes. The wrong glue peels off in weeks. The wrong screw splits a board down the grain. Learning the correct approach protects both your materials and your time. Every project you finish lasts longer and looks more professional than a rushed attempt ever could.
Tools and Materials You’ll Need
Gather everything before you start. Stopping mid-project to find a clamp invites mistakes.
- Two-part epoxy — bonds metal to wood with the strongest grip for most projects.
- Polyurethane construction adhesive — flexes with wood movement on larger surfaces.
- Cyanoacrylate (super glue) with activator — sets fast for small, low-stress parts.
- 120- and 220-grit sandpaper — roughens surfaces so adhesive bites.
- Isopropyl alcohol (90%+) — strips oil and grease from metal.
- Clean lint-free cloths — wipe surfaces without leaving fibers.
- Clamps or heavy weights — hold the joint steady during cure.
- Stainless or coated screws — add mechanical strength for load-bearing joints.
- Drill with countersink bit — prevents splits and seats fasteners flush.
- Painter’s tape — masks edges and controls squeeze-out.
- Disposable gloves and a putty knife — keep hands clean and spread epoxy evenly.
- Optional: a digital scale — measures epoxy ratios precisely for a flawless mix.
Step-by-Step Guide on How to Adhere Metal to Wood
Step 1 – Choose the Right Bonding Method
Match the method to the load. Small decorative parts need fast super glue. Heavy brackets and table legs need epoxy plus screws.
Knowing how to adhere metal to wood starts with this decision. Ask two questions: How much weight will the joint carry? Will the wood expand and contract with humidity?
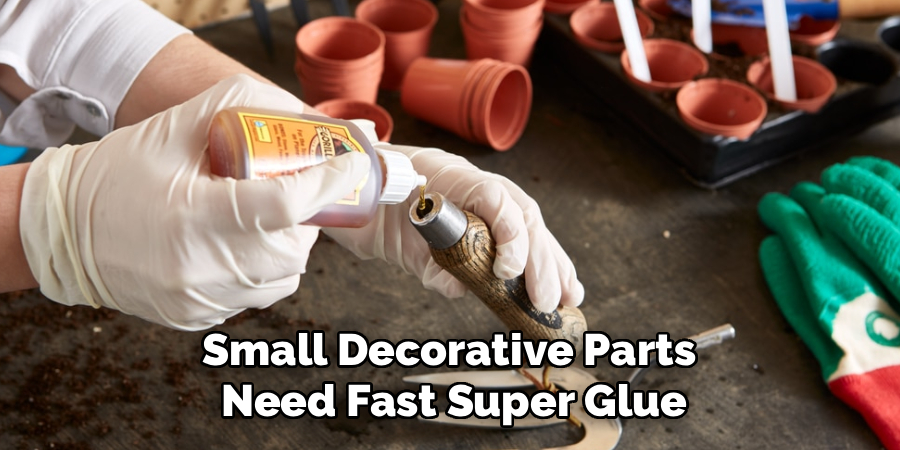
For light, fixed parts, cyanoacrylate works in seconds. For structural connections, two-part epoxy delivers the strongest chemical grip. On large panels where wood moves seasonally, polyurethane adhesive flexes without cracking.
Pick the wrong method and you’ll feel it later—a brittle bond that snaps or a soft one that creeps. Choosing correctly now saves you a frustrating redo. Write down your method before you touch a single tool.
Step 2 – Measure and Mark Your Placement
Dry-fit first. Set the metal piece on the wood exactly where it belongs, with no adhesive yet. This catches alignment problems while they’re still fixable.
Trace the outline with a sharp pencil. The faint graphite line gives you a target during the messy gluing stage. Mark screw holes too, if your joint uses fasteners.
Check your layout twice. A bracket that sits a quarter-inch off looks crooked the moment you step back. Use a square or ruler to confirm right angles and even spacing.
You’ll know the placement is right when the metal sits flat with no rocking. If it wobbles on the wood, the surface isn’t level—sand the high spots before you continue.
Step 3 – Sand Both Surfaces
Smooth surfaces resist adhesive. Rough ones grab it. Sanding creates the microscopic texture that gives your bond something to hold.
Start the wood with 120-grit, then refine with 220-grit. Sand with the grain until the surface feels evenly dull, not glossy. You’re after a clean, matte finish that accepts glue.
Scuff the metal too. Run sandpaper or a wire brush over the contact area until the shine disappears and a hazy grey appears. That dull look means you’ve broken the slick factory surface.
You’ll hear the grit bite as you work—a steady, gritty rasp. When both surfaces feel slightly toothy under your fingertip, you’re ready. Skip this step and even premium epoxy will peel off like a sticker.
Step 4 – Clean Away Dust and Oil
Adhesive fails on dirty surfaces. Sanding dust, skin oil, and factory grease all block the bond.
Wipe the wood with a dry cloth to clear loose dust. Then dampen a lint-free rag with isopropyl alcohol and wipe the metal thoroughly. The alcohol cuts through grease and flashes off in seconds, leaving no residue.
Don’t touch the cleaned surfaces with bare fingers. The oils from your skin are enough to weaken the joint. Handle the metal by its edges from here on.
You’ll know it’s clean when the cloth comes away without grey streaks. A truly prepped metal surface looks uniformly dull and feels dry, never slick. This minute of cleaning often decides whether your bond lasts years or weeks.
Step 5 – Mix and Apply Your Adhesive
Master this step and you’ve mastered how to adhere metal to wood. Precision here separates a clean joint from a sloppy one.
For two-part epoxy, squeeze equal amounts of resin and hardener onto a scrap surface. Mix for a full 60 seconds until the swirls vanish and the color turns uniform. Work fast—most epoxies start setting within five minutes.
Spread a thin, even layer on both surfaces with a putty knife. Thin beats thick; a heavy glob squeezes out and weakens the joint. You want full coverage with no dry gaps.
Watch for a slight glossy sheen across the whole contact area. That even shine tells you the adhesive is spread right and ready to bond.
Step 6 – Press and Clamp the Joint
Pressure makes the bond. Press the metal onto the marked outline and align it before the adhesive grabs.
Apply firm, even clamping pressure. Clamps work best, but heavy weights do the job on flat surfaces. You’re looking for a thin bead of squeeze-out around the edges—proof the surfaces are fully mated.
Wipe that excess away immediately with an alcohol-dampened cloth. Cured epoxy is stubborn to remove, so clean it while it’s soft.
Don’t crank the clamps so hard that you starve the joint of adhesive. Snug and steady wins. You’ll feel the right pressure when the metal seats flush and stops shifting under your hand. Now leave it completely alone.
Step 7 – Add Mechanical Fasteners for Load-Bearing Joints
Glue alone won’t hold a table leg or heavy bracket. Screws give you mechanical strength that backs up the adhesive.
Drill pilot holes slightly narrower than your screws. This prevents the wood from splitting along the grain—a crack you can’t undo. Countersink the holes so screw heads sit flush.
Drive stainless or coated screws while the adhesive is still wet. The two systems work together: glue spreads the load, screws lock it in place. Tighten until snug, not stripped.
You’ll know it’s right when the screw seats firmly and the metal pulls tight against the wood with no gap. A spinning screw means the hole is too wide—move over and try a fresh spot. This combination creates joints that survive real-world stress.
Step 8 – Let the Bond Cure Fully
Curing takes patience. The joint feels solid in minutes but won’t reach full strength for hours—sometimes a full day.
Check your adhesive’s label. Five-minute epoxy handles light loads after an hour but needs 24 hours for maximum strength. Don’t stress the joint early.
Keep the piece in a dry spot at room temperature. Cold slows curing and weakens the result. Resist the urge to test the bond by wiggling it.
You’ll know the cure is complete when the squeeze-out turns hard and clicks under your fingernail. A tacky or rubbery residue means it needs more time. Rush this stage and you’ll undo all your careful prep. Let chemistry finish its work before you put the joint to use.
Common Mistakes to Avoid
Skipping surface prep ranks as the number one failure. People assume strong glue fixes everything, then slap epoxy onto shiny, oily metal. The bond peels within weeks. Always sand both surfaces dull and wipe the metal with alcohol before you apply anything.
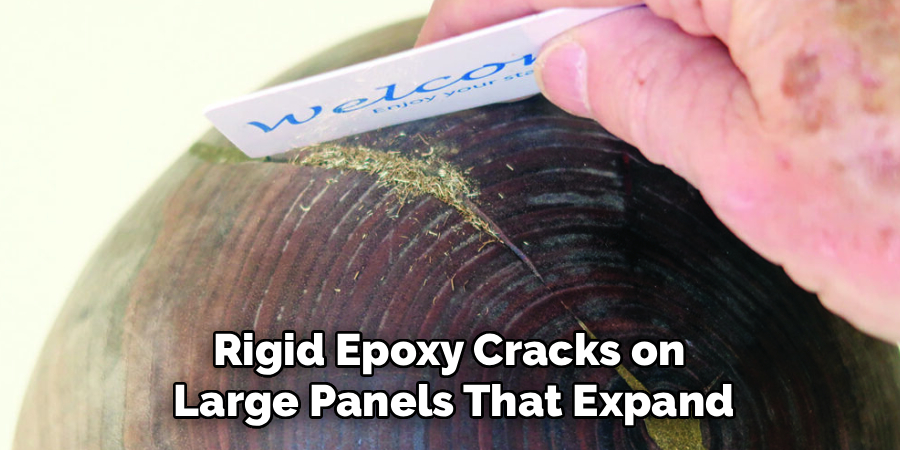
Using the wrong adhesive comes second. Super glue can’t carry a heavy bracket, and rigid epoxy cracks on large panels that expand with humidity. Match the product to the load and the movement. When in doubt on structural joints, combine epoxy with screws.
Applying too much adhesive backfires. A thick glob looks reassuring but actually weakens the joint—the bond is strongest when the layer is thin and the surfaces sit close. Spread a light, even coat instead.
Rushing the cure ruins solid work. Moving or stressing the joint before it fully hardens breaks the bond from the inside, and the damage stays hidden until it fails under load. Wait the full cure time listed on the label.
Finally, ignoring wood movement causes long-term cracks. Wood swells and shrinks with seasons; metal doesn’t. On big surfaces, choose a flexible polyurethane adhesive that moves with the wood instead of fighting it.
Expert Tips
Warm your epoxy before mixing. Set the bottles in a bowl of warm water for a few minutes. Warm resin flows easier, spreads thinner, and bonds tighter—a trick most beginners never learn.
Roughen metal in a crosshatch pattern, not a single direction. The criss-cross scratches give adhesive more angles to grip, which measurably strengthens the joint.
For invisible repairs, tint your epoxy with a touch of matching wood dust from sanding. The filled joint blends into the grain instead of leaving a glossy line.
On outdoor projects, always combine adhesive with corrosion-resistant screws. Moisture eventually attacks glue-only bonds, while stainless fasteners hold through every season.
Test your method on scrap first. Five minutes of testing reveals whether your prep and product actually hold, before you commit to the real piece.
Frequently Asked Questions
What Is the Strongest Adhesive for Bonding Metal to Wood?
Two-part epoxy delivers the strongest bond for most metal-to-wood projects. It grips both materials chemically and resists heat, moisture, and stress. For load-bearing joints, pair epoxy with stainless screws for maximum strength. Polyurethane adhesive works better on large panels where wood expands and contracts, since it flexes instead of cracking under seasonal movement.
Can I Glue Metal to Wood Without Screws?
Yes, for light and decorative parts. Two-part epoxy or cyanoacrylate holds small metal pieces firmly when you prep both surfaces correctly. But for anything load-bearing—table legs, heavy brackets, or shelves—add screws. Glue alone can’t handle continuous weight or daily stress. The combination of adhesive and mechanical fasteners gives you a joint that survives real-world use for years.
How Long Does Epoxy Take to Cure on Metal and Wood?
Most two-part epoxies handle light loads after one hour but need 24 hours to reach full strength. Five-minute epoxy sets fast but still cures over time. Keep the joint dry and at room temperature, since cold slows the process. Don’t stress or move the piece until the squeeze-out turns hard and clicks under your fingernail. Patience here protects your work.
Why Did My Metal-to-Wood Bond Fail?
The most common cause is poor surface prep. Glue won’t grip shiny, oily metal or glossy wood. Sand both surfaces dull and wipe the metal with isopropyl alcohol first. Other causes include the wrong adhesive for the load, applying too thick a layer, or rushing the cure. Fix the prep, match the product to the job, and let it fully harden.
Do I Need to Sand Both Surfaces Before Gluing?
Yes, always. Smooth surfaces resist adhesive, while roughened ones grab it. Sand the wood with 120- then 220-grit until it feels matte, and scuff the metal until the shine disappears into a hazy grey. This texture gives the adhesive microscopic grooves to bite into. Skipping this step is the fastest way to a bond that peels off within weeks.
Conclusion
Strong metal-to-wood joints come down to a clear process: choose the right method, prep both surfaces, apply a thin even coat, and let it cure fully. Skip a step and the bond fails. Follow them all and your joints hold for years.
You now know how to adhere metal to wood the right way—matching adhesive to load, sanding for grip, cleaning away oil, and backing structural joints with screws. These same principles work whether you’re mounting a drawer pull or building a steel-legged table.
Start with a small project. Glue a bracket, mount a handle, or repair a loose fitting. Each clean joint builds the confidence to tackle bigger builds. The skills transfer directly, and the results speak for themselves.
Gather your tools, test on scrap, and trust the process. Your next metal-to-wood connection will sit tight, look clean, and outlast every quick fix you’ve tried before. Now go put it to work.
