

Bugs, mold, and fungal spores can ruin a good piece of wood before you ever touch it. Heat solves the problem. Learning how to sterilize wood in the oven kills hidden pests and spores fast, without harsh chemicals or expensive equipment. You already own everything you need.
This method works for reclaimed lumber, craft wood, small slabs, and pieces you plan to use indoors. The heat penetrates the grain, dries out moisture that mold loves, and destroys insect eggs lurking beneath the surface. You get clean, safe wood ready for building, carving, or finishing.

This guide walks you through every step, from prepping your wood to cooling it down safely, so you sterilize effectively without scorching your project or your kitchen.
Why Sterilizing Wood in the Oven Matters
Reclaimed and outdoor wood carries passengers. Powderpost beetles, mold colonies, and fungal spores travel inside the grain, and they spread once the wood enters your home. Oven sterilization stops the infestation before it starts.
This skill saves you money. Instead of tossing questionable boards or paying for chemical treatments, you reclaim free or cheap lumber and make it safe. One ruined hardwood slab can cost more than a month of oven runs.
It also protects your finished work. Mold under a fresh coat of varnish destroys the surface and the smell never leaves. Insects bore through tabletops and shelving long after you build them.
Master this technique and you build with confidence. You extend the life of every project and avoid the costly mistakes that frustrate most beginners.
Tools and Materials You’ll Need
Gather these before you start. Each item earns its place.
- Conventional oven — your heat source, set between 200°F and 250°F.
- Oven thermometer — confirms the real internal temperature, since dials lie.
- Baking sheet or oven-safe tray — holds the wood off direct heating elements.
- Heat-resistant gloves — protect your hands when removing hot pieces.
- Moisture meter — reads the wood’s water content before and after.
- Aluminum foil — lines the tray and catches sap or residue.
- Timer — tracks heating time so you never overcook the grain.
- Clean workspace — for cooling and inspecting finished pieces.
- Optional: infrared thermometer — checks the wood’s surface temperature instantly without opening the oven door.
Keep flammable items far from the oven. Good airflow in your kitchen makes the whole process safer and faster.
Step-by-Step Guide on How to Sterilize Wood in the Oven
Step 1 – Inspect and Select Your Wood
Start by examining each piece in good light. Look for small round exit holes, fine sawdust trails, or soft spongy patches. These signal active insects or rot. Run your hand across the surface and feel for grit or powder that crumbles under pressure.
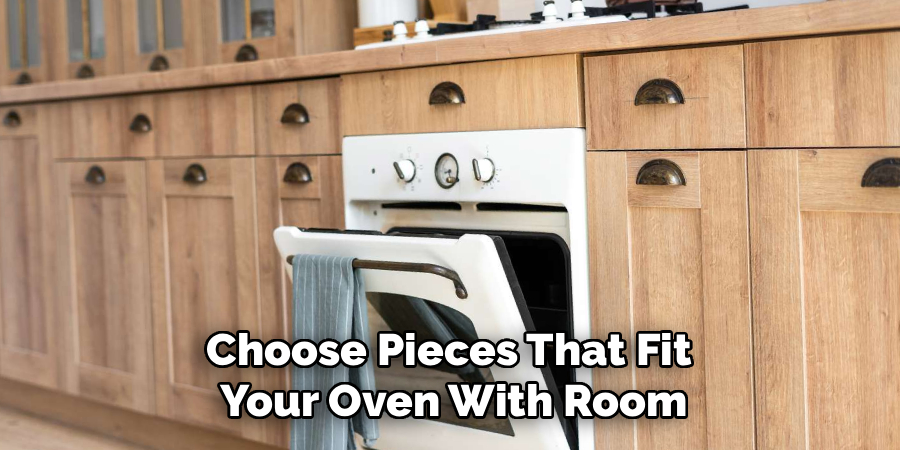
Choose pieces that fit your oven with room to spare. Avoid wood thicker than two inches, since heat struggles to reach the core without scorching the outside.
Skip any board soaked in oil, paint, or chemical preservatives. These release fumes when heated. Set aside green or freshly cut wood too, because high moisture causes warping and cracking under sustained heat. Clean, dry candidates give you the best results.
Step 2 – Clean the Surface Thoroughly
Knock off loose dirt, bark, and debris before the wood goes anywhere near heat. Use a stiff brush and sweep along the grain. You want a clean surface so the heat works on the wood, not on caked mud.
Wipe away sap with a dry cloth. Sticky residue smokes and smells when it bakes onto your tray. For stubborn grime, a lightly damp cloth works, but dry the wood completely afterward.
Listen for a clean, hollow tap when you knock the piece. A dull thud often means trapped moisture or internal rot. Brush out cracks and crevices where eggs and spores hide. A clean piece sterilizes evenly and far more reliably.
Step 3 – Measure the Moisture Content
Press your moisture meter against the wood and read the percentage. You want a reading below 20 percent before heating. Wetter wood swells, splits, and warps as the water inside turns to steam too fast.
Check several spots, including the ends and the center face. Moisture hides unevenly, and one damp pocket ruins an otherwise dry board. The ends usually read higher because they absorb water first.
If your reading climbs above 20 percent, air-dry the wood for a few days first. Stack it with gaps between pieces so air flows freely. Knowing how to sterilize wood in the oven starts with dry wood, because dry grain heats cleanly and holds its shape through the whole process.
Step 4 – Preheat the Oven Correctly
Set your oven between 200°F and 250°F. This range kills insects, eggs, and spores without charring the surface or releasing harmful fumes. Higher temperatures risk fire and ruin the wood.
Place your oven thermometer on the center rack and let it sit. Built-in dials run hot or cold by 25 degrees or more, and that gap matters. Wait until the thermometer reads steady within your target range.
You’ll hear the elements cycle on and off as the oven holds temperature. Watch for an even glow, not a fierce blast of heat. A stable, moderate oven gives the heat time to soak through the grain. Rushing this stage scorches the outside before the core ever warms.
Step 5 – Position the Wood Properly
Line your tray with aluminum foil to catch sap and residue. Lay the wood flat with space between each piece so hot air circulates on all sides. Crowded boards heat unevenly and trap moisture.
Place the tray on the center rack, away from the top and bottom elements. Direct contact with the elements scorches the wood and creates a fire risk. Center positioning bathes the piece in steady heat.
For longer boards, angle them so air reaches both ends. The ends carry the most moisture and need the most exposure. You should see clear gaps and feel confident the heat surrounds each piece. Good spacing now prevents hot spots and uneven sterilization later.
Step 6 – Heat for the Right Amount of Time
Set your timer based on thickness. Thin pieces under one inch need about one hour. Thicker slabs up to two inches need 90 minutes to two hours. The core must reach 130°F to 140°F to kill pests.
Stay nearby the entire time. Never leave heating wood unattended. Open the door briefly every 30 minutes to check progress and release built-up moisture. You’ll see faint steam rise from damp pieces early on.
The wood should darken slightly and give off a warm, toasty smell. Sharp smoke or a burning odor means the heat is too high or the time too long. This stage is the heart of how to sterilize wood in the oven, so watch it closely.
Step 7 – Watch for Visual and Sensory Cues
Trust your senses through the whole process. Properly sterilized wood turns a shade darker and smells faintly sweet, like fresh toast. The surface feels warm and dry to the touch, never sticky or damp.
Bad signs are easy to spot. Cracking sounds mean the wood is drying too fast and splitting. Visible smoke or a black, scorched surface means you pushed the temperature too high. Pull the piece immediately if you see this.
Steam early in the cycle is normal and fades as moisture leaves the grain. By the end, the wood should look uniform with no wet patches. A clean, even color across the whole surface tells you the heat reached every part.
Step 8 – Cool and Store the Wood Safely
Turn off the oven and let the wood rest inside for 15 to 20 minutes. This gradual cooldown prevents sudden temperature shocks that cause cracks. Rushing cold air onto hot wood splits the grain.
Put on your heat-resistant gloves and move the pieces to a clean, dry surface. The wood stays hot for a while, so handle it with care. Let it reach room temperature before you build or finish with it.
Store sterilized wood in a dry, sealed space away from damp basements or garages. Recontamination happens fast if you stack clean wood next to infested boards. Use the moisture meter one last time to confirm the readings stayed low.
Common Mistakes to Avoid
The biggest mistake is cranking the heat too high. Beginners assume hotter means faster, but anything above 250°F scorches the surface and creates a serious fire hazard. Wood ignites, and your kitchen pays the price. Stick to the safe range and let time do the work.
Walking away is another costly error. Heating wood demands your full attention from start to finish. A few unattended minutes is all it takes for a hidden sap pocket to flare or smoke to fill the room. Stay in the kitchen the entire time.
Many people skip the moisture check entirely. They load wet or green wood into the oven and watch it warp, crack, and split. Always confirm your wood reads below 20 percent first.
Crowding the tray ruins results too. Stacked boards block airflow, trap moisture, and leave cold spots where pests survive. Give each piece room to breathe.
Finally, never sterilize treated, painted, or oily wood. These materials release toxic fumes when heated, and no amount of ventilation makes that safe. Inspect every piece before it goes in.
Expert Tips
Use the carryover heat to your advantage. Wood keeps cooking after you switch off the oven, so the resting period inside adds real sterilization time without extra energy. Factor it into your timing.
Sterilize in small batches of similar thickness. Mixing thin and thick pieces means the thin ones scorch while the thick ones stay undercooked. Matching sizes gives you even results every time.
Mark suspect pieces with a pencil dot near visible exit holes. After heating, fresh sawdust beneath the mark warns you that activity continued and the core never got hot enough.
For valuable slabs, run a separate oven thermometer probe into a drilled test hole. Reading the true core temperature beats guessing. When it hits 130°F and holds for 30 minutes, the pests are gone.
Frequently Asked Questions
What Temperature Kills Bugs and Mold in Wood?
A core temperature of 130°F to 140°F kills insects, eggs, larvae, and most fungal spores. Set your oven between 200°F and 250°F so the surface stays safe while the heat penetrates to the center. Hold that core temperature for at least 30 minutes. Use a thermometer to confirm the real reading, since oven dials are often inaccurate by 25 degrees or more.
How Long Should Wood Stay in the Oven?
Heating time depends on thickness. Pieces under one inch need about one hour. Boards up to two inches thick need 90 minutes to two hours. The goal is reaching 130°F at the core, not hitting a fixed clock time. Check every 30 minutes, watch for steam and color changes, and pull the wood once it shows even darkening and a dry, toasty surface.
Can You Sterilize Treated or Painted Wood in the Oven?
No. Never heat treated, painted, stained, or oily wood. These materials release toxic fumes when heated, and the chemicals can ignite. The fumes are dangerous to breathe even with ventilation. Stick to clean, raw, untreated wood only. If you’re unsure whether a board was treated, leave it out. The risk to your health and your home is never worth it.
Will the Oven Damage or Warp My Wood?
It can, if you skip the prep. Wood warps when it holds too much moisture or heats too fast. Dry your wood below 20 percent first, keep the temperature in the safe range, and cool the pieces slowly inside the oven. Follow these steps and your wood stays flat and stable. Rushing any stage causes the cracks and splits beginners complain about.
Is Oven Sterilizing Better Than Chemical Treatment?
For small indoor pieces, yes. Oven heat kills pests and spores without leaving chemical residue, fumes, or odors in your finished project. It costs almost nothing and works fast. Chemicals make sense for large structural lumber or wood you can’t fit in an oven. For craft pieces, reclaimed boards, and slabs, heat gives you clean, safe results with no lingering toxins.
Conclusion
Clean wood builds better projects. Now you know how to sterilize wood in the oven the right way, from inspecting and drying your pieces to heating them at a safe temperature and cooling them without cracks. The process is simple, cheap, and chemical-free.
Remember the essentials. Keep your oven between 200°F and 250°F. Confirm the core hits 130°F. Dry your wood below 20 percent first, give each piece room to breathe, and never walk away while the heat is on. Skip treated or painted boards entirely.
Master this skill and you stop wasting money on ruined lumber. You reclaim free wood, protect your finished work from bugs and mold, and build with total confidence. Every safe board adds years to your projects.
Grab a questionable piece, fire up your oven, and put this method to work. Your next build deserves wood you can trust.
