


You want fabric that stays put on wood. No bubbles, no peeling corners, no sticky mess. Learning how to glue fabric to wood gives you that clean, professional bond on your first try.
This skill shows up everywhere in DIY work. Lining drawers, covering jewelry boxes, upholstering bench seats, building padded headboards, or wrapping speaker panels. The right adhesive and prep turn a tricky job into a satisfying one.
Most failures come from two things: the wrong glue and rushed surface prep. Fix those, and your fabric holds for years.
This guide walks you through the exact tools, materials, and steps to bond fabric to wood the right way—plus the mistakes that ruin good projects and the pro tricks that prevent them.
Why Gluing Fabric to Wood Matters
A solid fabric-to-wood bond saves you money and rescues furniture you’d otherwise toss. Reupholster a tired chair seat instead of buying new. Line a plain box and sell it for triple. Cover a scratched tabletop and skip the refinishing job entirely.
This skill builds real confidence. Once you nail the bond on a small project, you trust yourself with bigger ones—headboards, cornice boards, custom storage.
It also prevents costly do-overs. Fabric that bubbles or lifts means peeling everything off, sanding away dried glue, and starting again. That wastes material and hours.
Master the basics once. Then every soft-surface project—from drawer liners to padded benches—becomes faster, cleaner, and cheaper than hiring it out.
Tools and Materials You’ll Need
Gather everything before you start. A stalled project mid-glue means dry spots and weak bonds.
- Fabric adhesive – choose spray adhesive for thin fabrics or contact cement for heavy upholstery
- Clean fabric – pre-cut with 1–2 inches of overhang on each side
- Wood surface – sanded smooth and wiped clean
- 120-grit sandpaper – knocks down rough grain for better grip
- Tack cloth or microfiber rag – removes dust before bonding
- Foam brush or putty knife – spreads liquid glue evenly
- Brayer or smooth roller – presses out air and locks the bond
- Sharp scissors or rotary cutter – trims clean edges
- Painter’s tape – masks areas you want to keep glue-free
- Clamps or heavy books – apply even pressure while curing
- Optional: heat gun – speeds drying and reactivates contact cement for stubborn corners
Step-by-Step Guide on How to Glue Fabric to Wood
Step 1 – Prep the Wood Surface
Start with bare, smooth wood. Run 120-grit sandpaper over the surface in long, even strokes until it feels uniform under your fingertips. You’ll hear the grit smooth out from a gritty rasp to a soft hiss—that’s your cue the surface is ready.
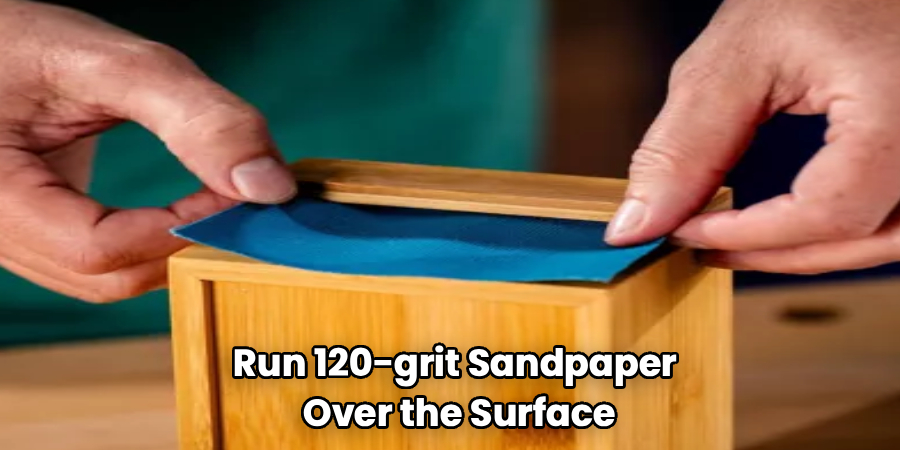
Sanding does two things. It removes old finish or sealant that blocks adhesion, and it opens the grain so glue grips tighter.
Wipe the surface with a tack cloth to pull off every speck of dust. Drag your palm across it. Clean wood feels dry and matte, never slick or powdery.
Skip this step and your fabric lifts within weeks. A properly prepped surface is the foundation for learning how to glue fabric to wood that actually lasts.
Step 2 – Measure and Cut Your Fabric
Lay your fabric flat, pattern-side down, on a clean table. Smooth out every wrinkle with your hand—creases now become permanent ridges later.
Set the wood piece on top and trace around it with chalk or a fabric pen. Add 1 to 2 inches of overhang on each side. That extra material wraps edges and hides imperfections.
Cut along your lines with sharp scissors or a rotary cutter. You want a clean, single-pass slice. Dull blades fray the edges and leave fuzz that catches in the glue.
Hold the cut piece up to the light. The edges should look crisp, not ragged. Set it aside, pattern-side down, ready for adhesive.
Step 3 – Choose and Test Your Adhesive
Match the glue to the fabric. Spray adhesive works best for thin cotton and lightweight liners. Contact cement holds heavy upholstery, vinyl, and canvas. Upholstery glue sits in the middle for medium-weight jobs.
Before committing, test on a scrap. Dab a small amount on a fabric offcut and press it to a wood scrap. Wait the full cure time, then tug hard.
A good bond resists peeling and leaves no bleed-through stains on the fabric face. If glue soaks through and darkens the surface, switch to a thicker adhesive or apply a lighter coat.
This quick test saves your main project from a ruined, blotchy finish.
Step 4 – Apply Adhesive to the Wood
Work in a well-ventilated space. Most fabric adhesives release strong fumes, so open a window or run a fan.
For spray adhesive, hold the can 6 to 8 inches from the wood and sweep in steady, overlapping passes. You want a thin, even mist—not puddles. Listen for that consistent hiss; uneven bursts leave bare patches.
For contact cement, spread a thin layer with a foam brush across the entire surface. Coat right to the edges. Missed spots become lifted corners.
The glue should look uniformly tacky, with a slight sheen. Wait until it turns from wet to tacky-dry before bonding. Touch it lightly—it should feel sticky but not transfer to your finger.
Step 5 – Position the Fabric
This step is your one shot. Once fabric touches glued wood, it grabs fast and won’t slide.
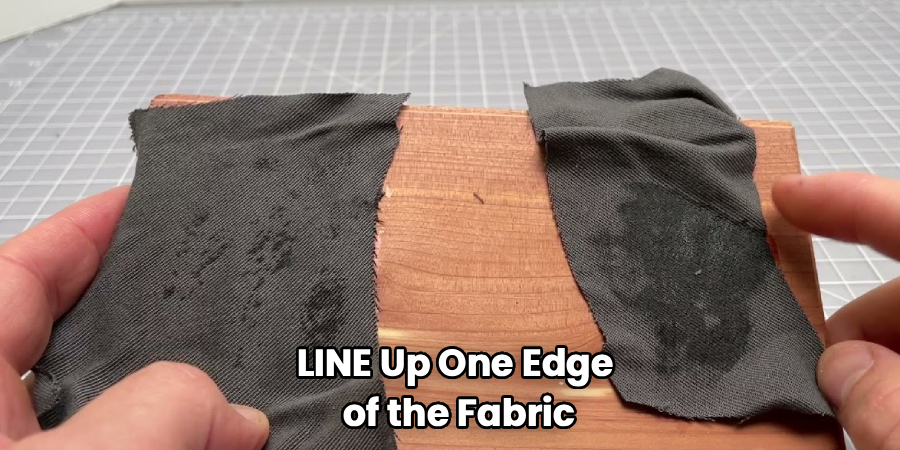
Line up one edge of the fabric with one edge of the wood. Let the rest hang free. Lower that aligned edge first, pressing it down gently.
Then roll the fabric slowly across the surface, smoothing as you go. Work from the anchored edge toward the opposite side. This pushes air out ahead of the fabric instead of trapping it underneath.
Keep tension light and even. Pull too hard and the fabric stretches, distorting your pattern. Watch the surface—it should lie flat and smooth, with no ripples forming behind your hand.
Step 6 – Press Out Air and Bubbles
Now lock the bond. Take your brayer or smooth roller and press firmly from the center outward in every direction. You’re chasing trapped air toward the edges.
You’ll feel small bubbles flatten under the roller and hear a faint crackle as they release. Keep rolling until the surface feels solid and uniform, with no soft spots underneath.
For stubborn bubbles, prick them with a pin and roll again. The tiny hole disappears into the weave.
Run your palm across the finished surface. Smooth and firm means success. Any squishy or raised area means trapped air—keep working it before the glue fully sets. This pressing stage is what separates a flat, professional result from a lumpy one.
Step 7 – Trim the Excess Fabric
Once the bond holds firm, deal with the overhang. For flat surfaces, flip the piece over and run a sharp blade along the wood edge, pulling the fabric taut as you cut.
For wrapped edges, fold the overhang around the back. Pull it snug, apply a thin line of glue, and press it flat. Trim corners at an angle to avoid bulky overlaps that bunch up.
Cut slowly and follow the wood’s line. A clean trim makes the whole project look store-bought.
This finishing detail matters as much as the glue itself. Knowing how to glue fabric to wood includes mastering the edges, where sloppy cuts and loose corners give away an amateur job.
Step 8 – Cure and Inspect
Patience pays off here. Let the piece cure for the time listed on your adhesive—usually 24 hours for a full bond.
Place clamps or stack heavy books across the surface to hold steady, even pressure. Protect the fabric with wax paper so nothing sticks to the face.
Keep the project in a dry, room-temperature spot. Humidity slows curing and weakens the grip.
After curing, inspect closely. Tug gently at the corners and edges—the most likely spots to fail. They should hold tight with zero lift.
Run your hand over the whole surface one last time. A finished, fully cured bond feels firm, flat, and permanent. Now your piece is ready to use.
Common Mistakes to Avoid
The biggest mistake is skipping surface prep. People glue straight onto sealed or dusty wood, then wonder why the fabric peels in a month. Sand and clean every time—no exceptions. Glue needs an open, debris-free surface to grip.
Using too much adhesive ranks second. A thick, gloppy layer bleeds through thin fabric and leaves dark stains on the face. It also stays tacky longer and traps moisture. Thin, even coats always beat heavy ones.
Rushing the tacky stage trips up beginners with contact cement. Bond too soon while the glue is still wet and you get a weak, slippery hold. Wait until it turns tacky-dry and grabs on contact.
Misaligning the fabric causes the worst headaches. Contact cement bonds instantly, so a crooked first placement is nearly impossible to fix without damage. Line up one edge carefully and roll the rest down slowly.
Finally, many people skip the curing time. They use the piece within hours, stressing a bond that hasn’t fully set. Give it the full 24 hours under pressure for results that last for years.
Expert Tips
Warm your glue and your room before you start. Adhesives flow better and bond stronger at 65–75°F. In a cold shop, the bond turns brittle and weak.
For curved or carved surfaces, keep a heat gun handy. A quick pass reactivates contact cement, letting you press fabric tight into corners and contours without it lifting.
Always glue the wood, not the fabric, when working with porous material. Spraying the fabric soaks the fibers and bleeds through. Coating the wood keeps the face clean.
Press from the center out—never the edges in. Working outward pushes air toward the exits instead of trapping it in the middle, where bubbles are hardest to remove.
And when in doubt, test on scrap first. Two minutes of testing saves an entire ruined project.
Frequently Asked Questions
What Is the Best Glue for Fabric on Wood?
Contact cement gives the strongest bond for heavy fabrics like upholstery, vinyl, and canvas. For thin cotton or drawer liners, spray adhesive works better and won’t bleed through. Match the glue to the fabric weight. Always test on a scrap first to confirm the bond holds and the adhesive doesn’t stain the fabric face.
Can I Use Regular White Glue or Wood Glue?
You can, but only for thin, lightweight fabrics on flat surfaces. White glue and standard wood glue soak into porous fabric and dry stiff, often bleeding through to the face. They also take longer to cure. For lasting results on upholstery or heavy material, use a dedicated fabric adhesive or contact cement instead.
How Long Does the Bond Take to Cure?
Most fabric adhesives reach a full cure in about 24 hours. The surface feels bonded within minutes, but the glue keeps hardening underneath. Apply even pressure with clamps or books during this time, and keep the piece in a dry, room-temperature spot. Rushing the cure stresses the bond before it sets and causes peeling.
Do I Need to Sand the Wood First?
Yes. Sanding removes old finish and dust while opening the grain so the adhesive grips tighter. Use 120-grit sandpaper, then wipe with a tack cloth to clear every speck. Gluing onto smooth, sealed, or dusty wood leads to fabric that lifts within weeks. Clean, lightly sanded wood is the foundation of a permanent bond.
How Do I Remove Fabric Glued to Wood?
Apply heat with a hair dryer or heat gun to soften the adhesive, then peel the fabric back slowly. For stubborn spots, use an adhesive remover or rubbing alcohol on a cloth. Once the fabric is off, sand away leftover glue residue before reusing the surface. Work patiently to avoid gouging the wood.
Conclusion
A clean fabric-to-wood bond comes down to three things: smart prep, the right adhesive, and patience. Sand and clean your wood. Match the glue to your fabric weight. Press out the air, then let it cure fully.
Get those right and your fabric stays flat, tight, and beautiful for years—no bubbles, no peeling corners, no wasted material.
You now have the full process. From prepping the surface to trimming clean edges, knowing how to glue fabric to wood opens up dozens of projects: lined drawers, padded benches, custom headboards, covered boxes, and more.
Start small. Try a drawer liner or a simple jewelry box first. Each project builds your skill and your confidence for bigger ones.
The pros aren’t using secret tools—they’re just doing the basics well, every time. Follow these steps, test on scrap when unsure, and you’ll get professional results from your very first project. Now grab your fabric and get building.
