

A wood wick candle should crackle softly and burn with a steady, even flame. When it sputters, smokes, or refuses to stay lit, the wick is almost always the problem. Learning how to trim wood wicks fixes that fast. A clean, properly trimmed wick gives you a strong flame, less soot, and a candle that lasts far longer than one you ignore.

You don’t need special skills or expensive gear. You need a few minutes, the right cut, and a little know-how. This guide walks you through the exact process step by step, so your wooden wick candles burn cleaner, brighter, and longer every single time.
Why Trimming Wood Wicks Matters
A neglected wick costs you money. Untrimmed wood wicks burn through wax faster, produce black soot, and often drown in their own melt pool. Trim the wick and you reverse all three problems at once.
Proper candle maintenance stretches your burn hours. A wick cut to the right height pulls fuel evenly, so the wax melts in a clean, level pool instead of tunneling down the center. That means fewer wasted dollars and more fragrance throw from every candle you own.
Trimming also protects your home. A long, charred wick throws off flame height and coats your jar in soot. For DIY beginners, mastering this one habit prevents the most common candle failures before they start. It’s the simplest skill with the biggest payoff.
Tools and Materials You’ll Need
Gather these before you start. Each one earns its place.
- Cut the wick cleanly — wick trimmer or sharp scissors
- Reach deep jars safely — long-handled wick trimmer or needle-nose pliers
- Remove burnt debris — small spoon or dry paper towel
- Steady the candle — a flat, heat-safe surface
- Protect your workspace — a tray or old cloth to catch wick debris
- Snip thick wooden wicks — nail clippers work for stubborn, layered wicks
- Optional: speed up cleanup — a soft brush to sweep charred bits from the wax surface
A dedicated wick trimmer makes the cleanest cut, but sharp scissors do the job fine for most wood wick candles. Keep your tools dry. Wax and water don’t mix well during candle maintenance.
Step-by-Step Guide on How to Trim Wood Wicks
Step 1 – Let the Candle Cool Completely
Never trim a warm wick. Hot wax shifts, the wick bends, and you risk a jagged, uneven cut. Wait until the candle is fully cool and the wax has set firm to the touch.
You’ll know it’s ready when the surface looks solid and matte, with no glossy melt pool near the wick. Press a fingertip gently against the edge of the wax. It should feel cool and hard, not soft or tacky.
This patience pays off. A cool candle gives you a stable base and a straight wooden wick to work with. Rushing this step leads to crooked cuts and wick debris falling into the wax. Give it time, and the rest goes smoothly.
Step 2 – Inspect the Wick
Look closely at the wick before you cut. A used wood wick usually shows a black, charred tip that crumbles when touched. You might see mushrooming — a thickened, ashy ball at the top — or a wick that’s split into uneven layers.
These are the visual cues that trimming is overdue. A healthy wick should stand straight, sit firm in the wax, and show clean, light-colored wood below the burnt section.
Run your thumb lightly over the tip. If it feels brittle and flakes off, that’s the part you’ll remove. Knowing exactly where the charred wick ends and the good wood begins tells you precisely where to make your cut.
Step 3 – Remove Loose Wick Debris
Before cutting, clear away the burnt fragments sitting on top of the wax. Charred bits left behind will sink into the next melt pool, clog the flame, and create extra soot.
Use a small spoon or a dry paper towel to lift the debris out. Tilt the candle slightly and let the loose pieces fall onto your tray. You’ll hear a faint, dry crumble as the brittle char breaks free.

Work gently. Digging into the wax scratches the surface and leaves marks that show once the candle melts. The goal is a clean wax top with a bare wick standing ready. Knowing how to trim wood wicks starts with a tidy surface, so take this step seriously.
Step 4 – Measure the Right Height
Wood wicks burn best at about ⅛ inch above the wax. That’s roughly the thickness of two stacked coins. Too tall, and the flame grows large and smoky. Too short, and the candle struggles to stay lit.
Hold your trimmer or scissors beside the wick and eyeball the cut line. If you want precision, rest a coin against the base of the wick as a quick height guide.
This measurement is the heart of the whole process. A wick at the correct height produces a low, controlled flame with that signature soft crackle. Get this number right and you’ve solved most burn problems before you’ve even lit the candle again.
Step 5 – Make the Cut
Position your blades at the marked height and cut in one firm, clean motion. A confident snip beats a slow, sawing cut every time. You want a sharp, square edge — not a frayed or angled tip.
Listen for a crisp snip. That clean sound tells you the blade went through the wood in a single pass. If the wick crushes or splinters, your tool is dull. Switch to sharper scissors or nail clippers.
Hold the cut piece as you trim so it doesn’t drop into the wax. A square, even cut helps the flame catch quickly and burn straight. This is the core of how to trim wood wicks — one clean cut at the right height.
Step 6 – Check for Splinters and Frays
Examine the freshly cut tip. Wood wicks sometimes split into thin layers, especially the flat, double-ply kind. A frayed top burns unevenly and throws off more soot than a clean edge.
Pinch the tip gently between your fingers. If you feel loose threads or a peeling layer, snip them away with a quick second cut. The finished wick should look like a single, solid edge — smooth across the top with no stray fibers sticking up.
This small check separates a good burn from a great one. A clean, square wick catches flame fast and holds it steady. Loose splinters flare, spit, and fade quickly, forcing you to relight again and again.
Step 7 – Clear the Surface Again
Cutting always leaves behind a few stray fragments. Sweep them off before you light up. Even tiny pieces of wood drift into the melt pool and burn dirty, dulling your clean flame.
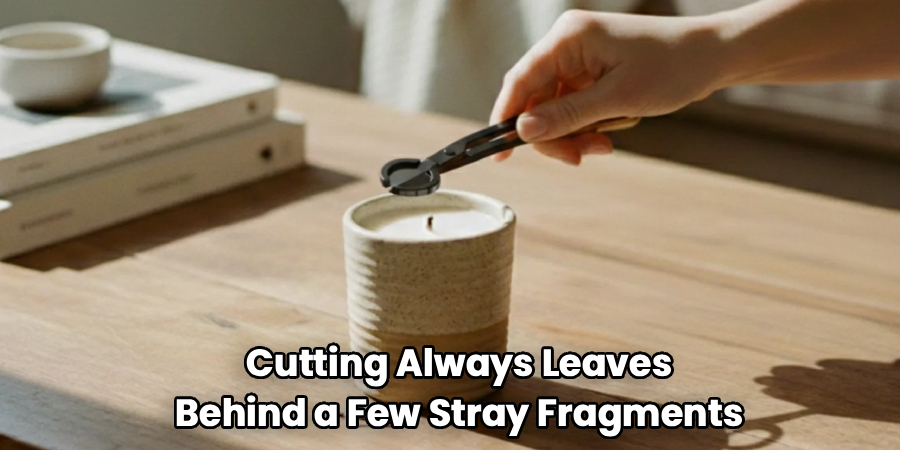
Use a soft brush or a dry paper towel to wipe the wax surface around the wick. Tilt the jar and let the bits slide onto your tray. The surface should look spotless, with only the trimmed wick standing in the center.
You’ll notice the difference the moment you light it. A clear surface and a clean wick deliver a bright, even flame with minimal smoke. Skip this step and those leftover specks float up, smolder, and leave faint streaks of soot on your jar.
Step 8 – Test the Burn
Light the candle and watch the first few minutes. A properly trimmed wood wick catches within seconds and settles into a low, steady flame about ½ to ¾ inch tall. You’ll hear that warm, gentle crackle that makes wooden wicks so appealing.
Watch for warning signs. A flame that climbs too high, flickers wildly, or sends up black smoke means the wick is still too long. Blow it out, let it cool, and trim a little more.
A flame that drowns or keeps dying signals a wick cut too short — wait for the next burn to leave it longer. When the flame holds steady and the wax melts in an even pool, you’ve nailed it.
Common Mistakes to Avoid
The biggest mistake is trimming a warm candle. Soft wax lets the wick lean and bend, so your cut ends up crooked and the next burn tilts to one side. Always wait for the wax to cool and set firm before you reach for the trimmer.
Cutting the wick too short is just as damaging. Beginners often panic at a tall flame and shave the wick down to the wax. The result is a candle that won’t stay lit, drowns in its own melt pool, and wastes the wax you paid for. Aim for that ⅛-inch height and resist the urge to go lower.
Leaving charred debris behind ruins an otherwise good trim. Those brittle black flakes sink into the wax and burn dirty, coating your jar in soot and dulling the flame. Clear the surface before and after every cut.
Using a dull blade is another quiet failure. A crushing, sawing cut frays the wood and leaves splinters that flare and spit. Keep a sharp wick trimmer or scissors on hand. Finally, don’t ignore mushrooming — that ashy ball at the tip is your signal that the wick has been begging for a trim.
Expert Tips
Trim every time, not just sometimes. Pros trim the wick before each and every burn, while the candle is cool. This single habit prevents almost every common problem — soot, tunneling, weak flames, and short burn life.
Save the burnt cuttings off your wax, but never toss them back in the jar. They smolder and stain.
For double-ply wooden wicks, trim both layers to the exact same height. Uneven layers fight each other and produce a lopsided flame.
Burn your candle long enough each session to melt the wax fully across the surface — usually one to two hours. This stops tunneling and keeps future trims clean. And store candles upright in a cool spot, so the wick stays centered and straight between burns.
Frequently Asked Questions
How Often Should You Trim a Wood Wick?
Trim before every burn. Cut the wick to about ⅛ inch each time the candle is cool, before you light it. Wood wicks build up charred buildup quickly, so a quick trim every session keeps the flame steady and the soot low. Skipping trims leads to large flames, smoking, and a shorter overall burn life for your candle.
Can You Use Regular Scissors to Trim Wood Wicks?
Yes, sharp scissors work well for most wood wick candles. The key is a clean, single cut — a dull blade crushes the wood and leaves frays that burn dirty. Nail clippers handle thick or layered wicks nicely. A dedicated wick trimmer reaches deep jars and gives the cleanest edge, but it’s a convenience, not a requirement.
Why Does My Wood Wick Keep Going Out?
A wood wick that keeps dying is usually cut too short or drowning in wax. If the wick sits below the melt pool, it can’t pull enough fuel to stay lit. Let the candle cool, then leave the wick slightly longer at the next trim. Also check that earlier burns melted the wax fully across the surface to prevent tunneling.
What Is the Ideal Height for a Wood Wick?
About ⅛ inch above the wax — roughly two stacked coins thick. This height gives you a low, controlled flame with a soft crackle and minimal soot. Taller wicks throw large, smoky flames that coat the jar in black. Shorter wicks struggle to stay lit. Stick close to ⅛ inch and adjust slightly based on how your specific candle burns.
Why Is My Wood Wick Producing Soot?
Soot comes from a wick that’s too long, frayed, or buried in debris. A tall wick burns more fuel than it can handle and releases black smoke. Trim it to ⅛ inch, remove any charred fragments, and clear loose splinters. Burning the candle in a draft also causes soot, so keep it away from fans, vents, and open windows.
Conclusion
A clean wick is the difference between a candle that frustrates you and one that delights you. When you know how to trim wood wicks correctly, every burn rewards you with a steady flame, that signature soft crackle, less soot, and far more hours of fragrance from each candle.
The process is simple. Let the wax cool, clear the debris, measure to ⅛ inch, cut clean, and check your work before you light. Do this every time and you’ll dodge the most common burn problems — drowning wicks, smoking flames, and wasted wax.
This is one of the easiest habits in candle care, and one of the most rewarding. You’ll save money, protect your jars from soot, and get the most out of every wooden wick you own. Grab your trimmer, cool your candle, and make that clean cut. Your next burn will show the difference immediately — and so will every one after it.
