
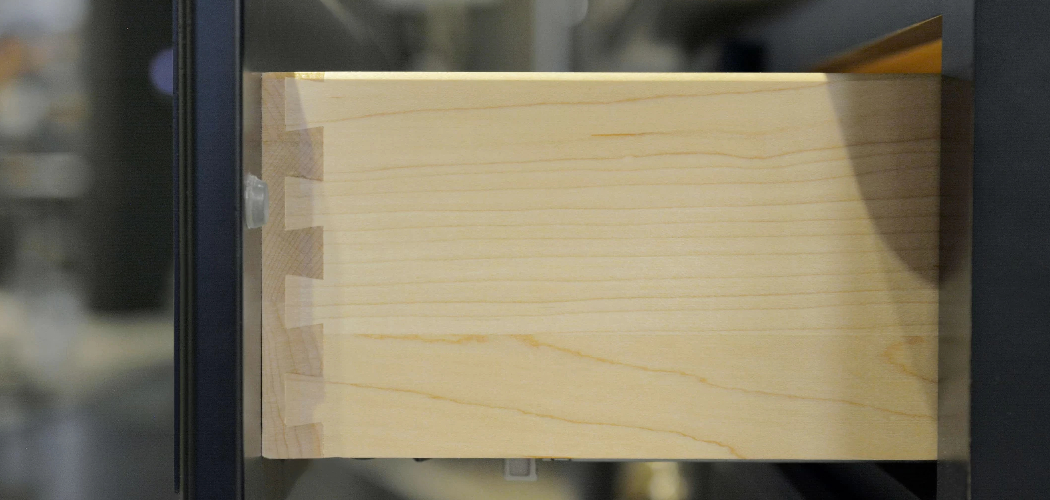
A dovetail joint says one thing instantly: this drawer was built to last. The interlocking pins and tails lock wood together so tight that the joint can outlive the furniture it holds. No screws. No brackets. Just precise cuts and end grain glued for maximum strength.
Most beginners think dovetails are too hard to attempt. They’re wrong. With sharp tools, accurate layout, and patience, you can cut a clean joint on your first drawer.
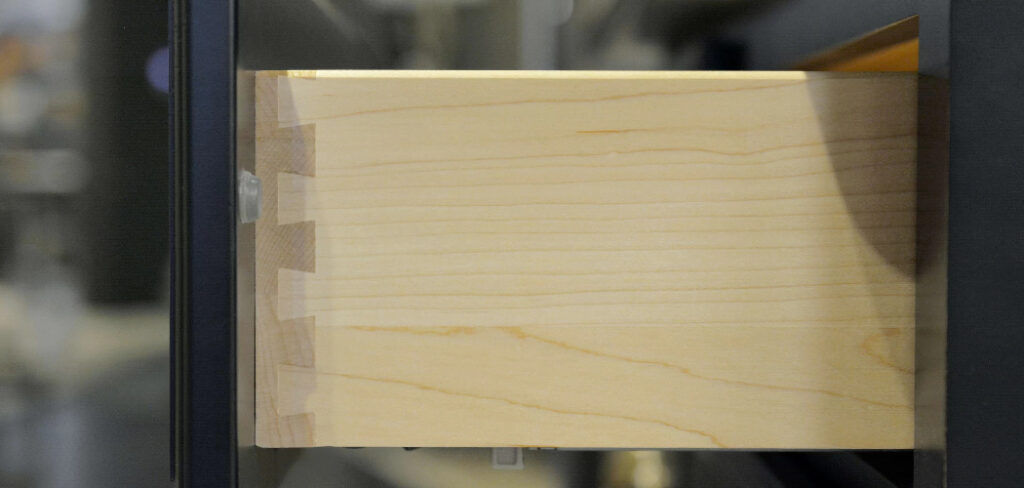
This guide walks you through how to make a drawer with dovetail joints from board selection to final fit. You’ll learn to lay out the joint, cut tails and pins, and assemble a drawer box that slides smooth and holds square. By the end, you’ll own a skill that turns plain stock into furniture-grade work.
Why Learning Dovetail Joinery Matters
Skip the metal hardware and the wobbly butt joints. Dovetails give you a drawer that survives decades of daily pulls without loosening.
The skill saves you money. Furniture with hand-cut joinery costs a premium at the store. Build it yourself, and you pay only for hardwood and glue. One quality drawer’s worth of materials runs a fraction of the retail price.
It builds confidence fast. Cut your first set of tails and pins, watch them slide together, and every future joint feels reachable. Drawers, boxes, cabinets — they all start here.
It also prevents costly mistakes. Dovetails teach you to work to tight tolerance, read grain direction, and saw to a line. Master that control, and you stop wasting expensive boards on sloppy cuts. The joint is a teacher as much as a technique.
Tools and Materials You’ll Need
Gather everything before you cut. A dull saw or missing marking gauge mid-layout ruins your accuracy and your rhythm.
- Saw the joint cleanly — dovetail saw with fine, sharp teeth
- Mark precise baselines — marking gauge and a marking knife
- Lay out angled pins and tails — dovetail marker or sliding bevel
- Chop the waste flush — set of sharp bench chisels
- Hold parts square during glue-up — bar clamps and a square
- Build the drawer box — straight-grained hardwood for sides and front
- Fit the bottom panel — quartersawn plywood or thin solid stock
- Bond the joints permanently — wood glue rated for furniture
- Smooth every face — sandpaper in 120, 180, and 220 grit
- Speed up repeat joints — a router dovetail jig (optional, but it cuts identical joints in minutes)
Choose hardwood for the drawer sides. Maple, cherry, and white oak hold a crisp dovetail edge and resist the wear of daily use.
Step-by-Step Guide on How to Make a Drawer With Dovetail Joints
Step 1 – Mill and Size Your Drawer Stock
Crooked boards make crooked joints. Every drawer part must start flat, straight, and square before you mark a single line.
Cut your drawer sides, front, and back to final width and length. Let the boards rest overnight in your shop. Wood relaxes after cutting, and a board straight at noon can cup by morning.
Joint one face flat, square an edge to it, then plane each piece to matching thickness. Drawer sides between 1/2 and 5/8 inch work best — thick enough to hold a joint, thin enough to look refined.
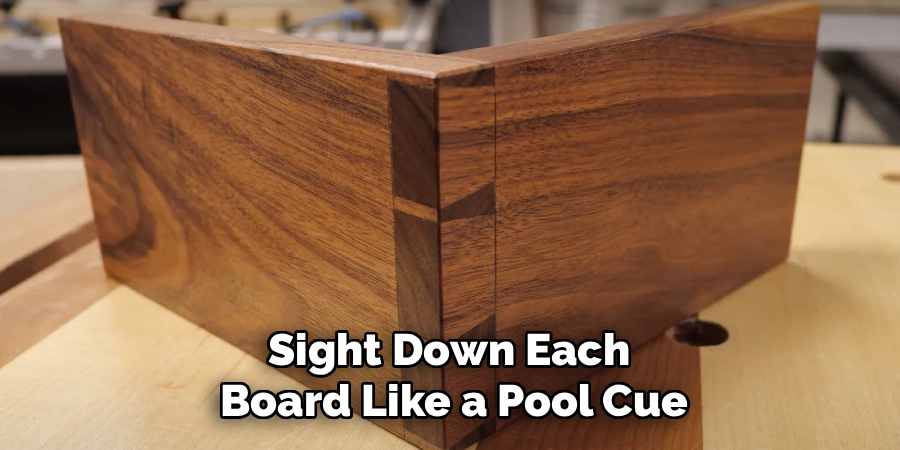
Sight down each board like a pool cue. A true board reflects light in one clean line. Any twist or bow, and you set that piece aside before it wrecks your layout.
Step 2 – Mark Your Baselines With a Gauge
The baseline controls everything. Set it to the exact thickness of the mating board, and your joint seats flush with no gaps.
Set your marking gauge to the thickness of the drawer side. Scribe a line around the end of each board where the tails and pins will stop. This shallow groove guides your chisel later and tells your eye exactly where to quit cutting.
Press firm and steady. A clean gauge line shows as one crisp scratch, not a fuzzy double track. Run it on all four faces of every joint end.
Drag a fingernail across the line. You should feel a defined ridge catch your nail. That tactile edge is the wall your saw and chisel respect.
Step 3 – Lay Out the Tails
Tails come first when you learn how to make a drawer with dovetail joints by hand. They’re easier to mark, and the pins get traced from them later.
Set your dovetail marker or bevel to a 1:8 ratio for hardwood. Mark evenly spaced tails across the end of the board, angling the lines from the baseline to the edge. Shade the waste between them with pencil so you never saw the wrong side.
Keep the half-pins at each edge slightly narrower. They anchor the joint and resist splitting.
Step back and check the spacing by eye. Even, balanced tails read as craftsmanship. Lopsided ones shout beginner. Adjust the layout now, while it’s only pencil.
Step 4 – Saw the Tails
This cut sets the tone for the whole joint. Saw straight to your lines, and the rest falls into place.
Clamp the board upright in your vise. Saw down each angled line on the waste side, stopping right at the baseline. Let the dovetail saw do the work with light, steady strokes.
Listen as you cut. A sharp saw whispers through the wood with a clean rasp. A dull one chatters and wanders off the line.
Keep your eye on both the front line and the baseline at once. The saw should track plumb and stop dead at the gauge mark. Cut every tail before you move on, so your body keeps the same angle and rhythm across the board.
Step 5 – Chop Out the Tail Waste
Now you clear the gaps between the tails. Clean, square waste removal is what makes pins seat tight later.
Lay the board flat and chop straight down on the baseline with a sharp chisel, bevel facing the waste. Work halfway through, flip the board, and chop from the other side to meet in the middle. This prevents blowout on the back face.
Pare the bottom flat until your chisel rides the baseline cleanly. The walls should stand square and smooth.
Run your thumb across the bottom of each gap. A correct chop feels flat and even, with crisp corners. A sloppy one feels stepped or rounded — pare it flush before you trace pins from it.
Step 6 – Trace and Cut the Pins
The pins must mirror your tails exactly. Trace them directly from the cut board for a glove-tight fit.
Stand the pin board upright and lay the finished tail board on top, ends aligned. Scribe around each tail with a marking knife. These knife lines become your pin layout, matched perfectly to the tails you already cut.
Square the lines down to the baseline and shade the waste. Saw just inside the knife line, leaving a hair of material to pare back.
Test as you go. The knife line should still show faintly on the finished pin wall. Saw to it, not past it — that thin margin is the difference between a tight joint and a loose, gappy one.
Step 7 – Pare the Pins and Dry-Fit
Patience here pays off. A careful dry-fit reveals every high spot before glue locks your mistakes in place.
Chop and pare the pin waste the same way you cleared the tails. Then push the two boards together by hand. They should meet with firm resistance about two-thirds of the way, then need a few light taps to seat fully.
Feel for the catch points. If a pin binds, pull the joint apart and look for shiny rub marks. Pare those spots thin and try again.
A correct dry-fit shows tight seams all around with no gaps at the baseline. Force a joint together too hard, and you split the tails. Sneak up on the fit instead.
Step 8 – Glue, Clamp, and Square the Drawer Box
This is the payoff. Glue the joints, pull them tight, and lock the drawer box square.
Brush a thin film of glue on the pins and tails — end grain and side walls both. Work fast but clean. Press each corner together, then clamp across the joints with light, even pressure.
Measure both diagonals of the drawer box. Equal diagonals mean the box is square. If they differ, shift a clamp until they match.
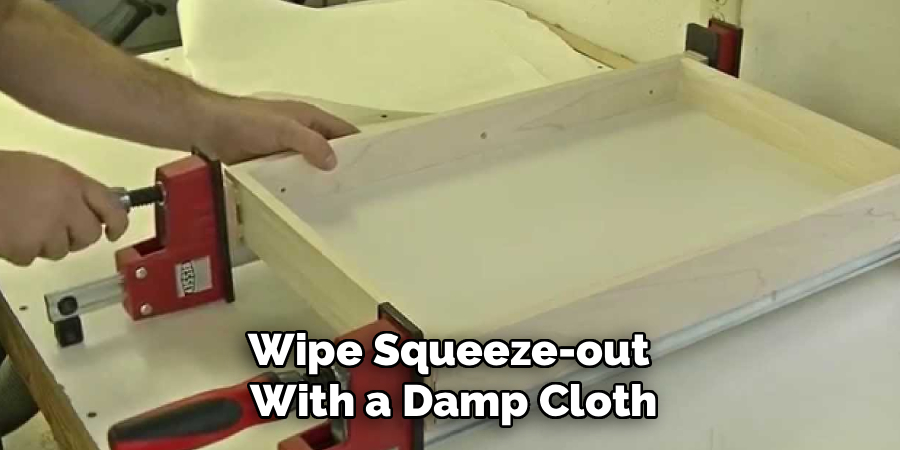
Wipe squeeze-out with a damp cloth before it skins over. Dried glue blocks finish and shows as pale blotches later.
Let it cure fully. The next morning, the joints feel like one solid piece of wood — exactly what dovetails do best.
Step 9 – Fit the Bottom and Final-Sand
The drawer is built. Now fit the bottom and smooth every surface for a furniture-grade finish.
Slide the bottom panel into its groove or fasten it under the box, leaving room for the solid stock to expand. Check that the drawer sits flat with no rock.
Sand the joints flush, working through 120, 180, then 220 grit. Sand with the grain. The dovetails should feel seamless under your palm, with pins and tails dead level.
Look across the corner in raking light. Crisp, flush joinery throws no shadows at the seams. Proud pins or sunken tails catch the light and need more sanding. Test the drawer in its opening — it should glide smooth and close flush.
Common Mistakes to Avoid
The biggest mistake is sawing on the wrong side of the line. Your pencil and knife lines mark the finished edge of the joint, not the cut. Saw into the waste, leaving the line intact. Cut on the line itself, and your tails come out undersized and gappy. Shade every waste section before you pick up the saw — it’s the cheapest insurance against a ruined joint.
Setting the baseline wrong ruins the seat. If your marking gauge reads even slightly off the mating board’s thickness, the joint either bottoms out short or leaves a step at the seam. Set the gauge directly off the actual board, not a tape measure, and scribe all four faces.
Forcing a tight dry-fit splits the wood. Beginners pound joints together to test them, then crack a tail or blow out an edge. The fit should need light taps, not a mallet beating. If it binds hard, pull it apart and pare the high spots.
Rushing the glue-up wrecks square drawers. Spread glue too slow and it skins before you clamp; clamp without measuring diagonals and the box racks out of square. Mix only what you can apply in two minutes, and check both diagonals before the glue grabs.
Expert Tips
Cut your tails slightly proud of the surface, then sand them flush after glue-up. A hair of extra length lets you level the joint perfectly instead of leaving sunken tails you can’t fix.
Use a 1:8 angle for hardwood and 1:6 for softwood. Steeper angles on soft stock split under load; shallower angles on hardwood hold cleaner. Match the ratio to the wood, not habit.
Wax your saw plate with paraffin before cutting. The blade glides through the kerf with less drag, and your cuts track straighter for it.
Mark your waste the same way every time — pencil shading inside the gaps. After fifty joints you’ll still glance down and know instantly which side to saw. Consistency is what separates a clean joint from a coin flip.
Frequently Asked Questions
What Wood Is Best for Dovetail Drawers?
Maple, cherry, and white oak are the best choices for dovetail drawers. They’re dense, hold a crisp joint edge, and resist the wear of daily use. Quartersawn stock moves least with humidity, so your joints stay tight year-round. Avoid soft, splintery woods like pine for the sides — they crush under the chisel and leave fuzzy, gappy pins that never seat clean.
Are Hand-Cut or Router Dovetails Better?
Both work; the right one depends on your goal. Hand-cut dovetails give you full control over spacing, varied tail widths, and a true handmade look. A router jig cuts identical joints fast, which suits multiple matching drawers. Start by hand to learn the joint, then add a jig when you need speed and repeatability. Skill on the saw makes you better at both.
How Tight Should a Dovetail Joint Fit?
A dovetail should seat with firm hand pressure and a few light mallet taps, not a hammering. Push the joint together dry first. It should meet resistance about two-thirds of the way, then close fully with gentle taps. If it binds hard or splits, pare the high spots. If it falls together loose, your saw drifted past the line.
What Angle Should I Cut Dovetails?
Use a 1:8 ratio for hardwood and a 1:6 ratio for softwood. The angle controls how well the joint resists pulling apart. Too steep on soft wood and the tails split under load; too shallow on hardwood and the joint loses its mechanical lock. A dedicated dovetail marker holds the ratio consistent across every tail you lay out.
Can a Beginner Cut Dovetails by Hand?
Yes. With a sharp saw, accurate layout, and patience, beginners cut clean dovetails on their first drawer. The keys are sawing to your line, chopping square baselines, and tracing pins directly from cut tails. Your first joint won’t be flawless, and that’s fine. Practice on scrap, study the fit, and each joint comes out tighter than the last.
Conclusion
You now have the full process for how to make a drawer with dovetail joints that lock tight and last for decades. Mill straight stock, set accurate baselines, lay out and saw the tails, trace and cut matching pins, dry-fit with patience, then glue the box square. Follow that order and you skip the gaps, splits, and racked corners that trip up most first-timers.
The payoff is real. You build furniture-grade drawers for the cost of hardwood and glue, gain skills that carry into every box and cabinet you make next, and own a joint that needs no screws to outlast the furniture around it.
This is craft work, and it rewards patience. Watch your pins and tails slide together into one seamless corner, run your hand across a flush joint, and know you built something that holds. Pick your hardwood this weekend, sharpen your chisels, and cut your first set of tails. The dovetail drawer you’ve pictured is well within reach.
