
No planer? No problem. You can still flatten boards, smooth rough surfaces, and prep stock for a project using nothing but hand tools and patience. Learning how to plane wood without planer access opens the door to better craftsmanship without a heavy machine taking over your garage.
A good hand plane gives you control, a quieter workshop, and a connection to the wood that power tools can’t match. You’ll feel the grain. You’ll hear the difference between a clean cut and a torn one. Best of all, you’ll save money and floor space while building a skill that lasts a lifetime. This guide walks you through every step of flattening and smoothing wood by hand, from setup to finish.
Why Learning This Matters
Power planers cost money and eat up space. Hand planing skips both. You can flatten a workbench top, fix a sticking door, or smooth reclaimed lumber with one well-tuned tool.
The savings add up fast. A quality hand plane costs far less than a benchtop planer, and it never needs an outlet. That makes it perfect for small shops, apartments, or job sites without power.
Hand planing also builds confidence. You learn to read wood grain, adjust your stroke, and feel when a cut goes right. Those instincts carry into every project you tackle.
And you avoid costly mistakes. Machines remove material fast — and ruin a board just as fast. By hand, you control every shaving and protect your stock.
Tools and Materials You’ll Need
Gather these before you start. The right setup makes the work smoother and safer.
- Flatten and smooth surfaces — a bench plane or jack plane (No. 5 is a great all-rounder)
- Refine and polish the surface — a smoothing plane (No. 4)
- Reach tight spots and end grain — a block plane
- Tame stubborn grain and remove plane marks — a card scraper
- Hold the work steady — a sturdy workbench with a vise or bench dogs
- Check for flatness and twist — a pair of winding sticks and a straightedge
- Keep the edge sharp — sharpening stones or a honing guide
- Mark your progress — a pencil
- Optional: speed up flat-checking — a set of feeler gauges for fine accuracy
A sharp blade matters more than any single tool. Hone before you begin.
Step-by-Step Guide on How To Plane Wood Without Planer
Step 1 – Inspect the Board and Read the Grain
Start by looking closely at your wood. Run your hand along the surface and feel the grain direction. It will feel smooth one way and rough, almost prickly, the other. That rough direction tells you where the plane will tear out fibers.
Hold the board to the light. You’ll spot high spots, dips, and any twist. Mark the high areas with a pencil so you know where to focus.
Knowing how to plane wood without planer tools starts here, with reading the surface before you cut. Skip this and you’ll fight the grain the whole way. Spend two minutes now and save twenty later.
Step 2 – Secure the Wood to Your Bench
A board that shifts ruins your stroke. Clamp it tight. Use a vise, bench dogs, or a planing stop so the wood stays locked against your pressure.
Push the board to test it. It should not move, rock, or slide. If it wobbles, shim underneath until it sits solid on a flat surface.
You want both hands free for the plane. A stable setup lets you put your full weight behind each pass without chasing the board across the bench.
Listen as you work later — a steady, even sound means the wood isn’t moving. Rattling or knocking tells you the clamp slipped. Stop and reset before you keep going.
Step 3 – Sharpen and Set Up Your Plane
A dull blade tears wood. A sharp one slices it. Before your first stroke, hone the iron until it shaves a hair off your arm or slices paper clean.
Set the depth shallow to start. Turn the adjustment knob until the blade just peeks past the sole. You’re aiming for thin, translucent shavings — not thick chunks.
Sight down the sole and check the blade sits square. A skewed blade cuts deeper on one side and leaves a sloped surface.
This is the heart of how to plane wood without planer machinery: a properly tuned hand plane does the work a motor never could, quietly and precisely. Take the time to dial it in.
Step 4 – Make Your First Passes Along the Grain
Position the plane at the board’s edge. Plane with the grain, following that smooth direction you found earlier. Push forward in one steady motion, keeping pressure on the front knob at the start and the rear handle at the end.
Listen for a clean shhhk sound. That’s the blade slicing fibers. A chattering or scraping noise means the blade is dull or set too deep.
Watch the shavings curl out of the mouth. Thin, even ribbons mean you’re doing it right. Dust or torn chunks mean trouble.
Overlap each pass slightly. Work across the whole face, hitting your pencil-marked high spots first until they disappear.

Step 5 – Check for Flatness and Twist
Stop and measure your progress. Lay a straightedge across the board in several directions. Light peeking under the edge shows dips that still need work.
Now check for twist. Set your winding sticks at each end and sight across the tops. If they line up parallel, the board is flat. If one tilts, you have a wind to remove.
Re-mark high spots with your pencil. The pencil lines vanish where the plane cuts, giving you a clear map of your progress.
Don’t rush this. A board that looks flat by eye can still rock on a true surface. Trust the tools, not your guess, and keep refining until everything reads level.
Step 6 – Switch to a Smoothing Plane
Once the surface is flat, swap your jack plane for a smoothing plane. This shorter plane rides the surface and erases the marks left by heavier cutting.
Set the blade even shallower now. You want gossamer-thin shavings, almost see-through. The goal is polish, not removal.
Take long, overlapping strokes across the entire face. Feel the surface after each pass. It should grow glassy and cool under your fingertips.
You’ll hear a softer, lighter hiss than before. That whisper tells you the blade is barely kissing the wood. Keep going until the whole board feels uniform and the surface gleams under angled light.
Step 7 – Tame Tricky Grain With a Card Scraper
Some boards fight back. Knots, swirls, and reversing grain tear out no matter how sharp your plane. That’s when a card scraper saves the day.
Hold the scraper at a slight angle and push or pull it across the rough patch. Flex it gently with your thumbs to control the cut.
You’ll see fine, fluffy shavings — not dust — when the scraper is sharp. Dust means the burr is gone and you need to re-sharpen the edge.
The scraper leaves a surface so smooth you may skip sanding entirely. Work the trouble spots until they blend into the rest of the board.
Step 8 – Final Inspection and Cleanup
Wipe the board clean and inspect under raking light. Tilt your head and let the light skim across the surface. Any remaining ridges or dips will cast shadows.
Run your palm over the whole face. It should feel even, smooth, and free of ridges. Catch a snag? Mark it and take one more pass.
Check the edges and corners with your block plane for any sharp burrs.
Step back and admire the work. A hand-planed surface has a subtle sheen and clean facets that sandpaper can’t match. When it feels right and looks right, you’re done.
Common Mistakes to Avoid
The biggest mistake is working with a dull blade. A dull iron tears fibers, leaves a fuzzy surface, and makes the whole job harder than it should be. Test your edge on paper or your arm before every session, and hone the moment cutting feels rough.
Next comes planing against the grain. Push the wrong direction and you’ll lift and tear fibers, leaving ugly chip-out. Always read the grain first and reverse your direction if the surface starts to roughen instead of smooth.
Setting the blade too deep is another classic error. Beginners crank the depth to remove material faster, then bog down or gouge the board. Start shallow. Thin shavings give you control and a cleaner result every time.
Many people also skip securing the wood properly. A board that slides under pressure ruins your stroke and your accuracy. Clamp it solid before the first pass.
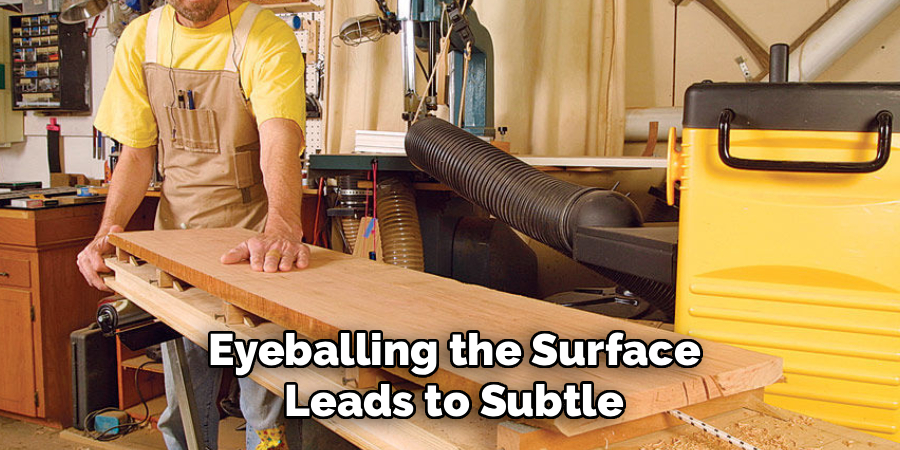
Finally, don’t ignore flatness checks. Eyeballing the surface leads to subtle dips and twist you won’t catch until assembly. Use a straightedge and winding sticks throughout the process, not just at the end.
Expert Tips
Wax the sole of your plane. A quick rub of paste wax or a candle on the bottom cuts friction dramatically. The plane glides instead of dragging, and your arms last longer.
Skew the plane for tough grain. Angle the body slightly while pushing straight ahead. This lowers the effective cutting angle and slices cleanly through fibers that would otherwise tear.
Keep a second blade honed and ready. Swapping a fresh iron mid-project beats stopping to sharpen, and it keeps your rhythm and your edge consistent.
Plane in early daylight or under a single side light. Raking light reveals every flaw your overhead bulb hides. Pros chase shadows, not guesswork.
And cut a tiny chamfer on board edges first. It prevents the corners from splintering as your plane exits the cut.
Frequently Asked Questions
Can You Flatten Wood Without a Planer?
Yes. A hand plane flattens boards just as well as a machine, often with a finer result. Start with a jack plane to remove high spots, check progress with a straightedge and winding sticks, then finish with a smoothing plane. It takes more time and effort, but you gain full control and a surface that needs little or no sanding.
What Hand Plane Should a Beginner Buy First?
Start with a No. 5 jack plane. It’s the most versatile size, long enough to flatten boards yet short enough to handle smoothing tasks. Add a No. 4 smoothing plane and a block plane later as your projects grow. Buy quality, keep the blade sharp, and one good plane will outlast every power tool in your shop.
How Do I Know Which Direction to Plane?
Run your hand along the surface both ways. One direction feels smooth; the other feels rough and catches slightly. Plane the smooth direction — that’s with the grain. If the surface tears or roughens as you cut, stop and reverse direction. Reading grain takes practice, but your fingertips and the shavings will quickly tell you when you’ve got it right.
Is Sanding the Same as Planing?
No. Sanding scratches the surface smooth with abrasive grit, while planing slices off thin layers with a sharp blade. Planing flattens wood and removes material faster, leaving a cleaner, crisper surface. Sanding only smooths what’s already there and can round over edges. Many woodworkers plane first for flatness, then sand lightly — or skip sanding entirely after a card scraper.
How Long Does Hand Planing Take?
It depends on the board size and how much material you remove. Smoothing a small, nearly flat board takes a few minutes. Flattening a rough, twisted plank can take half an hour or more. Sharp blades and shallow cuts speed the work. With practice, your strokes get more efficient and you’ll move through stock far faster than when you started.
Conclusion
You don’t need a heavy machine to get flat, smooth, ready-to-use boards. With a sharp hand plane, a steady bench, and a little patience, you can prep stock for any project. Learning how to plane wood without planer equipment gives you control, saves money, and builds skills that make you a better woodworker.
Remember the essentials. Read the grain before you cut. Secure your work tight. Keep your blade razor-sharp and your cuts shallow. Check for flatness with a straightedge and winding sticks as you go, then finish with a smoothing plane or card scraper for a glass-smooth surface.
The first few boards will challenge you. Your arms will tire and your strokes will wander. Stick with it. Each pass teaches your hands to read the wood and your ears to hear a clean cut.
Pick up a plane, find a rough board, and start. Hand planing isn’t just a workaround — it’s a craft worth keeping.
