
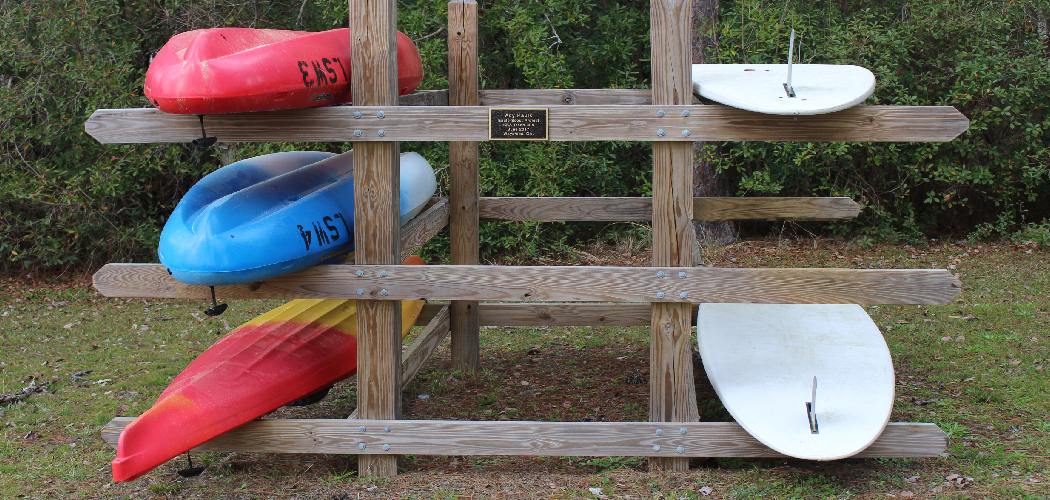
Your kayak deserves better than the garage floor.
Leaned against a wall, it warps. Dropped in a corner, it cracks. Stepped over for months, it slowly bends out of shape.
That’s a slow way to ruin a boat you paid good money for.
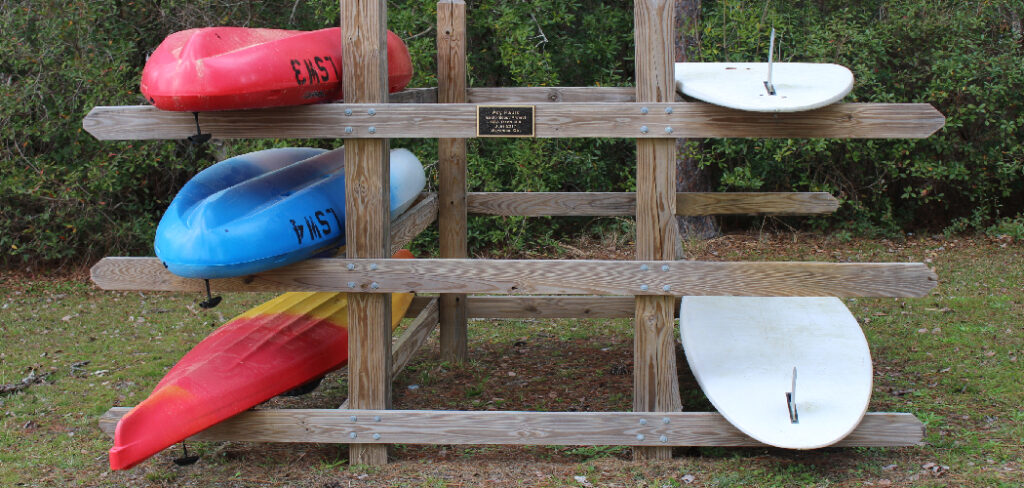
A wooden rack fixes all of it. It lifts your kayak off the ground. It spreads the weight evenly. It keeps the hull true season after season.
Learning how to build a kayak rack out of wood is one of the simplest projects a beginner can finish in a weekend. You need a few boards. A handful of tools. A flat spot to work.
This guide walks you through every cut, joint, and check — so you can build a sturdy wooden rack that holds your kayak safe and steady for years.
Why This Matters
A kayak is awkward. It’s long, heavy, and easy to damage when stored wrong.
Most beginners learn this the hard way. They lean the boat against a wall. Gravity does the rest. Six months later, the hull has a flat spot that never paddles straight again.
A rack stops that. It cradles the boat at two balanced points. The weight spreads. The shape holds.
Building it yourself does more than protect your kayak. A store-bought rack costs real money. A wooden one costs a fraction, and you control the size.
But the bigger win is skill.
You learn to measure. You learn to cut square. You learn to build something that carries weight without flexing. These are the bones of every woodworking project you’ll ever tackle.
Build this once, and the next project feels easy. Ready to start?
Tools and Materials You’ll Need
Gather everything first. A clean start means fewer stops mid-build.
- Pressure-treated lumber (4×4 posts) — for the upright legs that carry the load
- Standard 2×4 boards — for the arms, crossbars, and bracing
- Exterior wood screws (3-inch) — coated to resist rust, ideal for outdoor kayak storage
- Wood glue — for stronger, longer-lasting joints
- Circular saw or miter saw — for clean, square cuts
- Cordless drill/driver — for pilot holes and driving screws
- Carpenter’s level (4-foot) — to keep every leg plumb
- Speed square and tape measure — for accurate marking
- Sandpaper or orbital sander — to smooth edges that touch the hull
- Pool noodles or foam pipe insulation — to pad the arms and protect the kayak
- Work gloves and safety glasses — for every cut
- Optional: a pocket-hole jig — to hide screws and tighten joints fast
Sharp blades and a charged battery save you hours. Check both before the first cut.
Step-by-Step Guide on How to Build a Kayak Rack Out of Wood
Step 1 – Plan Your Rack Size and Style
Start with your boat, not your boards.
Measure your kayak’s length and width. Note its weight too — a heavy fishing kayak needs more support than a light recreational one. Write these numbers down.
Now choose your style. A freestanding rack stands on its own and holds one or more boats. A wall-mounted kayak holder saves floor space in a tight garage. For most beginners, a freestanding A-frame is the easiest and steadiest first build.
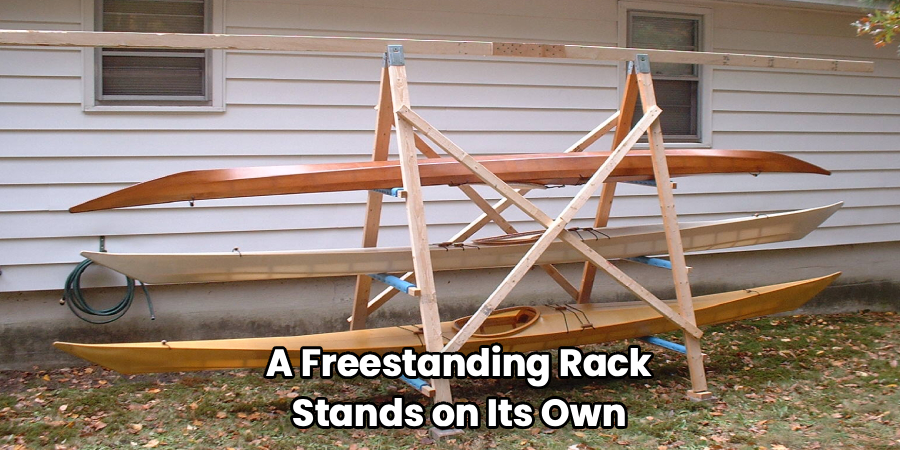
Plan two support points spaced about a third of the way in from each end. That spacing balances the hull and stops it from sagging in the middle.
Sketch it on paper. Mark every measurement. A clear plan now means fewer wasted cuts later. Does the size fit your space? Adjust before you cut.
Step 2 – Cut Your Lumber to Length
Measuring beats guessing every time.
Lay your lumber across a pair of sawhorses. Mark each cut with your speed square so the line runs dead straight across the board. A crooked mark makes a crooked cut.
Cut your 4×4 posts for the legs first. Then cut the 2×4 arms that will cradle the kayak. Cut them all in matched pairs so both sides of the rack stand even.
Listen as the blade works. A smooth, steady whir means a clean cut. A bogging, straining sound means you’re pushing too fast — ease off and let the saw do the work.
Stack your cut pieces by type. Run your hand along each cut end. It should feel flat and square, with no splinters tearing loose.
Step 3 – Build the A-Frame Sides
This is where the shape takes form.
Lay two legs on the ground in an A shape. Cross them near the top so they lean against each other. The angle sets how wide the base spreads — wider means steadier.
Add a horizontal crossbar near the bottom to lock the legs apart. Pre-drill your holes first. Pilot holes stop the wood from splitting with that sharp cracking sound nobody wants to hear.
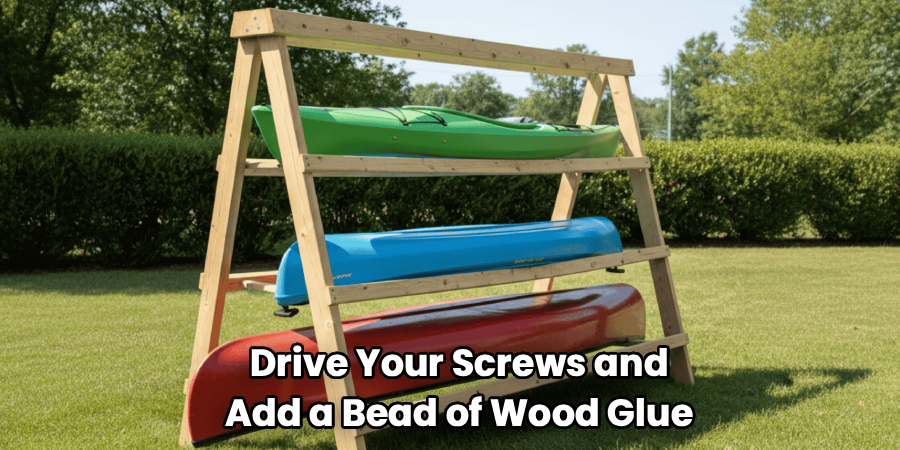
Drive your screws and add a bead of wood glue at each joint. Glue and screws together make a bond far stronger than either alone.
Build the second A-frame to match the first exactly. Set them side by side and check. They should mirror each other perfectly. When you know how to build a kayak rack out of wood that stands square, every later step gets easier.
Step 4 – Connect the Two Frames
Now your rack becomes one piece.
Stand both A-frames upright, spaced apart to match your kayak’s length. Have a helper hold them steady — two frames want to tip until they’re joined.
Run a long 2×4 between the two frames near the top and another near the bottom. These connectors turn two wobbly triangles into one rigid structure. Pre-drill, glue, and screw each end.
Push on the assembled frame once it’s joined. It should barely move. A frame that sways or twists means a loose joint — back the screw out, add glue, and drive it again.
Check that the whole thing sits flat on the floor. If one leg rocks, your cuts or your floor are uneven. Slip a shim under the short leg, or trim the long one until all four feet plant solid.
Step 5 – Attach the Support Arms
These arms hold your boat.
Mount two 2×4 arms on each side of the rack, angled slightly upward at the outer ends. That upward tilt forms a shallow cradle that keeps the kayak from sliding off.
Space the arms to match the two support points from your plan. Both sides must sit at the same height. Lay your level across each pair of arms and confirm the bubble centers. Mismatched arms make the kayak rest crooked.
Pre-drill, glue, and screw each arm into the legs. Tug each one hard when you finish. A solid arm doesn’t budge.
Step back and sight down the rack. The arms should march evenly down both sides like rungs on a ladder. Even spacing is the visual cue you got it right.
Step 6 – Sand and Pad the Contact Points
Smooth wood protects your hull.
Run your sander over every surface the kayak will touch. Rough wood scratches gel coat and snags the hull. Sand until each edge feels soft under your fingertips, not sharp.
Pay special attention to the support arms. These press against the boat under its full weight, so any splinter or ridge leaves a mark over time.
Now add padding. Slit a pool noodle or foam pipe insulation down its length and slip it over each arm. The foam cushions the hull and spreads pressure across a wider area.
Press your palm against the padded arm. It should give slightly, like a firm cushion. That softness is what keeps your kayak’s shape true through months of garage kayak storage.
Step 7 – Seal and Weatherproof the Wood
Protect the wood, and the wood protects the boat.
Wipe the whole rack down to clear sawdust. Then brush on an exterior wood sealer or outdoor paint, coating every face you can reach. This shields the lumber from rain, sun, and the damp that rots untreated wood.
Pay extra attention to the feet. The bottoms of the legs touch the ground and soak up moisture fastest. A heavy coat there adds years to an outdoor kayak rack.
Let each coat dry fully before adding the next. Rushing leaves a tacky finish that never hardens. A proper cure feels dry and smooth, never sticky.
Two thin coats beat one thick one. Thin coats soak in and bond. Thick coats drip, sag, and peel. Take your time and let it set.
Step 8 – Load and Test Your Kayak
The real test comes now.
Lift your kayak onto the padded arms, deck up, hull resting in the cradles. Center it so both support points carry equal weight. A well-balanced boat sits level and quiet.
Step back and watch. The arms should hold firm with no visible flex or creak. A groaning joint or a bending arm means the weight capacity is too low — add a brace before you trust it.
Give the rack a gentle shake with the boat loaded. Nothing should rattle, shift, or lean. That stillness tells you the build is sound.
Knowing how to build a kayak rack out of wood means knowing when to stop and when to reinforce. If everything holds rock-steady, you’re done. Your boat finally has a home that keeps it safe.
Common Mistakes to Avoid
The most common mistake is skipping the pilot holes. Beginners drive screws straight into dry lumber to save time, and the wood splits with a crack. A split board loses most of its strength, and near a joint that carries weight, that crack can spread under load. Spend the extra minute. Pre-drill every screw.
Next is mismatched support arms. If the arms on one side sit higher than the other, the kayak rests crooked and the weight loads unevenly. Over months, that uneven pressure flattens one side of the hull. Always level both pairs of arms before you screw them down.
Another trap is using untreated wood for the legs. The feet touch the ground and wick up moisture, and untreated lumber rots from the bottom up within a season or two. Use pressure-treated posts, and seal everything.
Then there’s skipping the padding. Bare wood under a heavy kayak scratches the gel coat and presses ridges into the hull. Foam padding is cheap insurance for an expensive boat.
Finally, beginners overload a flimsy frame. Always match your bracing to the weight capacity your boat actually needs.
Expert Tips
Build your rack a few inches taller than you think you need. A higher cradle clears clutter on the floor and makes sliding the boat on and off far easier on your back.
Angle the support arms about ten degrees upward. That gentle tilt cradles the hull naturally and stops the kayak from sliding off when you bump it.
Add a third support point if you store a long touring kayak. Two points work for short boats, but extra length sags in the middle without that center brace.
Leave room for paddle storage. A few hooks or a small shelf on the frame keeps your paddles, life vest, and gear in one place.
And before you load the boat, weigh down the empty rack and shake it hard. Better to find a weak joint now than with your kayak on top.
Frequently Asked Questions
What Is the Best Wood for a Kayak Rack?
Pressure-treated lumber works best for the legs and any part touching the ground, since it resists rot and moisture. For the arms and bracing, standard pine or cedar holds up well, especially when sealed. Cedar costs more but naturally resists weather, making it a smart choice for an outdoor kayak rack. The key is sealing all bare wood to protect it from rain and damp.
How Much Weight Can a Wooden Kayak Rack Hold?
A well-built rack from 4×4 legs and 2×4 arms easily holds a single kayak weighing 80 to 100 pounds, often more. The strength comes from proper bracing, glued-and-screwed joints, and balanced support points. If you plan to store multiple boats or a heavy fishing kayak, add extra crossbars and a third support arm. Always test the loaded rack before trusting it fully.
Should I Build a Freestanding or Wall-Mounted Kayak Rack?
It depends on your space. A freestanding rack moves easily and holds multiple boats, making it great for garages or backyards with room to spare. A wall-mounted kayak holder saves floor space in tight areas but requires solid wall studs to anchor into safely. For beginners, the freestanding A-frame is simpler, since it needs no wall anchoring and stands stable on its own.
How Do I Protect My Kayak From Damage on the Rack?
Padding is your best defense. Slit pool noodles or foam pipe insulation and slip them over the support arms to cushion the hull. Sand every wood surface that touches the boat until it’s smooth. Space your support points about a third of the way in from each end to balance the weight. This setup spreads pressure evenly and keeps the hull from developing flat spots.
Can I Build a Kayak Rack for Outdoor Storage?
Yes, but weatherproofing is essential. Use pressure-treated lumber for the legs, seal every surface with exterior paint or wood sealer, and apply extra coats to the feet. Position the rack on a level, well-draining spot away from standing water. For long-term outdoor kayak storage, add a tarp or cover to shield the boat from sun and rain. Reseal the wood once a year to keep it strong.
Conclusion
A kayak rack is just a frame that holds your boat off the ground. You’ve now seen every part of it.
Measure your kayak. Cut your lumber square. Build two matching A-frames. Connect them tight. Mount the arms level. Pad them soft. Seal the wood. Load and test.
Each step is small. None of them is hard. Together they raise a rack that protects a boat worth far more than the few boards it took to build.
Skip the pilot holes, and the wood splits. Skip the padding, and the hull scratches. Skip the sealer, and the legs rot. Those shortcuts feel faster. They cost you more in the end.
Knowing how to build a kayak rack out of wood gives you something a store-bought rack never can: the skill to build it your size, your way, and to build the next project with confidence.
This weekend, measure your kayak. Mark one board. Make one cut.
What will you build after this?
