
Your fireplace is throwing away a chemical you can make for free.
That sounds odd. But it’s true. Every winter, you sweep out gray ash and toss it in the trash. Inside that ash sits the raw material for lye — the same caustic substance that turns fat into soap and cures stubborn projects in the workshop.
People bought lye for centuries before it sat on store shelves. They pulled it from the hearth. You can too.
This skill connects you to old, practical craft. It costs almost nothing. It teaches you patience and respect for a powerful material.
This guide walks you through how to make lye from wood ash, step by step, from cold ashes to a tested, usable solution you can trust.
Why This Matters
A bucket of ash is free. Commercial lye is not.
That’s the first reason. But the savings are only the start.
Making your own lye builds real self-sufficiency. You stop depending on a store for a basic ingredient. You learn to read materials by sight, smell, and feel. You gain the kind of hands-on confidence that only comes from doing the thing yourself.
This skill opens doors. Soap making becomes possible at home. Old recipes that call for “potash” suddenly make sense. You understand the chemistry behind tools and finishes you already use.
And there’s something deeper. You join a long line of people who made what they needed from what they had.
That knowledge doesn’t expire. Once you own it, it stays with you.
Tools and Materials You’ll Need
Gather your supplies before you start. Working with a caustic solution is no time to go hunting for a missing glove.
- Hardwood ash — from oak, ash, maple, or other hardwoods, never softwood or treated lumber
- A wooden or food-grade plastic barrel or bucket — metal reacts with lye
- Soft or rainwater — distilled works too; hard tap water weakens the result
- Clean straw, gravel, and a layer of cloth — for the filter bed
- A second collection container — also wood, plastic, or glass
- Heavy rubber gloves and safety goggles — non-negotiable
- A long-handled wooden or plastic spoon — for stirring
- A non-reactive pot for boiling down — stainless or enamel
- pH test strips — to check strength accurately
- A fresh raw egg or potato (optional) — the old-timer’s float test for strength
Keep vinegar nearby. It neutralizes spills fast and gives you peace of mind.
Step-by-Step Guide on How to Make Lye From Wood Ash
Step 1 – Collect and Sort Your Hardwood Ash
The ash decides everything. Choose it with care.
You want clean hardwood ash — oak, maple, ash, hickory, or fruit woods. These burn into ash rich in potassium, which gives you strong lye. Softwoods like pine make weak, resinous ash that won’t serve you well.
Never use ash from painted, stained, or pressure-treated wood. Those carry chemicals you don’t want anywhere near soap or skin.
Sift out the chunks. Pull away charcoal bits, nails, and unburned wood. You’re after fine, powdery gray ash that feels light and silky between gloved fingers.
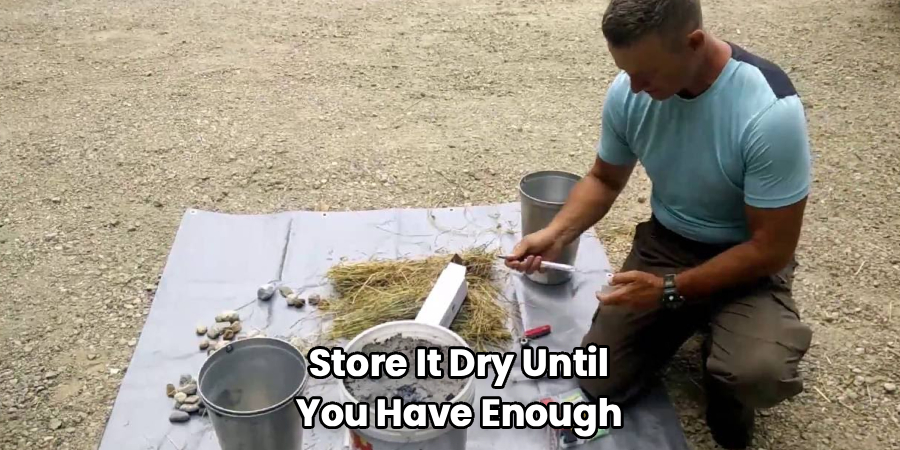
Store it dry until you have enough. A full five-gallon bucket of clean ash makes a worthwhile batch. Damp ash clumps and leaches poorly, so keep it covered.
Step 2 – Build Your Leaching Container
Now you build the vessel that pulls lye from the ash. This is the drip leach method, used for generations.
Take your wooden or food-grade plastic barrel and drill a small hole near the bottom edge. The lye water will drain through here, so place a container beneath to catch it.
Layer the filter bed from the bottom up. Start with clean gravel. Add a thick layer of straw next. Top the straw with a cloth.
This bed does two jobs. It holds the ash above the drain hole. And it strains out grit so your wood ash lye water runs cleaner.
Set the barrel on blocks or a stand. You need room beneath it for the collection container to sit and catch every drop.
Step 3 – Pack the Ash Bed
With your container ready, you load the ash.
Pour your sifted hardwood ash onto the filter bed. Pack it down gently but firmly with your gloved hands or the back of a spoon. You want it snug, not crushed solid.
Leave several inches of space at the top of the barrel. That gap holds the water you’ll pour in next.
Press the surface flat and even. An uneven bed sends water channeling down one side, and you’ll leach unevenly. A level surface pulls strength from the whole batch.
Learning how to make lye from wood ash comes down to this slow, patient leaching. The water needs time to soak through every particle and carry the potassium hydroxide out with it.
Take your time here. A well-packed bed rewards you later.
Step 4 – Add Soft Water Slowly
Water is the key that unlocks the ash. Use it wisely.
Pour soft water or rainwater over the ash bed slowly. Hard tap water carries minerals that fight the leaching, so avoid it if you can. Distilled water works in a pinch.
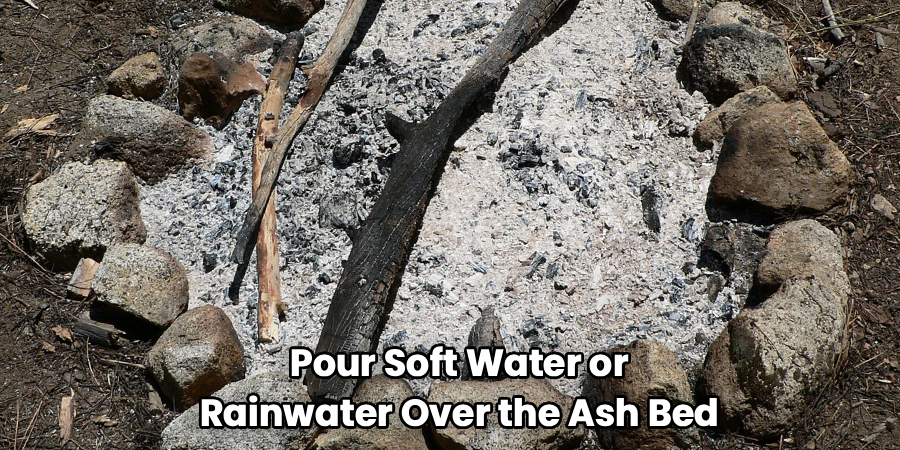
Add the water gradually, letting it sink in rather than flooding the surface. You’ll hear a soft hiss and crackle as the dry ash drinks it up. The surface darkens and settles.
Keep adding until water just covers the ash. Then stop. Let it sit and steep.
Don’t rush this. The longer the water rests in contact with the ash, the more potassium it dissolves. Many people let it steep for several hours, even overnight, before opening the drain.
Step 5 – Drain and Collect the Lye Water
This is the moment the ash gives up its strength.
Open the drain hole and let the liquid trickle into your collection container. It comes slow, a steady amber-to-brown drip. Resist the urge to force it. Slow leaching pulls more lye than a fast flush.
Watch the color. Strong wood ash lye water runs dark, like weak coffee or strong tea. Pale, clear liquid means a weak batch.
The smell hits you too — sharp, mineral, slightly soapy. That’s the caustic solution forming.
For more strength, pour the collected liquid back through the ash bed a second or third time. Each pass dissolves more potassium hydroxide and deepens the color. This recycling trick is how the old soap makers reached the strength they needed.
Step 6 – Test the Strength
A batch you can’t measure is a batch you can’t trust.
Two tests tell you where you stand. The first is the float test. Drop a fresh raw egg or a small potato into the lye water. If it floats with a quarter-sized patch breaking the surface, your lye is roughly soap-making strength. If it sinks, the solution is too weak.
The second test is more precise. Dip a pH test strip into the liquid. Strong lye reads very high — around 12 to 13 on the scale. That high pH confirms a true caustic solution.
Trust the strips over the egg for accuracy. The float test is a handy old gauge, but pH testing gives you a real number you can repeat batch after batch.
Step 7 – Concentrate by Boiling (Optional)
Sometimes your lye comes out too weak. Boiling fixes that.
Pour the lye water into a non-reactive pot — stainless steel or enamel only. Never use aluminum, which the caustic solution will eat through.
Heat it gently outdoors or under strong ventilation. As the water evaporates, the lye grows stronger and darker. Steam rises with that same sharp, mineral smell, so keep your goggles and gloves on and your face clear of the vapor.
Watch the volume drop. The liquid thickens and the color deepens toward a rich brown. Test the strength again as it reduces, since boiling concentrates it fast.
Stop when the float or pH test reads where you want it. Boiled too far, and you’ll crystallize the potassium into raw potash.
Step 8 – Store Your Lye Safely
Finished lye demands respect in storage.
Pour it into a glass or food-grade plastic container with a tight, clearly labeled lid. Write “LYE — CAUTION” in bold letters. This is a caustic solution that burns skin and eyes, so leave no room for a mistake.
Never store it in metal. The lye reacts and corrodes the container, weakening over time and risking a leak.
Keep it somewhere cool, dry, and far out of reach of children and pets. A high shelf in a locked cabinet works well.
Liquid lye loses strength as it sits and absorbs moisture from the air, so seal it tight and use it within a few months. Test the pH again before any project to confirm it still holds its punch.
Common Mistakes to Avoid
The most dangerous mistake is skipping safety gear. Lye is a true caustic that burns skin on contact and blinds eyes in seconds. Some beginners treat it casually because it’s homemade and “natural.” Nature made it no gentler. Wear goggles and heavy rubber gloves every single time, keep vinegar within reach to neutralize splashes, and work where children and pets can’t wander in.
Another common error is using the wrong wood. Softwood ash from pine or fir gives weak, resin-tainted lye. Ash from painted or pressure-treated lumber carries toxic chemicals that ruin any soap or finish. Stick to clean hardwood ash and nothing else.
Storing lye in metal is a quiet disaster. The solution attacks aluminum and other reactive metals, corroding the container and contaminating the lye. Use glass or food-grade plastic, always.
Many people also rush the leaching. They flood the ash and drain it fast, then wonder why their lye runs pale and weak. Slow steeping and multiple passes through the ash bed make all the difference.
Finally, skipping the pH test leaves you guessing. Test every batch so you know exactly what you’re working with.
Expert Tips
Run your collected liquid through the ash bed two or three times. Each pass deepens the color and strength far more than a single soak ever will. This recycling is the real secret behind strong, old-fashioned lye.
Save rainwater through the year just for leaching. Its softness pulls potassium far better than mineral-heavy tap water, and it costs you nothing.
Keep a logbook. Record the wood type, steeping time, number of passes, and final pH reading for each batch. After three or four batches, you’ll know your exact recipe for repeatable strength.
Warm your leaching water slightly before pouring. Warm water dissolves potassium faster than cold, cutting your steeping time and boosting your yield from the same amount of ash.
Frequently Asked Questions
What Kind of Wood Ash Makes the Strongest Lye?
Hardwood ash makes the strongest lye by far. Oak, hickory, maple, ash, and fruit woods burn into ash packed with potassium, which dissolves into a powerful caustic solution. Softwoods like pine and fir give weak, resin-heavy ash that disappoints. Always avoid ash from painted, stained, or pressure-treated wood, since those release toxic chemicals you don’t want in soap or on your skin.
How Do I Know When My Lye Is Strong Enough?
Use two tests together. Float a fresh egg or small potato in the liquid; if a quarter-sized piece floats above the surface, you’re near soap-making strength. For accuracy, dip a pH strip — strong lye reads around 12 to 13. Trust the pH reading most, since it gives a repeatable number. A weak batch can be boiled down or run through the ash again.
Is Homemade Wood Ash Lye Dangerous?
Yes, very. Homemade lye is a real caustic solution that burns skin and eyes on contact, the same as the store-bought kind. Being natural makes it no safer. Always wear goggles and heavy rubber gloves, work in a ventilated space, and keep vinegar nearby to neutralize any spills. Store it labeled and locked away from children and pets at all times.
Can I Use This Lye for Soap Making?
You can, with a caution. Wood ash lye is potassium hydroxide, which makes soft or liquid soap, not the hard bar soap that needs sodium hydroxide. Old-fashioned soft soap recipes call for exactly this kind of lye. Because homemade strength varies, test the pH carefully and expect to adjust your recipe. Many soap makers love it for its traditional, hands-on character.
How Long Does Homemade Lye Last?
Liquid wood ash lye weakens over time. It absorbs moisture and carbon dioxide from the air, which slowly cuts its strength. Stored in a tightly sealed glass or food-grade plastic container in a cool, dry spot, it stays usable for a few months. Always test the pH before a project to confirm it still holds its strength. For long storage, boil it down to dry potash instead.
Conclusion
The chemistry of your hearth is older than any store.
You’ve got the full path now. Sort clean hardwood ash. Build a leaching barrel. Pack the bed and steep it slow with soft water. Drain the dark lye water, run it through again for strength, and test it with an egg and a pH strip. Boil it down if you need more punch. Then store it safe and labeled.
Here’s what learning how to make lye from wood ash really gives you. It hands you a free, useful material from something you used to throw away. It opens the door to soap making and old craft. It builds the quiet confidence that comes from making what you need with your own hands.
Skip the safety gear, and you risk a burn. Rush the leaching, and you get weak results. Respect the process, and you join a craft centuries deep.
This week, save one bucket of clean hardwood ash and keep it dry. The first step is the simplest one. Will you take it?
