
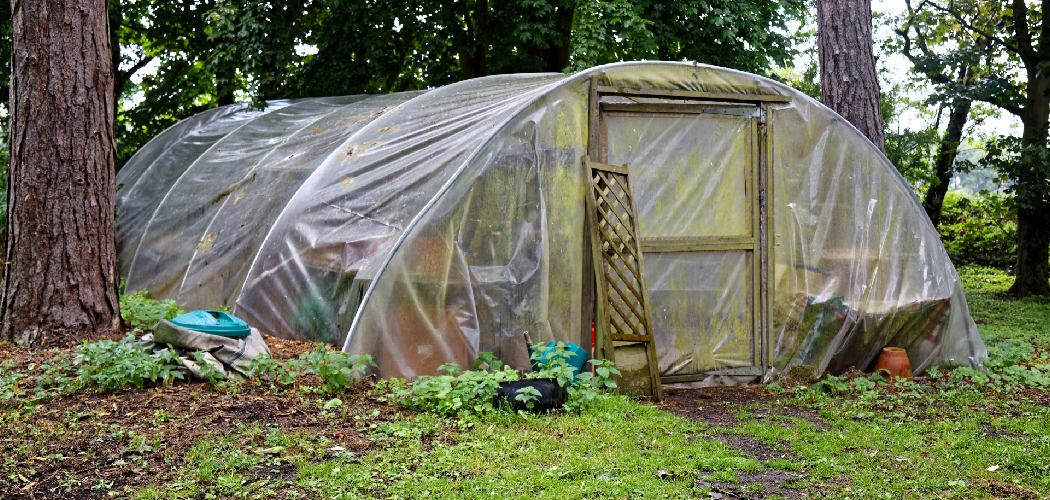
A greenhouse looks complicated. It isn’t.
It’s a box. A frame. A roof that lets light in. Strip away the mystery, and that’s all you’re really building.
Most beginners stall before they start. They picture engineering. They picture failure. They picture wasted lumber stacked in the garage.
That fear costs you a growing season.
Learning how to build a greenhouse out of wood is one of the most rewarding projects a DIYer can take on. It gives your seedlings shelter. It stretches your harvest into the cold months. And it teaches you real framing skills along the way.
Wood is forgiving. Wood is cheap. Wood lets you adjust as you go.
This guide walks you through every step — foundation to glazing — so you can frame, raise, and finish a sturdy wooden greenhouse that lasts for years.
Why This Matters
Plants don’t wait for you. The season ends whether you’re ready or not.
A greenhouse changes that. It buys you weeks on each end of the year. It protects tender starts from late frost. It blocks the wind that snaps young stems.
Building it yourself does more than save money — though it saves plenty. A kit costs hundreds. A custom shop build costs thousands. Your own wooden greenhouse frame costs a fraction of both.
But the real reward is skill.
You learn to square a frame. You learn to set a foundation. You learn to read a level and trust it. These are the same skills behind decks, sheds, and additions.
Build this once, and you stop fearing bigger projects. You start seeing them as boxes too. Ready to begin?
Tools and Materials You’ll Need
Lay everything out before the first cut. A clean start makes a clean build.
- Pressure-treated lumber — for the sill plate and any wood touching the ground
- Standard framing lumber (2x4s) — for walls, studs, and the ridge beam
- Polycarbonate panels or glazing panels — for the walls and roof that let light through
- Galvanized or coated screws — to resist rust in a damp environment
- Concrete blocks, pavers, or gravel — for a stable greenhouse foundation
- Hinges and a latch — for the door and vents
- Circular saw — for fast, straight cuts
- Cordless drill/driver — for driving screws and pilot holes
- Carpenter’s level (4-foot) — to keep everything plumb and true
- Speed square and tape measure — for accurate marking
- Work gloves and safety glasses — for every step
- Optional: a chalk line — to snap long, straight reference marks across your foundation fast
Sharp blades and charged batteries save hours. Check both before you start.
Step-by-Step Guide on How to Build a Greenhouse Out of Wood
Step 1 – Plan and Mark Your Layout
Start with a flat spot in full sun.
Watch the ground for a day. Note where shadows fall from trees, fences, and your house. Plants want six hours of light or more, so pick the brightest patch you have.
Now mark your footprint. Drive a stake at each corner and run string between them. Pull the string tight until it hums when you flick it.
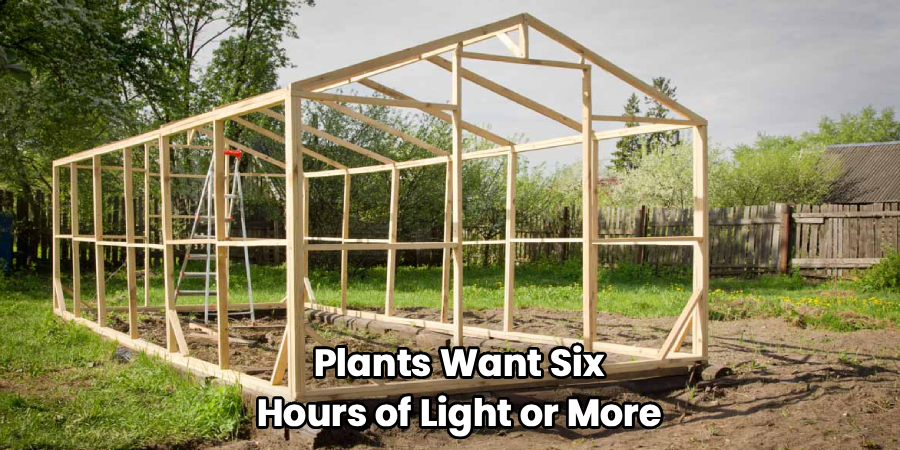
Check your square. Measure diagonally from corner to corner both ways. When the two measurements match, your layout is true. When they don’t, shift a stake until they do.
A common size for beginners is 8 by 10 feet — big enough to work inside, small enough to manage. Walk the space. Does it feel right? Adjust before you dig.
Step 2 – Build a Level Foundation
A greenhouse is only as straight as the ground beneath it.
Clear your marked area of grass and roots. Dig down a few inches and rake the soil flat. Run your level across it in every direction.
Lay your greenhouse foundation now. Set concrete blocks or pavers at each corner and along the sides, or spread a bed of compacted gravel for drainage. Press each block down and check it with the level again.
Here’s the cue that matters: the bubble sits dead center, every time, on every block. If one block rocks, add or remove gravel beneath it until it sits solid.
A foundation that drains keeps your pressure-treated sill plate dry. A foundation that’s level keeps your walls from leaning. Take your time here. Everything above depends on it.
Step 3 – Lay the Sill Plate
The sill plate ties your frame to the ground.
Cut your pressure-treated lumber to match each side of your foundation. Pressure-treated wood resists rot and bugs, which matters because this board sits closest to moisture.
Lay the boards flat along the perimeter, resting on your blocks or gravel. Butt the corners tight. Check the square again with your diagonal measurements — this is your last easy chance to fix it.
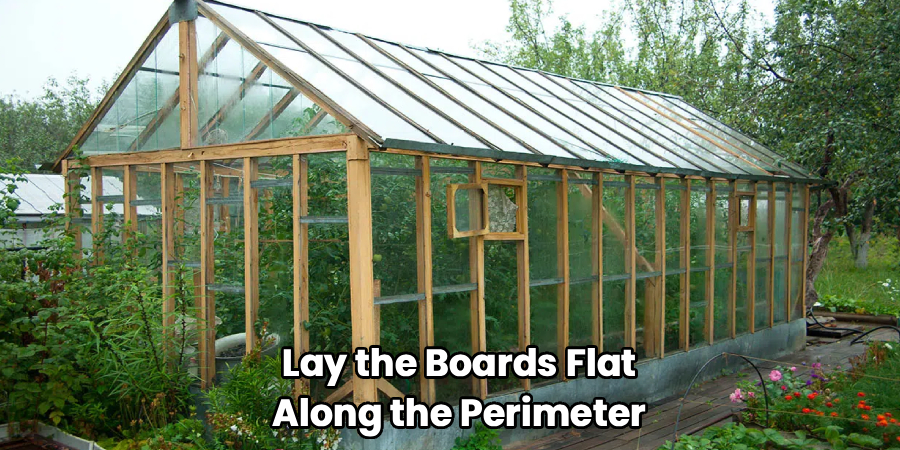
Anchor the sill plate down. Drive masonry anchors into concrete blocks, or stake it firmly into a gravel bed. Push hard on each corner when you finish. Nothing should shift.
Run your hand along the top edge. It should feel flat and continuous, with no gaps where boards meet. This frame is your launch pad for everything that follows.
Step 4 – Frame the Walls
Now the shape rises.
Build each wall flat on the ground first. Lay out your 2x4s, mark stud spacing every 16 or 24 inches, and screw them into a rectangle. Pilot holes stop the wood from splitting with a sharp crack.
Stand each wall up onto the sill plate. You’ll need a second pair of hands here — walls are awkward and want to tip. Hold one plumb with your level while a helper screws it down.
Listen for the solid thunk of a screw biting tight. A squeaky, spinning screw means stripped wood — back it out and move over an inch.
Frame an opening for your door on one end. Leave room for a vent up high on the opposite wall. Once all four walls stand and lock together at the corners, push on them. A good frame barely flexes.
Step 5 – Install the Ridge Beam and Roof Rafters
The roof gives your greenhouse its shape and sheds water and snow.
Set the ridge beam first. This is the long board that runs down the peak, the spine of your roof. Rest it on temporary supports at each gable end, centered above the walls, and check it dead level.
Cut your rafters with matching angles at both ends so they meet the ridge beam snug. A tight joint shows no daylight gap where wood meets wood.
Screw each rafter pair in place, working from both ends toward the middle. Space them to match your wall studs below for a frame that carries weight straight down.
Step back and sight along the peak. The ridge should run dead straight, with rafters marching evenly down both slopes. A sagging line means a loose joint somewhere — fix it now.
Step 6 – Attach the Glazing Panels
This is where light pours in.
Polycarbonate panels are the beginner’s best friend. They’re light, tough, and they won’t shatter like glass if a branch drops. Cut them with a fine-tooth blade for a clean edge that doesn’t crack.
Lay each panel over the frame and pre-drill your screw holes slightly oversized. Polycarbonate expands and contracts with heat, and snug holes crack under that movement.
Drive screws with rubber washers to seal each hole against rain. Snug, not crushed — overtighten, and you dimple the panel and crack the seal.
Work from the bottom up on the walls, overlapping panels like shingles so water sheds outward. Run your finger along each seam. It should feel smooth and tight. When sunlight glows through a finished wall, knowing how to build a greenhouse out of wood suddenly feels real.
Step 7 – Add Ventilation and the Door
Heat builds fast inside. Without ventilation, you cook your plants instead of growing them.
Frame a vent opening near the roof peak, where hot air collects. Cut a simple flap from a spare panel, hinge it at the top, and add a prop stick or an automatic vent arm to hold it open.
Hang your door next. Build it from leftover 2x4s and a glazing panel, then mount it on sturdy hinges. Swing it a few times. It should glide without scraping the frame or sticking at the latch.
Add a latch that holds firm against wind gusts. A door that bangs open in a storm lets cold rush in and panels rattle loose.
Cross-ventilation is the goal: cool air low, hot air out the top. That airflow is the heartbeat of how to build a greenhouse out of wood that plants actually thrive in.
Step 8 – Seal, Finish, and Inspect
The build is up. Now you make it last.
Walk the whole structure with a tube of exterior sealant. Run a bead along every seam where panels meet wood and where walls meet the sill plate. You’re closing the tiny gaps that let in drafts and drips.
Treat any exposed framing lumber with an outdoor wood sealer or paint. This shields it from the constant humidity inside a greenhouse, which rots untreated wood faster than weather outside ever could.
Now inspect like an owner. Push on every wall. Wiggle the door. Tug a few panels. Look for daylight where there shouldn’t be any.
Tighten loose screws. Add sealant to gaps you missed. A solid greenhouse feels rigid underfoot and quiet in the wind — no rattles, no flex, no drafts on your hand.
Common Mistakes to Avoid
The biggest mistake happens before any wood gets cut: skipping the level foundation. Beginners rush to frame because that’s the exciting part. But a foundation that’s off by an inch throws every wall out of plumb, and the error grows as you build up. By the roof, nothing fits. Spend the extra hour leveling your blocks. It saves you a day of frustration later.
Next is ignoring wood-to-ground contact. Untreated lumber resting on damp soil rots within a season or two. Always use pressure-treated lumber for the sill plate and anything touching the foundation. Save the standard framing wood for up high where it stays dry.
Another trap is overtightening screws on polycarbonate panels. Crank them too hard and you crack the panel or crush the seal, and rain leaks straight through. Drive screws snug with rubber washers, then stop.
Then there’s forgetting ventilation. A sealed greenhouse turns into an oven on a sunny spring day, and heat scorches the plants you worked to protect. Plan vents from the start, not as an afterthought.
Finally, beginners skip the diagonal square check. Walls that look fine to the eye can be badly skewed. Measure corner to corner, every time.
Expert Tips
Orient the long side of your greenhouse to face south if you can. That single choice captures the most winter light and warms the space for free.
Buy your glazing panels first, then design the frame to fit standard panel sizes. Cutting fewer panels means fewer weak seams and less waste.
Leave a small gap under the door on purpose. It pulls cool air in at the bottom while your peak vent pushes hot air out — natural airflow with no fan or electricity.
Pre-drill every hole near a board’s end. Wood splits easiest there, and a split stud weakens the whole wall.
Keep a bucket of gravel handy during the foundation stage. Small adjustments under one block are faster than re-digging an entire trench.
And paint or seal your lumber before assembly when you can reach every face. Once it’s screwed together, those hidden surfaces stay raw.
Frequently Asked Questions
What Is the Best Wood for a Greenhouse Frame?
Cedar and redwood are top choices because they naturally resist rot and insects, though they cost more. For a budget build, use pressure-treated lumber for any wood touching the ground and standard framing pine for the upper structure, sealed with exterior paint. The key is keeping moisture out, since the humid air inside a greenhouse rots untreated wood faster than you’d expect.
Do I Need a Concrete Foundation for a Wooden Greenhouse?
No, a full concrete slab isn’t required for most home greenhouses. A level bed of compacted gravel or concrete blocks set at the corners and along the sides works well and drains better. The goal is a flat, stable, well-draining base that keeps your pressure-treated sill plate off wet soil. Reserve a poured slab for large or permanent structures.
Should I Use Glass or Polycarbonate Panels?
For beginners, polycarbonate panels win. They’re lightweight, shatter-resistant, and far easier to cut and install than glass. They also insulate better, holding heat through cold nights. Glass offers superior clarity and lasts longer, but it’s heavy, fragile, and demands precise framing. If you want a forgiving, safe, and affordable build, choose polycarbonate glazing panels every time.
How Do I Keep My Greenhouse From Overheating?
Ventilation is your answer. Install a vent near the roof peak where hot air rises, and create an air inlet low on the opposite side or under the door. This cross-flow pulls cool air in and pushes hot air out naturally. On very hot days, add shade cloth over the roof or open the door. Good airflow protects your plants from cooking.
How Long Does It Take to Build a Wooden Greenhouse?
A simple 8-by-10-foot wooden greenhouse takes a confident beginner about two to four weekends. The foundation and framing go quickly, but leveling, glazing, and sealing reward patience. Working with a helper speeds up wall-raising and roof work considerably. Don’t rush the foundation or the square checks — time spent there saves you from fixing crooked walls later.
Conclusion
A greenhouse is just a box that loves the sun. You’ve now seen every part of it.
Pick a bright spot. Level the foundation. Lay the pressure-treated sill plate. Frame the walls. Set the ridge beam. Attach the panels. Add a vent and a door. Seal it tight.
Each step is small. None of them is hard. Together they raise a structure that feeds you for years.
Skip the level foundation, and your walls lean. Skip the ventilation, and your plants cook. Skip the diagonal check, and nothing fits. Those shortcuts feel faster. They cost you more in the end.
Knowing how to build a greenhouse out of wood gives you something a kit never can: the skill to build the next thing, and the one after that. A box becomes a shed. A shed becomes a workshop. It all starts here.
This weekend, mark out one corner. Drive one stake. Measure one diagonal.
What will you grow first?
