
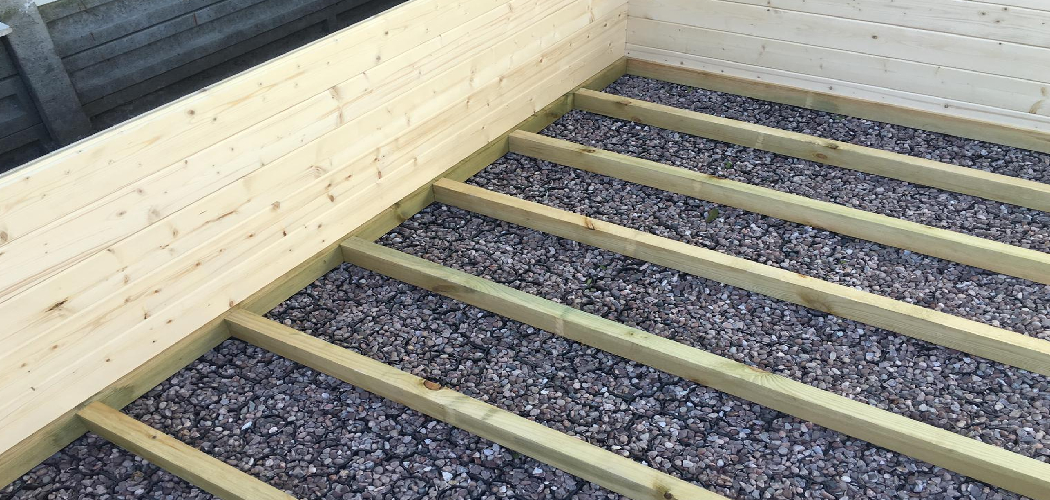
Your shed is only as strong as what sits beneath it.
Skip the base, and you’ll learn this the hard way. The floor warps. The doors stick. Damp creeps up through the boards. Within a year, a shed set straight on the dirt starts to rot from the bottom up.
A solid wooden base stops all of it. It lifts the shed off wet ground. It spreads the weight evenly. It keeps the whole structure square and dry for decades.
Learning how to build a wooden base for a garden shed is one of the most useful projects a beginner can take on. You need a few treated boards. Some basic tools. A flat patch of ground.
This guide walks you through every measurement, cut, and check — so you can build a level, lasting foundation that protects your shed from day one.
Why This Matters
Most shed failures start at the bottom.
A weak foundation costs you more than money. It costs you the whole shed. Untreated wood on bare soil wicks up moisture. The floor rots. The frame twists. The repair bill climbs fast.
A proper base prevents that. It’s cheap insurance for an expensive structure.
Building it yourself does three things. It saves you the cost of hiring a contractor. It teaches you to work with pressure-treated lumber and floor framing. And it gives you confidence that the next outdoor woodworking project won’t feel so daunting.
You learn to measure square. You learn to level across distance. You learn to join timber that carries real weight.
These skills carry forward. Build this base well, and you’ve built the foundation for every project that follows.
Ready to give your shed a base that lasts?
Tools and Materials You’ll Need
Gather everything before you start. A clean setup means fewer trips to the shed midway through.
- Pressure-treated timber (4×2 or 4×4) — for the perimeter frame and joists
- Gravel or hardcore — to form a free-draining sub-base under the frame
- Exterior wood screws (3-inch, coated) — to resist rust outdoors
- Galvanized framing brackets — for stronger joist connections
- Damp-proof membrane or DPC strip — to block ground moisture
- Circular saw or hand saw — for square, clean cuts
- Cordless drill/driver — for pilot holes and driving screws
- Spirit level (long, 4-foot) — to check level across the frame
- Tape measure and carpenter’s square — for accurate marking
- Shovel and garden rake — to clear and grade the ground
- String line and wooden pegs — to mark a square layout
- Optional: a laser level — to set level fast across a wide base
Sharp blades and a charged battery save you hours. Check both first.
Step-by-Step Guide on How to Build a Wooden Base for a Garden Shed
Step 1 – Measure and Mark the Site
Start with the ground, not the timber.
Measure your shed’s footprint. Add the exact dimensions to your plan, then mark them on the ground using pegs and string. Run the string tight between four corner pegs to outline the base.
Now check it’s square. Measure both diagonals corner to corner. When the two measurements match, your layout is true. If they differ, shift the pegs until they line up.
Look down the string lines. They should run dead straight, with no sag or curve. A crooked outline now means a crooked shed later.
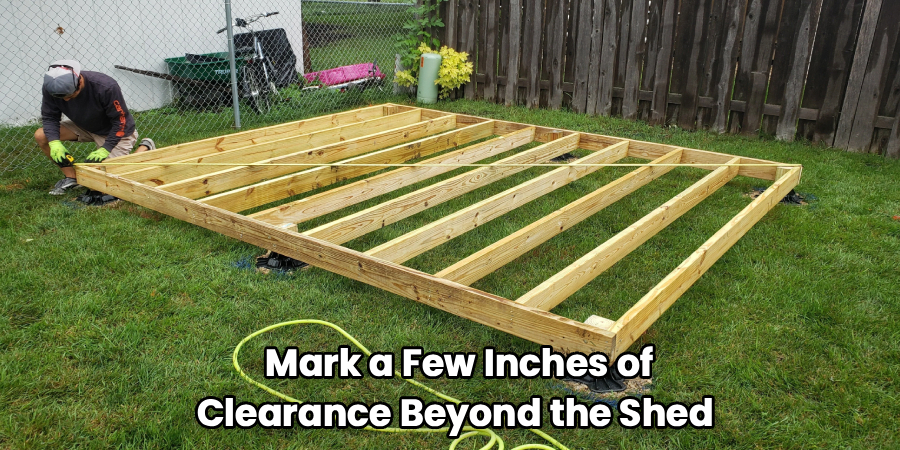
Mark a few inches of clearance beyond the shed walls on each side. That overhang lets rain drip clear of the timber instead of soaking it.
Step 2 – Clear and Level the Ground
Flat ground is everything here.
Strip away grass, roots, and loose topsoil inside your marked area. Dig down a few inches until you hit firm, stable earth. Rake it smooth.
Now check the slope. Lay your spirit level across a straight board set on the soil. Watch the bubble. If it drifts to one side, that’s your low spot. Shave the high ground or pack the low.
You want the whole area level, or sloped a fraction for drainage. A base built on a tilt loads one corner harder than the rest.
Press your boot across the surface. It should feel firm and even, with no soft, spongy patches. Spongy soil sinks under weight and pulls your frame out of true.
Step 3 – Lay a Gravel Sub-Base
Gravel is your defense against damp.
Spread a layer of gravel or crushed hardcore across the cleared ground, about two to three inches deep. This sub-base lets water drain away instead of pooling under your timber.
Rake it flat, then tamp it down firmly. A compacted gravel base feels solid underfoot, almost like packed stone. Loose gravel shifts and crunches — keep tamping until that crunch goes quiet.
Check it with your level again across the whole area. The surface of the gravel should sit even, edge to edge.
This step is where many beginners get lazy. Don’t. A free-draining gravel base is what keeps moisture from ever reaching your wooden frame. Skip it, and the damp finds a way in.
Step 4 – Cut the Perimeter Frame
This frame sets the shape of everything above it.
Cut your pressure-treated timber to match your shed’s footprint. Cut the two long sides and two short ends, measuring twice before each cut. A speed square keeps your marks straight across the board.
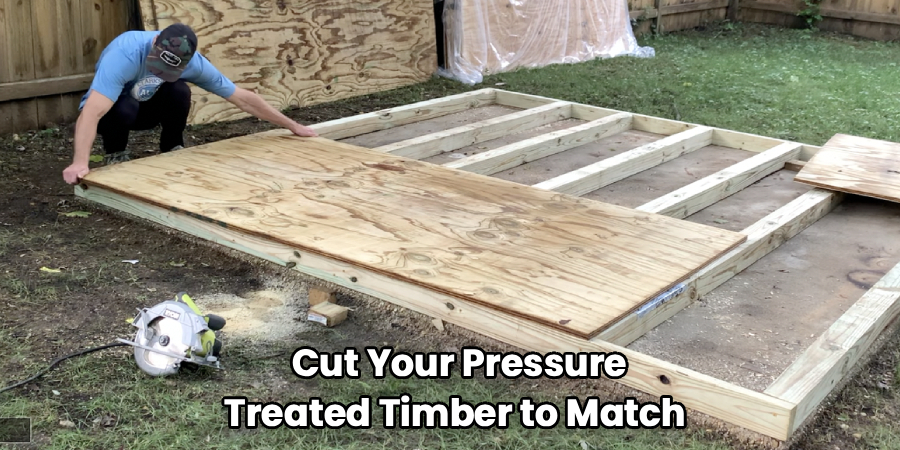
Listen as the saw works. A smooth, steady whir means a clean cut. A straining, bogging sound means you’re forcing it — ease off and let the blade do the work.
Lay the four pieces out on the gravel in their final shape. Knowing how to build a wooden base for a garden shed starts with a perimeter that sits perfectly square.
Run your hand along each cut end. It should feel flat and true, with no splinters tearing loose. Stack the pieces ready to join.
Step 5 – Assemble and Square the Frame
Now the frame comes together.
Join the corners with coated screws and galvanized brackets. Pre-drill each hole first. Pilot holes stop the timber splitting with that sharp cracking sound you never want to hear near a load-bearing joint.
Drive your screws home and add a bracket at each corner for extra strength. The frame should feel rigid once joined, not loose or wobbly.
Check square again. Measure both diagonals. Equal numbers mean a true rectangle. Adjust before you fix anything down.
Lay your level along each side and across the middle. The bubble should center every time. A frame that’s level now saves you endless trouble later. Mismatched corners leave a shed that leans, and doors that never quite close.
Step 6 – Add the Floor Joists
Joists carry the weight of the floor.
Cut your joists to fit snugly inside the perimeter frame. Space them evenly across the width, usually around 16 inches apart. Closer spacing makes a stronger, stiffer floor.
Fix each joist with brackets and screws. Pre-drill, then drive the screws firm. Tug each joist when you finish. A solid joist doesn’t budge under your hand.
Sight down the row of joists from one end. They should march evenly across the frame like rungs on a ladder. Uneven spacing or a bowed joist shows up as a bounce in the finished floor.
Lay your level across the tops of all the joists at once. Every top edge should sit flush. A high joist leaves a bump under the shed floor.
Step 7 – Lay the Damp-Proof Membrane
Moisture is the slow killer of timber.
Roll a damp-proof membrane across the top of your frame, or lay a DPC strip along each timber that touches the ground. This barrier blocks ground moisture from creeping up into the wood.
Smooth it flat so no creases trap water. Trim any excess that hangs over the edges.
This step takes minutes, but it adds years to your shed foundation. Pressure-treated lumber resists rot well, yet a damp-proof layer gives it a second line of defense.
Run your fingers across the membrane. It should lie tight and smooth against the timber, with no gaps or bunching. A loose, wrinkled layer lets damp pool exactly where you don’t want it.
Step 8 – Fix the Floor Deck
The deck turns your frame into a floor.
Lay your treated floorboards or sheets across the joists, running them at right angles to the joists below. This crossing pattern locks the whole base together and stops flexing.
Screw the boards down into every joist. Pre-drill near the ends to avoid splits. Leave a tiny gap between boards for the timber to expand in wet weather.
Walk across the finished deck. It should feel rock-solid, with no bounce, creak, or give underfoot. A springy spot means a missed screw or a joist set too far apart.
Run your palm over the surface. It should feel even and flat, ready for the shed walls to land square on top.
Step 9 – Check Level and Secure the Base
The final checks matter most.
Lay your level across the deck in several directions — corner to corner, side to side, and across the middle. The bubble should center every time. This is your last chance to catch a low spot before the shed goes up.
If the base sits on soft ground, anchor it. Drive ground stakes or fix the frame to concrete pads at each corner. A secured base won’t shift, sink, or lift in high wind.
Push hard against one corner of the finished base. It shouldn’t rock, slide, or twist. That stillness tells you the build is sound.
A well-built wooden base for a garden shed gives you a flat, dry, square platform — exactly what your shed needs to last.
Common Mistakes to Avoid
The most common mistake is building straight on bare soil. Beginners skip the gravel sub-base to save time and money, and the damp finds its way up within a single season. Soil holds water against the timber, and even treated wood eventually rots when it never gets to dry out. Always lay a free-draining gravel base first.
Next is failing to check square. If you join the perimeter frame without measuring the diagonals, you end up with a parallelogram instead of a rectangle. The shed walls then sit out of line, the roof twists, and the doors never close cleanly. Measure both diagonals and match them before fixing anything down.
Another trap is skipping pilot holes. Driving screws straight into dry, treated timber splits the wood with a crack, and a split board near a joint loses most of its strength. Spend the extra minute and pre-drill every screw.
Then there’s spacing joists too far apart. Wide gaps leave a bouncy, weak floor that sags under stored weight. Keep joists around 16 inches apart.
Finally, beginners ignore the slope. A base built on a tilt loads one corner harder, and over time that corner sinks.
Expert Tips
Build your base a touch larger than the shed footprint, then let the walls sit slightly inset. That small overhang lets rainwater drip clear of the timber instead of running down onto it.
Use galvanized brackets at every joist connection, not just the corners. They cost a little more, but they hold the frame rigid far better than screws alone, and they won’t rust out in a few wet winters.
Treat every fresh cut end. Pressure-treated lumber loses its protection where you saw through it, so brush an end-grain preservative onto each cut before assembly.
Set the base on concrete pads if your ground stays wet. Pads lift the timber clear of standing water and make leveling far easier.
And before the shed goes up, weigh the empty base down and check it once more for movement. Better to find a soft spot now than after the walls are standing.
Frequently Asked Questions
What Is the Best Wood for a Shed Base?
Pressure-treated lumber is the best choice for a shed base, since it resists rot, insects, and moisture far better than untreated timber. Look for timber rated for ground contact if any part touches the soil. For the floor deck, treated plywood or treated floorboards work well. Always brush preservative onto fresh cut ends, as sawing through removes the factory protection at that point.
Do I Need a Gravel Base Under a Wooden Shed Base?
Yes, a gravel sub-base makes a real difference. It lets water drain away instead of pooling against your timber, which is the main cause of rot in shed foundations. Spread two to three inches of crushed gravel or hardcore, then tamp it firm and level. This free-draining layer keeps moisture away from the wood and gives the frame a stable, even surface to sit on.
How Level Does a Shed Base Need to Be?
A shed base should be as level as you can make it, ideally within a quarter inch across its length. An uneven base loads one corner harder than the rest, which causes sinking, twisting, and doors that won’t close. Check level in several directions with a long spirit level — corner to corner, side to side, and across the middle. A laser level makes this faster across a wide base.
How Far Apart Should Shed Floor Joists Be?
Space your floor joists around 16 inches apart for most garden sheds. This spacing gives a strong, stiff floor that won’t bounce or sag under stored weight. For heavier loads, like a workshop with machinery, move the joists closer, around 12 inches apart. Fix each joist with galvanized brackets and screws, and check that every joist top sits flush before you lay the deck.
Can I Build a Shed Base on Sloping Ground?
Yes, but you’ll need to level it first. Dig into the high side and build up the low side, or use concrete pads of different heights to bring the frame level. A skid foundation with treated runners also works well on a gentle slope. Whatever method you choose, the finished base must sit level. A shed built on a tilt sinks and twists over time.
Conclusion
A shed base is just a flat, dry, square platform. You’ve now seen every part of building one.
Mark your site. Level the ground. Lay the gravel. Cut the frame. Square it true. Add the joists. Block the damp. Fix the deck. Check it level.
Each step is small. None of them is hard. Together they build a foundation that protects a shed worth far more than the timber it took to make.
Skip the gravel, and the damp creeps in. Skip the square check, and the doors stick. Skip the pilot holes, and the wood splits. Those shortcuts feel faster. They cost you the whole shed in the end.
Knowing how to build a wooden base for a garden shed gives you something a quick fix never can: a structure that stays dry, level, and solid for decades, and the skill to build the next project with confidence.
This weekend, measure your site. Drive one peg. Make one cut.
What will you build on top of it?
