
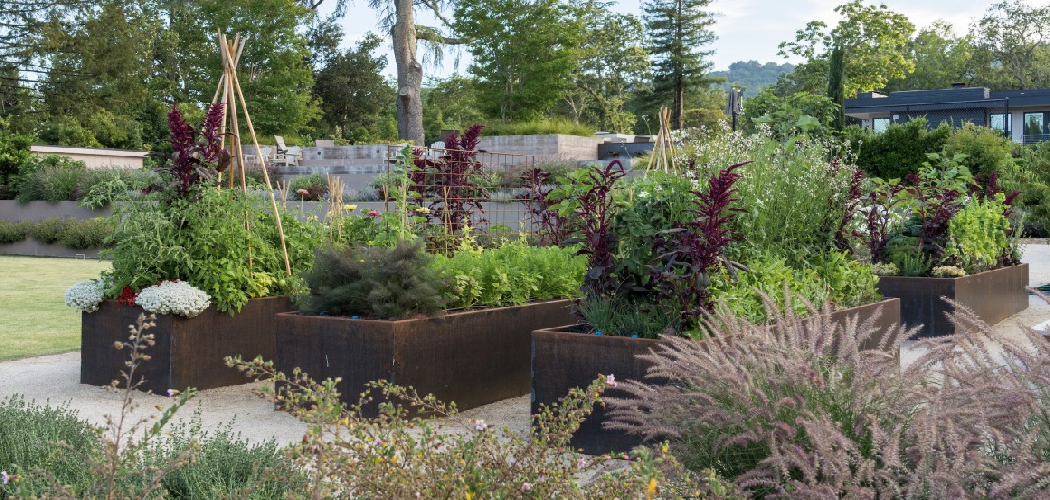
Your tomatoes are about to fall over.
Maybe not today. But soon. The plant grows fast. The fruit grows heavy. The stems bend, then snap.
Store-bought wire cages rust, bend, and collapse by midsummer. You buy them again next year. And the year after that.

There’s a better way. You can build your own.
Wood is cheap. Wood is sturdy. Wood looks good in a garden bed. A wooden plant support lasts seasons longer than flimsy wire, and you make it exactly the size your plants need.
This guide walks you through how to make tomato cages from wood, step by step, from a stack of raw cedar to a finished cage strong enough to hold a loaded plant all summer long.
Why This Matters
A pack of wire cages costs you money every spring. They never last.
Building your own changes that. You spend a little once. You get a cage that holds up for years.
But the savings are only the start.
You learn to measure, cut, and join wood. You gain confidence with tools you were nervous to touch. You finish a real project and stand back proud.
This is a perfect first build. The cuts are simple. The joints are forgiving. A mistake here costs you a scrap board, not a heartbreak.
And the skills carry forward. Once you can build a cage, you can build a garden trellis, a raised bed, or a row of DIY garden stakes. Each outdoor wood project teaches the next.
You start small. You finish strong.
Tools and Materials You’ll Need
Gather everything first. A build goes smoothly when you’re not hunting for a missing screw halfway through.
- Cedar or another rot-resistant wood — cedar, redwood, or treated lumber for outdoor use
- 1×2 or 2×2 lumber — for the vertical legs and horizontal rungs
- A handsaw or power saw — for clean, square cuts
- A drill and exterior screws — galvanized or coated to resist rust
- A tape measure and pencil — for accurate marking
- A speed square or carpenter’s square — to keep corners true
- Medium-grit sandpaper — to smooth rough edges
- Wood glue (optional) — for extra-strong joints alongside the screws
- Exterior wood sealant or stain — to protect the cage from weather
Keep a clamp or two nearby if you have them. They hold pieces steady so your hands stay free while you drive screws.
Step-by-Step Guide on How to Make Tomato Cages From Wood
Step 1 – Plan Your Cage Size
Start with the plant, not the wood.
A full-grown tomato plant stands tall. Indeterminate varieties climb four to six feet and spread wide. Your cage has to hold all that weight without leaning.
Plan for a cage around five feet tall and one foot square at the base. That gives the roots room and the stems support.
Sketch it on paper first. Mark your four vertical legs and the horizontal rungs that connect them. Decide how many rungs you want — three or four spaced evenly up the legs works well.
Learning how to make tomato cages from wood begins right here, with a clear plan. Measure your garden spacing too, so each finished cedar tomato cage fits its bed without crowding the next plant.
Step 2 – Cut the Vertical Legs
Now you make the bones of the cage.
Measure four lengths of 2×2 cedar for the legs. Five feet each is a solid choice. Mark each cut line with your pencil and square so the ends sit flat and true.
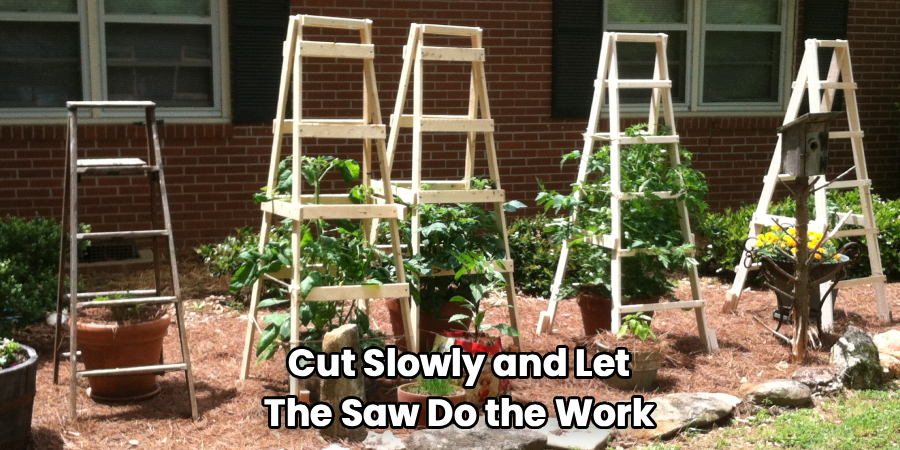
Cut slowly and let the saw do the work. You’ll hear a steady, even rasp when the blade tracks straight. A screeching, jumping blade means you’re forcing it — ease off.
Stack the four legs side by side after cutting. Line up the ends. They should match within a hair. If one runs long, trim it now.
Sharpen the bottom end of each leg into a rough point if you want to push the cage into soft soil. A few angled cuts do the job.
Step 3 – Cut the Horizontal Rungs
The rungs tie the legs together and give the plant something to lean on.
Decide your rung length based on your base width. For a one-foot-square cage, cut your 1×2 rungs to around twelve inches. You’ll need four rungs per level, so multiply by the number of levels you planned.
Cut them all in one batch. Use a stop block — a scrap clamped to your work surface — so every rung comes out the exact same length. Matching rungs keep the cage square.
Run your fingers along each cut end. Rough, splintery edges catch on plants and skin. A quick pass with sandpaper leaves them smooth and clean to the touch.
Step 4 – Sand Every Piece
Don’t skip this. Smooth wood lasts longer and works better.
Take your medium-grit sandpaper to every leg and rung. Knock down the sharp corners. Smooth the saw marks. Round the cut ends slightly.
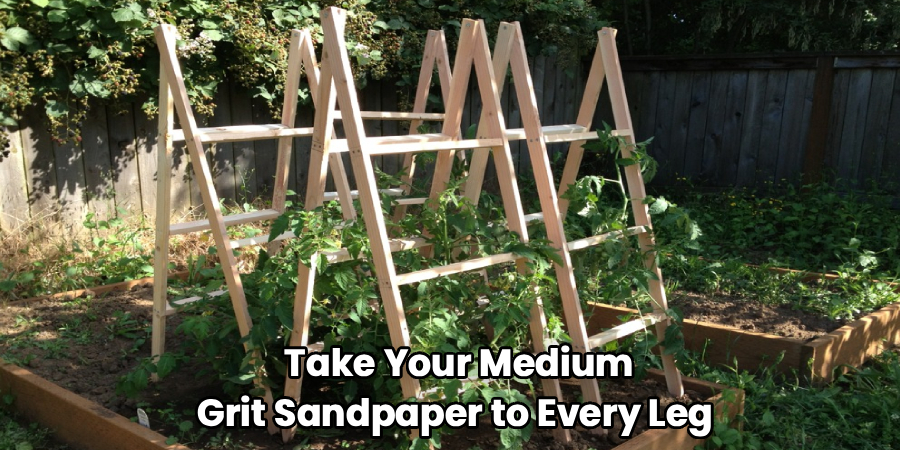
You’ll feel the difference under your hand — rough turns to soft, dusty-smooth in a few strokes. The wood lightens in color where you sand.
This matters for more than comfort. Splinters and rough edges trap moisture and invite rot. A smooth surface sheds water and takes sealant evenly later.
Wipe each piece down with a dry cloth when you finish. You want the dust gone before you glue or stain. Clean wood bonds better and looks far sharper in the finished cage.
Step 5 – Build the First Side Panel
Time to join wood to wood.
Lay two legs flat and parallel on your work surface, spaced one foot apart. This is one side of the cage. Place your rungs across them at your planned heights — say, twelve, thirty, and forty-eight inches up from the bottom.
Check each corner with your square. The rungs must sit at a true ninety degrees to the legs, or the whole cage twists.
Add a dab of wood glue where each rung meets a leg if you want extra hold. Then drive two exterior screws through the rung into the leg.
You’ll feel the screw bite and pull tight. Stop when the head sits flush. Over-driving splits the wood.
Step 6 – Build the Matching Side and Join Them
Repeat the last step to make a second identical side panel.
Lay it next to the first and compare them. The rung heights should line up exactly. If they don’t, back out a screw and adjust now — it only gets harder later.
Stand both panels upright, facing each other, one foot apart. This is where a clamp or a helper earns their keep.
Connect the two panels with your remaining rungs, screwing them into the front and back legs at the same heights. The frame becomes a box. It stops wobbling and starts feeling solid.
Knowing how to make tomato cages from wood really comes down to this moment — when four flat sides lock together into one sturdy, freestanding cube that holds its shape under pressure.
Step 7 – Reinforce and Square the Frame
A cage that racks sideways won’t survive a storm.
Push gently on the top of the frame from one corner. Does it lean and spring back? That’s racking, and you need to stop it.
Add a diagonal brace across one or two sides. Cut a length of 1×2 to run corner to corner, mark where it crosses the legs, and screw it in place. The diagonal locks the square and kills the wobble.
Check the whole frame with your square again. Measure both diagonals across the top — when they match, your cage is truly square.
Give it a firm shake. A well-built cage stays silent and stiff. Creaks and give mean a loose screw waiting to fail. Tighten anything that moves.
Step 8 – Seal and Finish the Wood
Bare wood in the garden weathers fast. Protect it.
Brush on an exterior wood sealant or a stain rated for outdoor use. Coat every surface, paying special attention to the cut ends and the bottoms of the legs, where moisture creeps in first.
You’ll watch the wood darken and richen as the finish soaks in. Cedar deepens to a warm, honeyed brown.
Let the first coat dry fully — usually a few hours — then add a second. Two coats outlast one by seasons.
Skip any finish near the soil line if you grow strictly organic, or choose a food-safe, plant-friendly product. Let the cage cure a day or two before it touches your plants.
Common Mistakes to Avoid
The biggest mistake is building too small. Beginners eyeball a young seedling and build a cage to match it. Then July arrives, the plant explodes, and the cage vanishes under a jungle of stems. Always build for the full-grown size — tall and wide — not the seedling in front of you.
The second mistake is using the wrong wood. Cheap pine looks fine in spring and rots out by fall. It sits in wet soil, soaks up water, and crumbles. Spend a little more on cedar, redwood, or properly treated lumber. A rot-resistant cedar tomato cage lasts many seasons; untreated pine barely lasts one.
A third common error is ignoring square corners. People slap rungs on by eye and end up with a leaning, twisted frame that racks in the first strong wind. Use your square at every joint. Measure the diagonals. A square cage stands; a crooked one folds.
Many builders also over-drive their screws, splitting the wood right at the joint. Drive slowly and stop when the head sits flush.
Finally, skipping the sealant invites rot, splinters, and a short life. A few minutes with a brush adds years to your build.
Expert Tips
Drill a small pilot hole before every screw. Cedar splits easily, especially near the ends, and a pilot hole stops the crack before it starts. This one habit saves more boards than any other.
Build your cages in batches. Once you’re set up with cuts and a drill, making five cages takes far less than five times the effort of making one. Cut all your legs at once, all your rungs at once, then assemble.
Soak the bottom few inches of each leg in extra sealant overnight. The end grain drinks it up, and that’s exactly where rot attacks first.
Store your cages flat and dry over winter. Sun and frost age them faster than the growing season does. A little shelter doubles their working life.
Frequently Asked Questions
What Is the Best Wood for Tomato Cages?
Cedar is the top choice. It naturally resists rot and insects, so it survives wet soil far longer than other woods. Redwood works just as well if you can find it. Pressure-treated lumber is a solid budget option for outdoor wood projects, though some gardeners avoid it near edible plants. Steer clear of untreated pine, which soaks up water and breaks down within a single season.
How Tall Should a Wooden Tomato Cage Be?
Build it around five feet tall for most varieties. Indeterminate tomatoes climb four to six feet, so they need real height to stay supported. Determinate, bushier types can manage with a shorter cage near three to four feet. Remember that a foot or so of leg sinks into the soil for stability, so add that length to your cut measurements when you plan.
Do I Need to Seal or Stain My Tomato Cage?
Yes, sealing matters. Bare wood in the garden faces constant moisture, sun, and soil contact, all of which speed up rot. A coat or two of exterior sealant or stain seals out water and adds years of life. Focus on the cut ends and the leg bottoms, which absorb moisture fastest. If you grow organically, choose a plant-safe, food-grade finish.
How Much Does It Cost to Build a Wooden Tomato Cage?
A single cedar cage usually costs less than a sturdy store-bought metal one, and it lasts far longer. Exact cost depends on lumber prices in your area and how many cages you build at once. Buying wood in bulk and building a batch drops the price per cage noticeably. Over a few seasons, the homemade cage easily pays for itself.
Can Beginners Build a Wooden Tomato Cage?
Absolutely. This is one of the friendliest outdoor wood projects for a first-timer. The cuts are straight and simple, the joints are forgiving, and a small slip costs only a scrap board. You need just a saw, a drill, and a square. Take your time, check your corners, and you’ll finish a sturdy cage you can trust. Each build makes the next one easier.
Conclusion
Your tomatoes don’t have to fall over again.
You’ve got the full path now. Plan the size for a full-grown plant. Cut your cedar legs and rungs. Sand them smooth. Build two side panels, join them into a box, and brace the frame square. Then seal the wood and let it cure.
That’s it. A cage built to last.
Here’s what learning how to make tomato cages from wood really gives you. It saves you money every spring. It hands you a wooden plant support far stronger than rusting wire. And it builds the quiet confidence that comes from making something solid with your own hands.
Build too small, and the plant swallows the cage. Skip the sealant, and the wood rots. Respect the steps, and you’ll get years of service from a single afternoon’s work.
This weekend, cut just four legs and stand them up. The first cut is the hardest part. Will you make it?
