
A sagging, gapped, or rattling screen door wastes your time and your money. Hung wrong, it lets in bugs, drags on the threshold, and strains the hinges until they tear loose. Hung right, it swings clean, latches with a soft click, and lasts for decades. Learning how to hang a wood screen door takes one afternoon, a few common tools, and a steady approach to measuring and alignment.
You don’t need a workshop or years of carpentry behind you. You need patience and the right sequence. This guide walks you through every step — from measuring your door frame to setting the screen door hinges and final adjustments — so your finished install looks sharp, swings smooth, and seals tight.
Why Learning This Matters
Hiring a contractor to hang a single exterior door runs $150 to $400 in labor alone. Do it yourself and you keep that money. You also gain a skill that transfers to interior doors, gates, and cabinet work.
A poorly hung screen door fails fast. The wood twists, the hinges pull, and the latch stops catching. Within a season you’re back to square one. Doing it right the first time protects the door and the frame it hangs in.
There’s confidence in this too. Once you’ve measured a door frame, mortised a hinge, and watched the door swing true, the next install feels routine. You stop guessing and start knowing. That shift is worth more than the saved cash.
Tools and Materials You’ll Need
Gather everything before you start. Stopping mid-install to find a tool throws off your rhythm and your measurements.
- Wood screen door — sized to your opening, or trimmed to fit
- Three screen door hinges — 3-inch butt hinges for standard doors
- Tape measure — for accurate door frame readings
- Pencil — sharp, for marking hinge locations
- Wood chisel — 1-inch width for clean hinge mortises
- Cordless drill — with pilot and driver bits
- Screws — matched to your hinge holes
- Level — to check plumb and alignment
- Wood shims — for spacing and gap control
- Block plane — to trim the door edge if needed
- Utility knife — to score mortise outlines
- Safety glasses — wear them every time
- Self-closing hinge or pneumatic closer (optional) — pulls the door shut automatically and stops slamming
Step-by-Step Guide on How to Hang a Wood Screen Door
Step 1 – Measure the Door Frame
Start with numbers. Pull your tape measure across the door frame at the top, middle, and bottom. Frames are rarely perfectly square, and those three readings tell you the truth. Write each one down.
Measure the height on both the hinge side and the latch side. A half-inch difference between them means the frame has settled, and you’ll plan your gaps around the smaller number.

Run your hand along the jamb. Feel for old paint ridges, splinters, or swollen wood. These small bumps push a door out of alignment and cause it to bind.
Your goal is a consistent 1/8-inch gap around the door once it’s hung. Accurate measurements here decide whether the rest of the job goes smooth or fights you.
Step 2 – Test-Fit the Door
Set the door into the opening before any hardware goes on. Lift it onto a pair of shims so the bottom sits 1/4 inch above the threshold. Hold it steady against the hinge-side jamb.
Look at the gaps. You want even spacing down the latch side and across the top. If the door wedges tight on one corner or leaves a wide wedge of daylight on another, the frame is out of square or the door needs trimming.
Press your palm flat against the face. It should sit nearly flush with the jamb, not proud or sunken. This dry fit shows you exactly what to fix before you commit. Mark any spot that rubs or gaps too wide.
Step 3 – Trim the Door if Needed
When the door binds, take wood off — slowly. Clamp the door on edge and run a block plane along the high spot in long, even strokes. You’ll hear a clean shaving curl off, and the surface will turn pale and smooth under the blade.
Work the hinge edge, not the latch edge, whenever possible. The hinge side disappears into the gap and hides minor imperfections.
Check your progress often. Set the door back in the opening, look at the gaps, and plane again only if it still rubs. Take too much and you can’t put it back. A 1/8-inch gap is the target, so stop the moment you hit it. Sand the planed edge lightly to knock down any fuzz.
Step 4 – Mark the Hinge Locations
Set the door back on its shims in the test-fit position. Mark three hinge spots: one 7 inches down from the top, one 11 inches up from the bottom, and one centered between them.
Hold each hinge against the door edge and trace its outline with a sharp pencil. Press firm so the line stays crisp. Carry matching marks onto the door frame jamb at the exact same heights.
Accuracy here is everything. If your door marks and jamb marks don’t line up, the door will twist when you close it. Double-check each measurement against your tape before you cut anything. Knowing how to hang a wood screen door comes down to this kind of careful, repeatable marking.
Step 5 – Cut the Hinge Mortises
A mortise is the shallow recess that lets a hinge sit flush. Score the pencil outline with a utility knife first. You’ll feel the blade bite into the wood fibers, which stops them from splintering past your line.
Set your chisel inside the outline, bevel facing in, and tap the handle with light mallet taps. Make a series of shallow cuts across the recess, then pare them out flat. The wood lifts away in clean flakes.
Test the hinge in the mortise. The leaf should sit level with the surrounding wood — not raised, not sunk. Run your finger across it. A flush hinge feels seamless; a proud one catches your fingertip. Deepen the mortise a hair at a time until the fit is perfect.
Step 6 – Attach the Hinges to the Door
Set each hinge into its mortise on the door edge. Line the screw holes up dead center, because off-center screws pull the hinge sideways as they tighten.
Drill a pilot hole at each mark. Pilot holes stop the wood from splitting and guide the screw straight. Skip them and you risk a cracked door edge that no amount of glue fully fixes.
Drive one screw per hinge first, snug but not crushed. Check that every hinge still sits flush. Then drive the rest. You’ll feel the screw seat with a firm, solid stop — not a stripped, spinning slip. If a screw spins, back it out, plug the hole with a glued toothpick, and try again.
Step 7 – Mount the Door in the Frame
This is the step that brings it all together, and it’s the heart of how to hang a wood screen door. Grab a helper if you can — a second set of hands keeps the door steady.
Lift the door into the opening and rest it on shims to hold the bottom gap. Align the loose hinge leaves against your marked spots on the door frame jamb.
Drive one screw into the top hinge first, then the bottom, then the middle. Test the swing before you fully tighten. The door should glide open and shut without dragging or springing back.
Listen as it closes. A smooth install makes a soft whisper, not a scrape or thud. Add the remaining screws once the swing checks out.
Step 8 – Install the Latch and Closer
With the door hung, mark where the latch meets the jamb. Hold the strike plate against that spot and trace it. Mortise a shallow recess so the plate sits flush, then screw it down.
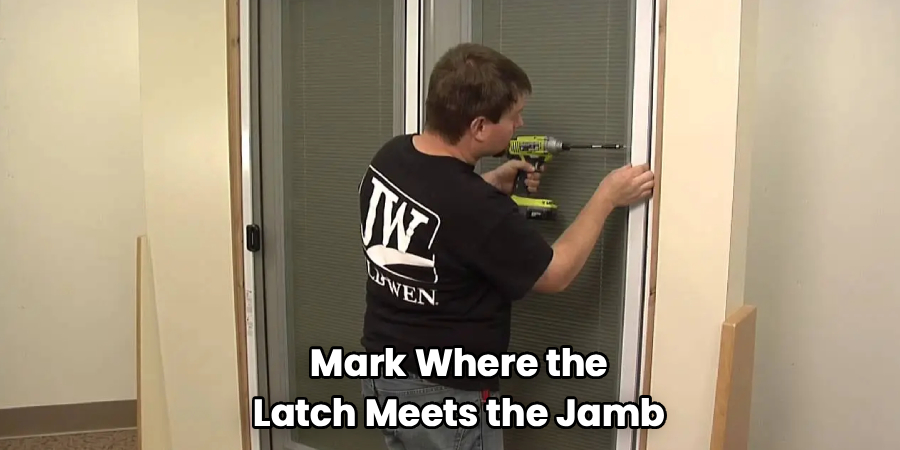
Close the door slowly. The latch tongue should slide into the strike and catch with a clean click. If it misses, shift the strike plate a hair up, down, or sideways until it lines up.
For the optional closer, mount the bracket to the door and jamb per the hardware spacing. Adjust the tension screw so the door pulls shut firmly but doesn’t slam. A well-set closer eases the door home with a quiet, controlled motion every single time.
Step 9 – Final Adjustments and Sealing
Step back and watch the door work. Swing it through its full arc several times. Even gaps, smooth motion, and a solid latch tell you the job is right.
If the door rubs, loosen the hinge screws on the binding side, slip a thin cardboard shim behind the leaf, and retighten. This shifts the door a fraction and clears the rub.
Run a bead of exterior sealant or weatherstripping around the frame to block drafts and insects. Press it firm into the corners where gaps hide.
Finish the bare wood with exterior paint or sealer within a few days. Unprotected wood swells with moisture, and a swollen door binds. A sealed door stays true through every season.
Common Mistakes to Avoid
The biggest mistake is skipping the measurements. People eyeball the door frame, assume it’s square, and hang the door blind. Frames settle over years, and a frame that’s off by a half-inch will leave you with a door that gaps on top and drags on the bottom. Measure three times before you cut once.
Forcing a tight door is the next trap. When a door binds, the fix is planing the edge, not muscling it shut. Slamming a swollen door cracks the stiles and strips the hinges. Take the wood down slowly and test often.
Many beginners mount hinges without cutting mortises. A surface-mounted hinge holds the door proud of the jamb, creates uneven gaps, and stops the latch from catching. The few minutes a mortise takes save hours of frustration later.
Skipping pilot holes splits the wood. Screw threads act like wedges, and dry wood splits along the grain the moment a screw forces in dry. Drill first, every time.
Finally, people leave the wood bare. Untreated exterior wood drinks up rain, swells, and binds within weeks. Seal it.
Expert Tips
Set hinge screws with a hand screwdriver for the final turn. A drill spins fast and strips heads or over-drives the screw before you feel it seat. Hand-finishing gives you control and a flush, tight result.
Use one longer screw — 2.5 to 3 inches — in each hinge on the jamb side. The long screw bites into the framing behind the trim, not just the soft jamb. This single trick stops the most common cause of a sagging door.
Wax your screw threads. Rub each screw across a bar of soap or a candle before driving. The threads cut cleaner, seat faster, and resist stripping.
Check the door at noon and again at dusk during install week. Wood moves with temperature and humidity, and catching that movement early lets you adjust before it sets a problem.
Frequently Asked Questions
What size gap should a screen door have?
Aim for a 1/8-inch gap along the top and latch side, and a 1/4-inch gap at the bottom. This spacing lets the door swing freely without rubbing the frame while still sealing against bugs and drafts. Too tight, and the door binds when the wood swells. Too wide, and you lose your weather seal and insect protection.
How many hinges does a wood screen door need?
Three hinges. Wood screen doors carry real weight, and three hinges distribute that load across the door frame. Two hinges let the door sag over time and pull the screws loose. Place them roughly 7 inches from the top, 11 inches from the bottom, and one centered between. This spacing keeps the door square through years of daily use.
Can I hang a screen door by myself?
Yes, but a helper makes it easier and faster. Working solo, rest the door on shims to hold it steady while you drive the first hinge screws. The shims act as your second pair of hands, freeing you to align and fasten. Once the top hinge is set, the door supports itself and you can finish the rest comfortably.
Why does my screen door keep sticking?
A sticking door usually means swollen wood, loose hinges, or a frame out of square. Check the hinge screws first and tighten any that are loose. If the door still drags, the wood has likely swollen from moisture — plane the binding edge lightly and seal the bare wood. A long screw in the top hinge often fixes sag-related sticking.
Do I need to seal a wood screen door?
Yes, seal it within a few days of install. Bare exterior wood absorbs rain and humidity, swells, and binds in the frame. A coat of exterior paint or clear sealer locks out moisture and keeps the door true through every season. Reseal every two to three years, or whenever the finish starts to wear thin or flake.
Conclusion
Hanging a wood screen door comes down to three things: accurate measurements, flush hinge mortises, and patient adjustment. Measure your door frame at the top, middle, and bottom. Cut clean mortises so the screen door hinges sit flush. Test the swing before you drive every screw home. Get those right and the door swings smooth, latches clean, and holds square for years.
You’ve now seen how to hang a wood screen door from first measurement to final seal. The skill saves you hundreds in labor, protects your door and frame from costly damage, and builds the kind of hands-on confidence that carries into your next project.
Don’t rush the work. Take the wood off slowly, drill your pilot holes, and seal the bare grain before the weather finds it. Do it right the first time, and you won’t touch that door again for a decade. Grab your tools, set aside an afternoon, and hang it true.
