
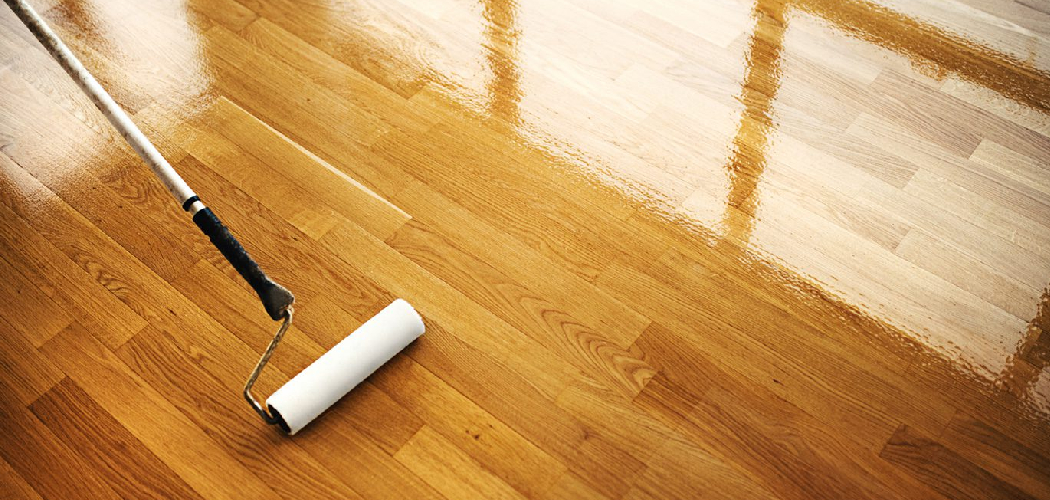
That old laminate dresser is not real wood. You know it. The color is flat. The finish is plastic. And every stain you have tried before just beaded up and wiped away.
Here is the part most people miss. Fake wood can take stain. It just needs a different approach.
Learning how to stain fake wood saves you from tossing furniture you could rescue. It turns a tired veneer cabinet into something warm. It puts the look back in wood grain that the factory printed flat.
This is not magic. It is method. Surface prep. The right product. Patience between coats.
This guide walks you through every step, from cleaning to topcoat, so your faux wood project finishes strong the first time.
Why Staining Fake Wood Matters
You buy a piece of furniture. Two years later, the finish looks dull. You want to refresh it. But it is laminate, not oak.
Most people give up here. They drag it to the curb. They buy new. They spend money they did not need to spend.
That is the hidden cost.
Staining fake wood changes that math. A can of gel stain costs less than a takeout dinner. The skill takes one afternoon to learn. And once you have it, every veneer dresser, cabinet, or shelf in your home becomes a project, not a problem.
You build confidence. You avoid landfill waste. You stop paying full price for things you already own. That is why this small skill matters more than it looks.
Tools and Materials You’ll Need
Gather everything before you start. Stopping halfway to find a brush ruins your timing.
- Gel stain (works best on non-porous faux wood surfaces)
- 150 and 220-grit sandpaper or a sanding sponge
- Liquid deglosser or a degreasing cleaner like TSP
- Tack cloth or a lint-free rag
- A high-quality bonding primer
- Synthetic-bristle brush and a foam applicator
- Wood filler for chips and scratches
- A clear polyurethane or polycrylic topcoat
- Painter’s tape and a drop cloth
- Clean cotton rags for wiping
- Nitrile gloves and a basic respirator mask
- Optional: a small foam roller for faster, smoother coverage on large flat panels
Step-by-Step Guide on How to Stain Fake Wood
Step 1 – Clean the Surface Thoroughly
Start with a clean slate. Grease, dust, and old polish block adhesion every time.
Mix a degreasing cleaner with warm water. Wipe the entire piece down. Pay attention to drawer pulls and corners where grime hides.
You will feel the difference. A dirty laminate surface feels slightly tacky under your fingers. A clean one squeaks.
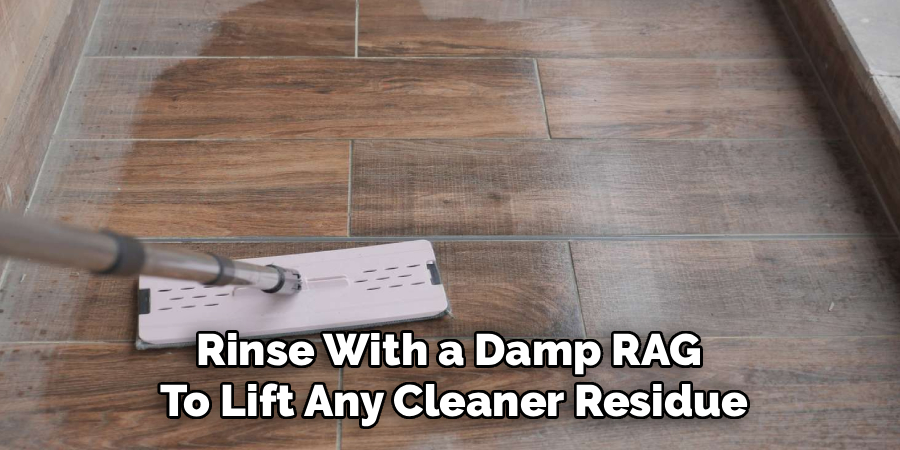
Rinse with a damp rag to lift any cleaner residue. Then let it dry completely. Rushing this step traps moisture under your finish.
Look at the surface in raking light. Tilt a lamp low across it. Streaks and film show up fast at that angle. If you see them, wipe again. Clean wins half the battle before you ever open a stain can.
Step 2 – Sand for Better Adhesion
Faux wood is slick. Stain needs grip. Sanding gives it that grip.
Take your 150-grit paper and scuff the whole surface. You are not removing the wood grain film. You are dulling the shine. Work in the direction of the printed grain, not against it.
Listen as you go. A glossy surface sounds smooth and quiet under the paper. A properly scuffed surface sounds slightly gritty and rough.
The visual cue matters most. When the shine turns to a soft, even haze, you are done. Shiny spots mean you missed an area. Go back over them.
Keep your pressure light and steady. Press too hard and you cut through the laminate to the particleboard below. That damage is hard to hide.
Step 3 – Repair Chips and Damage
Now fix the flaws. Chips, dents, and lifted edges show through stain like scars.
Press wood filler into each gap with a putty knife. Overfill slightly. The filler shrinks as it dries.
For lifted veneer corners, apply a thin bead of wood glue underneath. Press the edge flat and weigh it down with a heavy book overnight.
Let the filler cure fully. You will know it is ready when it turns from dark and damp to a uniform pale tone.
Then sand each repair smooth with 220-grit until it sits flush with the surface. Run your fingertips across it with your eyes closed. If you cannot feel the seam, neither will the finish.
Step 4 – Wipe Away All Dust
Sanding leaves a fine film. That dust is the enemy of a smooth coat.
Grab your tack cloth. Wipe every surface, every groove, every edge. Fold the cloth often so you are always using a clean face.
A vacuum with a brush attachment helps on detailed pieces. Run it along carved trim and inside drawer frames.
Then go over everything once more with a barely damp rag. This catches the last of the powder.
Check your work in that low side light again. Dust shows as tiny speckles when the lamp hits it right. The surface should look and feel clean, almost soft. Skip this and your topcoat will trap every grain of grit like sand under glass.
Step 5 – Apply a Bonding Primer
This is the secret to how to stain fake wood successfully. Primer is the bridge between slick laminate and your finish.
Choose a bonding primer made to stick to glossy surfaces. Stir it well. Apply a thin, even layer with your synthetic brush or foam roller.
Work in long, smooth strokes. Thin coats beat thick ones every time. A heavy coat drips and leaves ridges that telegraph through the stain.
Watch the sheen as it dries. Wet primer looks shiny. Cured primer turns flat and chalky to the touch.
Let it dry for the full time on the label. Then give it a light scuff with 220-grit. This tiny step locks the next layer in place.
Step 6 – Apply the Gel Stain
Here is where the transformation happens. Gel stain sits on top of the surface instead of soaking in, which is exactly what faux wood needs.
Stir the can slowly. Load your brush lightly. Spread the stain in the direction of the printed grain.
Then wipe. Use a clean cotton rag to pull the excess off, again following the grain lines. The longer you leave it before wiping, the darker the color.
You will feel the drag of the gel as it grabs. The surface should look rich and even, not blotchy or pooled.
Mastering how to stain fake wood comes down to this layer. Go thin. One light coat now, more later, builds depth without streaks or muddy spots.
Step 7 – Build Color with Additional Coats
One coat rarely gives you the depth you want. Patience pays here.
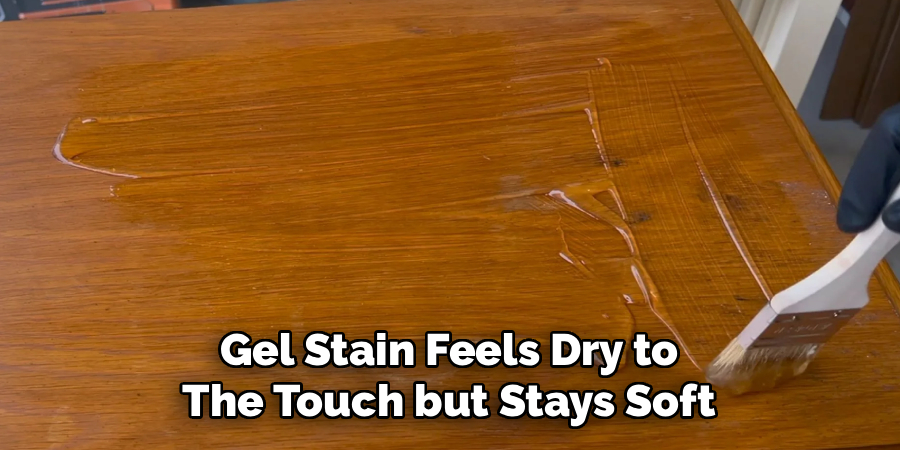
Let the first coat dry fully. Gel stain feels dry to the touch but stays soft underneath longer than you think. Wait the full recommended time, usually a full day.
Then apply a second thin coat the same way. Brush with the grain. Wipe with the grain. Step back and check the color under natural light.
Each layer deepens the tone and evens out light spots. Two or three coats usually nail the look.
Resist the urge to glob it on to finish faster. Thick coats stay tacky, smudge easily, and never cure right. Thin and slow always beats thick and quick.
Step 8 – Seal with a Protective Topcoat
The stain gives you color. The topcoat gives you durability. Skip it and your finish scratches within a week.
Choose a clear polycrylic for light stains or polyurethane for darker tones. Polycrylic dries clear. Oil-based poly adds a slight amber warmth.
Apply thin coats with a clean foam brush. Move in one direction. Avoid going back over an area that has started to set, or you will leave brush marks.
Watch for bubbles. They appear when you shake the can or brush too fast. If you see them, smooth them out gently while wet.
Two or three light coats build a hard, washable shell. Lightly sand with 220-grit between coats for a glass-smooth finish you can run your hand across.
Step 9 – Cure and Reassemble
The finish feels dry in hours. It is not fully cured for days.
Resist the temptation to load your piece up right away. Let it rest in a warm, dry spot for at least 48 to 72 hours.
You can tell it is curing well by the smell fading and the surface hardening. A cured topcoat feels firm and cool, not soft or rubbery.
Once it has hardened, reattach the hardware. Slide the drawers back in. Set the piece in place.
Then step back and look. The flat factory print is gone. In its place sits warm, even color with real depth. That is the payoff for doing each step right.
Common Mistakes to Avoid
The biggest mistake is skipping the prep. You see the stain. You want the color. So you brush it straight onto glossy laminate. It beads, smears, and peels within days. No product sticks to a slick, dirty surface. Clean and scuff first, every time.
The second mistake is skipping primer. Faux wood has no pores for stain to grab. Without a bonding primer, even gel stain struggles to hold. That bridge layer is not optional on most laminate and veneer.
The third mistake is going too thick. Beginners pile on heavy coats to save time. Thick stain stays tacky for days, smudges under any touch, and dries unevenly. Thin coats cure faster and look far better.
The fourth mistake is rushing the dry time. You touch it, it feels dry, so you add the next coat. Underneath, it is still soft. The layers mix into a gummy mess. Read the label and wait the full time.
The fifth mistake is forgetting the topcoat. Stain alone scratches off fast on faux surfaces. Always seal your work.
Expert Tips
Test on a hidden spot first. The inside of a drawer or the back panel tells you how the surface takes stain before you commit to the whole piece.
Work in good light. Natural daylight reveals streaks and thin spots that hide under a yellow bulb.
Keep your strokes going one way. Mixing directions catches the light differently and shows every overlap.
Warm the gel stain slightly on a cold day. It flows smoother and wipes cleaner when it is not stiff from the cold.
Use a foam applicator for the topcoat on flat panels. It leaves fewer brush marks than bristles.
And buy quality painter’s tape. Cheap tape bleeds and lifts your fresh finish when you pull it. The few extra dollars protect hours of work.
Frequently Asked Questions
Can You Stain Fake Wood Without Sanding?
You can, but you should not skip prep entirely. If sanding is not an option, use a liquid deglosser instead. Wipe it on to dull the shine and open the surface for adhesion. Sanding still gives the best grip, though. A quick scuff with 220-grit takes minutes and dramatically improves how well your stain and primer hold.
What Kind of Stain Works Best on Laminate?
Gel stain is your best choice for laminate and veneer. Traditional liquid stains need wood pores to soak into, and faux wood has none. Gel stain is thick and sits on the surface instead, clinging to the bonding primer beneath it. This lets you build rich, even color on slick surfaces where regular stain would simply bead up and wipe away.
Do I Really Need a Primer?
Yes, in almost every case. Faux wood surfaces are smooth and non-porous, so stain has nothing to grab onto. A bonding primer creates that grip. It is specifically made to stick to glossy laminate and give your stain a stable base. Skipping primer is the top reason faux wood projects peel, chip, or fail within the first week of use.
How Long Should the Finish Cure?
Let the topcoat cure for at least 48 to 72 hours before heavy use. It may feel dry within a few hours, but it stays soft underneath much longer. Place items on it too soon and you will leave dents or marks. Keep the piece in a warm, dry, dust-free spot. Full hardness can take up to a week for oil-based topcoats.
Can I Make Fake Wood Look Darker?
Absolutely. Apply additional thin coats of gel stain to deepen the color. Each layer adds richness and tone. You can also leave the stain on a little longer before wiping to let more pigment grab. Just keep every coat thin and let each one dry fully. Building color slowly always looks better than one heavy, blotchy application.
Conclusion
Fake wood is not a dead end. It is a starting point.
You now know how to stain fake wood from the first wipe to the final cure. Clean it. Scuff it. Repair the flaws. Prime for grip. Then build color with thin, patient coats of gel stain and lock it all in with a topcoat.
Each step matters. Skip the prep and your finish fails. Rush the dry time and your coats turn gummy. Respect the process and you get warm, even color that lasts for years.
That tired laminate dresser does not belong at the curb. The veneer cabinet you almost replaced has another life in it. The skill to bring them back now sits in your hands.
So pick one piece this weekend. Just one. Clean it, scuff it, and lay down a single coat.
You will be surprised how good fake wood can look. Will you try it?
