
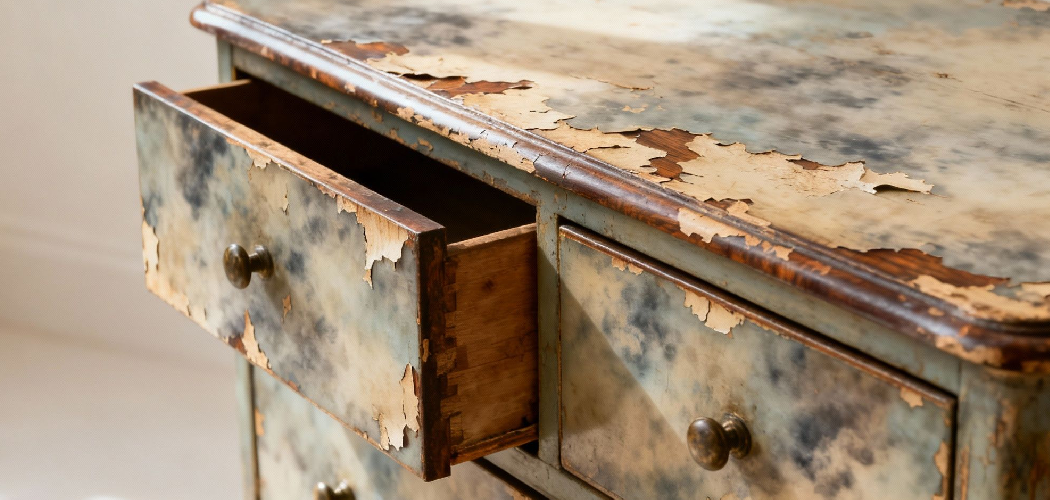
That lifting edge on your dresser top is not a death sentence for the piece. Peeling veneer happens to almost every wood furniture owner eventually. The thin decorative layer loosens from its base, catches on your sleeve, and threatens to crack off entirely. Most people assume the damage is permanent and either toss the furniture or pay a restorer hundreds of dollars.
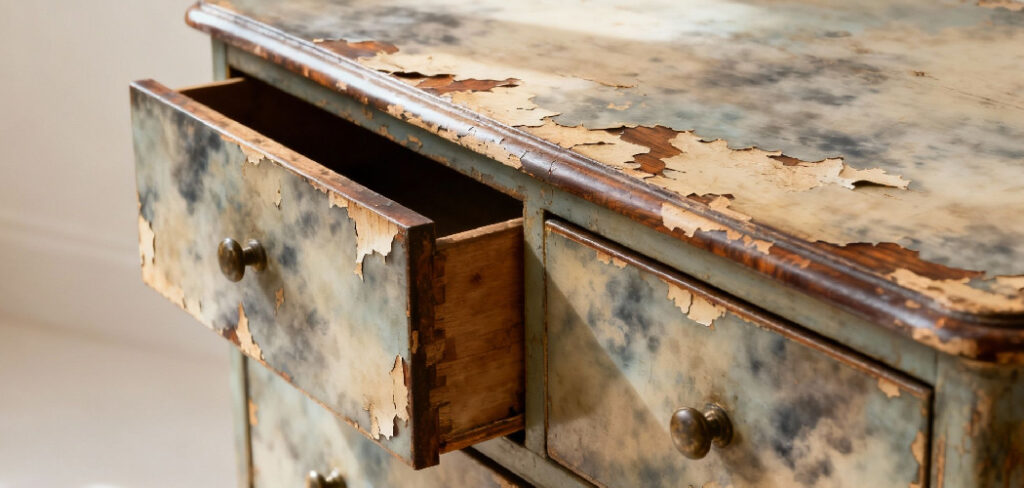
Neither is necessary. Learning how to repair peeling veneer on wood furniture takes basic tools, a little patience, and the right glue. You can fix a bubbled tabletop or a curling cabinet edge in an afternoon. This guide walks you through every step, from prep to final finish, so you can restore the surface with confidence and make it last.
Why This Skill Matters
Veneer repair pays for itself the first time you do it. A professional furniture restoration job runs $150 to $500 for a single peeling panel. The materials to fix it yourself cost under $30. That gap is yours to keep.
Beyond the money, you protect pieces you actually care about. Antique dressers, mid-century desks, and inherited tables often carry veneer that no longer exists in stores. Once it cracks off and gets lost, the look is gone for good.
You also build real confidence. Veneer work teaches you about wood adhesive, clamp pressure, and surface prep — skills that carry into every future project. Master this one repair and you extend the life of furniture by decades instead of replacing it.
Tools and Materials You’ll Need
Gather everything before you start. Stopping mid-repair to find a tool lets glue set in the wrong spot.
- Wood glue or veneer glue — PVA wood glue works for most repairs; hide glue suits antiques.
- Glue syringe or thin spatula — pushes adhesive under lifted edges.
- Clamps and cauls — apply even clamp pressure across the repair.
- Wax paper — keeps clamps and weights from sticking.
- Painter’s tape — holds small sections while glue cures.
- Veneer roller or hard rubber roller — presses the layer flat and forces out air.
- Putty knife — lifts loose sections cleanly.
- Wood filler — fills small chips, gaps, or missing pieces.
- Fine-grit sandpaper (220 and 320) — smooths the surface before finishing.
- Clean rags and warm water — wipe squeeze-out fast.
- Heat source like a household iron (optional) — reactivates old glue on minor lifts.
Step-by-Step Guide on How To Repair Peeling Veneer on Wood Furniture
Step 1 – Assess the Damage
Start by reading the damage before you touch a drop of glue. Run your fingertip across the surface and feel for soft bubbles, raised edges, or sections that flex when you press them. A loose edge sounds hollow when you tap it with your fingernail — that tap-tap difference tells you exactly where the bond failed.
Look for cracks, missing chips, and dark stains that signal old moisture damage. Note whether the veneer is simply lifting or has snapped off entirely. Lifting sections reattach easily. Missing pieces need patching.
Knowing how to repair peeling veneer on wood furniture starts with this honest assessment. Spend five minutes here and you save an hour of rework later. Mark each problem spot lightly with painter’s tape so you do not miss one.
Step 2 – Clean Under the Lifted Veneer
Old glue and grime block a new bond. Gently lift the peeling section with a putty knife, working slowly so you do not crack the brittle wood. You will hear a faint crackle as it raises — that is normal. Stop the moment you feel resistance.
Scrape out the dried adhesive underneath with the tip of your knife. The old glue often looks like a yellowish, flaky crust. Get it all. Wipe the cavity with a barely damp rag, then let it dry completely.
A clean, dry surface grips new wood adhesive far better than a dusty one. If you see dark spots, that is trapped moisture or mold. Let the area air out for a day before moving on.
Step 3 – Soften Stubborn Edges
Some veneer curls so hard it refuses to lie flat. Forcing it cracks the grain. Instead, soften it first.
Lay a damp cloth over the curled edge and press a warm iron on top for a few seconds. The steam relaxes the wood fibers, and you will see the edge slowly settle. Move in short bursts — too much heat scorches the veneer and leaves a dull brown mark you cannot sand out.
Test the flexibility by gently pressing the edge down. When it stays without springing back, it is ready. This trick saves antique veneer that would otherwise shatter. Work patiently. Rushing the heat is the fastest way to ruin a piece you are trying to save.
Step 4 – Apply the Adhesive
Now comes the bond. Load a glue syringe with PVA wood glue or thinned veneer glue, then slide the tip under the lifted section. Push a thin, even bead deep into the gap. Too much glue oozes everywhere; too little leaves dead spots that peel again.
Spread the adhesive with a thin spatula so it coats both the veneer back and the base wood. You want full contact across the whole repair area. The surface should look evenly wet, not pooled.
Knowing how to repair peeling veneer on wood furniture comes down to this layer. A complete, thin coat of wood adhesive creates a bond stronger than the original. Work fast — most PVA glue starts grabbing within five minutes.
Step 5 – Press and Roll Out Air
Air pockets ruin a flat finish. Once the glue is down, set the veneer in place and press from the center outward with a hard rubber roller. You will feel it flatten and hear faint squelches as trapped air and excess glue escape the edges.
Keep rolling until the surface lies completely flat with no visible ridges. Wipe every bit of squeeze-out immediately with a warm, damp rag. Dried glue on the surface seals the wood and blocks stain or finish later.
Check your work at a low angle against the light. A properly bonded section reflects light in one smooth plane. Bumps or shiny pools mean you missed a spot — fix it now, before clamping.
Step 6 – Clamp With Even Pressure
Clamp pressure makes or breaks the repair. Lay wax paper over the glued area so nothing sticks. Place a flat wooden caul on top to spread force evenly, then add clamps or stack heavy books and weights.
Tighten clamps until you see a thin line of glue squeeze out — that confirms full contact. Do not crank them so hard the veneer crushes or the panel bows. Even, firm pressure beats brute force every time.
Leave it clamped for the full cure time, usually 24 hours for PVA glue. Resist the urge to peek early. A bond interrupted halfway sets weak and lifts again within months. Patience here gives you a repair that lasts for years.
Step 7 – Patch Missing Sections
If a chip broke off entirely, you need to fill the gap. For tiny voids, press matching wood filler into the hole with a putty knife, leaving it slightly proud of the surface. It shrinks as it dries.
For larger missing pieces, cut a patch from matching veneer. Trace the gap, cut the patch slightly oversized, and fit it like a puzzle piece. Glue and clamp it the same way you did the lifted sections.
Match the grain direction so the repair disappears under finish. A mismatched grain catches the eye instantly. Take your time aligning the lines — this small detail separates an invisible fix from an obvious patch job.
Step 8 – Sand and Finish
Once everything cures hard, smooth the repair. Start with 220-grit sandpaper and work lightly along the grain. Veneer is thin, so heavy sanding cuts straight through it — let the paper do the work. Switch to 320-grit for the final pass.
Run your hand across the surface. It should feel seamless, with no ridge where the patch meets the original. Wipe away all dust with a tack cloth.
Now match the finish. Apply stain to blend the repair, then seal with the same topcoat as the rest of the piece — oil, lacquer, or polyurethane. Build thin coats and let each dry. The repaired area should reflect light identically to the surrounding wood when you finish.
Common Mistakes to Avoid
The biggest mistake is using too much glue. Beginners flood the gap, thinking more adhesive means a stronger hold. The opposite is true. Excess glue prevents the veneer from sitting flat, oozes onto the surface, and seals the wood so stain will not absorb. A thin, complete layer always outperforms a thick, sloppy one.
Skipping the cleanup step ranks a close second. Old, flaky adhesive trapped under the veneer blocks the new bond from forming. The repair feels solid for a week, then lifts again. Always scrape the cavity clean and let it dry fully before applying fresh wood glue.
Rushing the cure time wrecks otherwise perfect work. Unclamping after a few hours feels tempting, but PVA glue needs the full 24 hours to reach strength. Pull the clamps early and the bond sets weak.
Many people also force curled veneer flat without softening it first. Dry, brittle wood snaps under pressure. A quick pass with steam relaxes the fibers and saves the piece.
Finally, aggressive sanding cuts right through the paper-thin layer, exposing the substrate underneath. Sand light, sand along the grain, and stop early.
Expert Tips
Match your glue to the piece. Antiques built with hide glue respond best to fresh hide glue, because it bonds with the original adhesive and stays reversible for future restoration. Modern furniture takes standard PVA wood glue without issue.
Warm your glue slightly before applying it on cold days. Cold adhesive thickens, drags, and grabs unevenly under the veneer. A few minutes near a warm spot keeps it flowing into tight gaps.
Use a heat gun or iron to reactivate old glue on minor lifts — sometimes you skip new adhesive entirely. Press the loosened veneer down while it is warm, roll it flat, and clamp.
Always test your stain on a hidden spot first. Repaired wood often absorbs color differently than aged veneer, and you want to catch that mismatch before it shows on the tabletop.
Frequently Asked Questions
What Glue Works Best for Peeling Veneer?
PVA wood glue handles most veneer repairs and bonds strong on modern furniture. For antiques, use hide glue — it matches the original adhesive and stays reversible for future work. Avoid super glue, which dries brittle and cracks under the natural movement of wood. Match the glue to the piece and your repair holds for years.
Can I Fix Veneer Without Removing the Whole Piece?
Yes. Most peeling veneer reattaches in place without lifting the entire panel. Slide a glue syringe under the loose edge, inject adhesive, press the section flat, and clamp it. You only remove a full sheet when it has warped badly or cracked beyond saving. For lifting edges and small bubbles, work directly on the spot.
How Long Does Veneer Glue Take to Cure?
PVA wood glue reaches a usable bond in about an hour but needs a full 24 hours to cure completely. Keep the repair clamped under even pressure for that entire window. Hide glue sets faster but benefits from the same overnight wait. Skipping the full cure time is the most common reason repairs fail and lift again.
How Do I Fix a Veneer Bubble in the Middle?
Slice a small slit along the grain through the center of the bubble with a sharp blade. Inject wood glue into the opening with a syringe, then press the bubble flat with a roller. Cover it with wax paper, set a flat weight on top, and clamp for 24 hours. The slit closes invisibly under finish.
Will the Repair Be Noticeable After Finishing?
Not if you match the grain and finish carefully. Align any patch with the grain direction of the surrounding wood, sand lightly along the grain, and test your stain on a hidden area first. Build thin topcoat layers to match the original sheen. Done right, the repaired surface reflects light the same way as the rest of the piece.
Conclusion
Peeling veneer looks worse than it is. With clean prep, the right wood adhesive, and steady clamp pressure, you can restore almost any lifting edge or bubbled panel in a single afternoon. Assess the damage, clean out the old glue, apply a thin even coat, press out the air, and clamp it for a full 24 hours. Patch what is missing, sand light along the grain, and match the finish. That sequence works on dressers, tabletops, cabinets, and antiques alike.
You now know how to repair peeling veneer on wood furniture without paying a restorer or risking a treasured piece. Every repair you complete builds skill and saves money you would otherwise spend on replacements. Start with a small, low-stakes spot to get the feel for the glue and the roller. Then tackle the bigger jobs with confidence. The furniture you save today will outlast the furniture you would have thrown away.
