
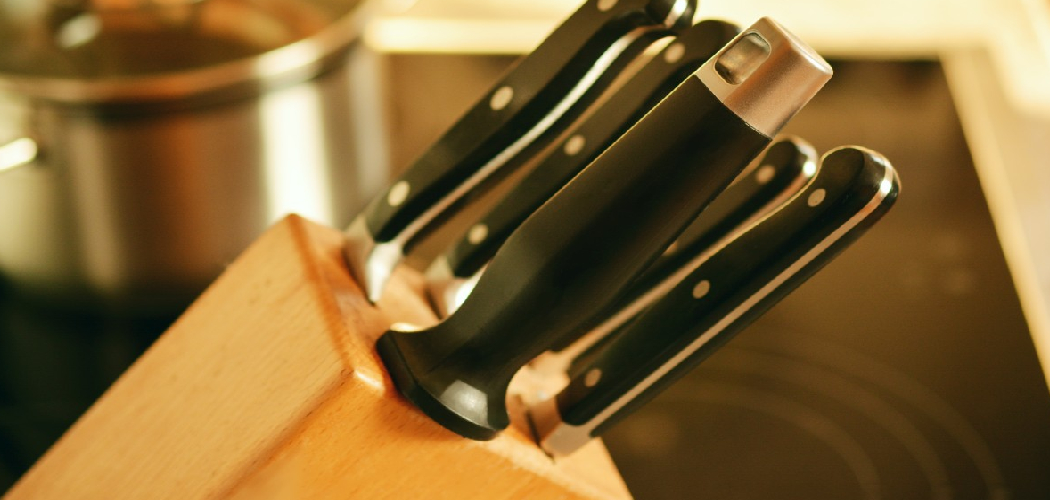
Your knife block hides a problem. Crumbs, moisture, and food residue collect deep inside those slots where you can’t see them—and where bacteria thrive. Most people wipe the outside and call it done. That’s not cleaning. That’s pretending.
A wood knife block needs real care if you want it to last years instead of months. The good news: the process is simple once you know the steps. You don’t need fancy products or woodworking experience. You need a few household items, a little patience, and the right method.
This guide walks you through exactly how to clean a wood knife block from the inside out, so your knives stay sharp, your wood stays protected, and your kitchen stays sanitary.
Why Cleaning Your Knife Block Matters
Skip cleaning, and your knife block becomes a breeding ground. Damp slots trap food particles. Bacteria multiply in the dark. Mold takes hold. Then every knife you pull out carries that contamination straight to your cutting board.
There’s a cost angle too. A quality wood knife block isn’t cheap. Neglect it, and the wood dries, cracks, and warps. Replace it every year, and the expense adds up fast. Maintain it, and a good block lasts a decade or more.
Regular knife block maintenance also protects your blades. Clean, dry slots prevent moisture from dulling edges or causing rust. For DIY beginners, this is the easiest entry point into proper wood care—low risk, high reward, and skills that transfer to cutting boards, utensils, and butcher blocks alike.
Tools and Materials You’ll Need
Gather everything before you start. You likely have most of these items already.
- Remove debris fast — a thin bottle brush or pipe cleaner sized for the slots
- Disinfect safely — distilled white vinegar
- Sanitize without damage — 3% hydrogen peroxide
- Scrub stubborn spots — an old, soft-bristled toothbrush
- Dry thoroughly — clean microfiber or lint-free cloths
- Protect the wood — food-safe mineral oil or food-safe wood oil
- Clear loose crumbs — a vacuum with a crevice attachment
- Optional: speed up drying — a hair dryer set to cool
Stick with food-safe products only. Skip harsh chemical cleaners and bleach—they soak into wood grain and leave residue near your knives. Mild dish soap works for surface grime, but the items above handle the deep work.
Step-by-Step Guide on How to Clean a Wood Knife Block
Step 1 – Empty and Inspect the Block
Pull every knife out first. Set them aside on a towel, blades pointing away from you.
Now look closely. Tilt the block toward a light source and peer into each slot. You’ll often spot crumbs, dried food, or a faint dark film clinging to the wood. Run your finger across the outer surface—if it feels gritty or slightly tacky, that’s built-up residue.
Check the wood itself too. Hairline cracks or rough patches signal the wood is drying out and needs oil later. A musty smell means moisture has settled deep inside.
Knowing how to clean a wood knife block starts here, with a clear read on what you’re dealing with before any water touches the wood.
Step 2 – Shake Out the Loose Debris
Turn the block upside down over a sink or trash can. Give it firm shakes and a few taps against your palm.
Listen for the rattle of crumbs dropping out. You’ll be surprised how much falls free—bits of bread, herbs, even tiny metal shavings from the blades. Keep tapping until the sound stops.
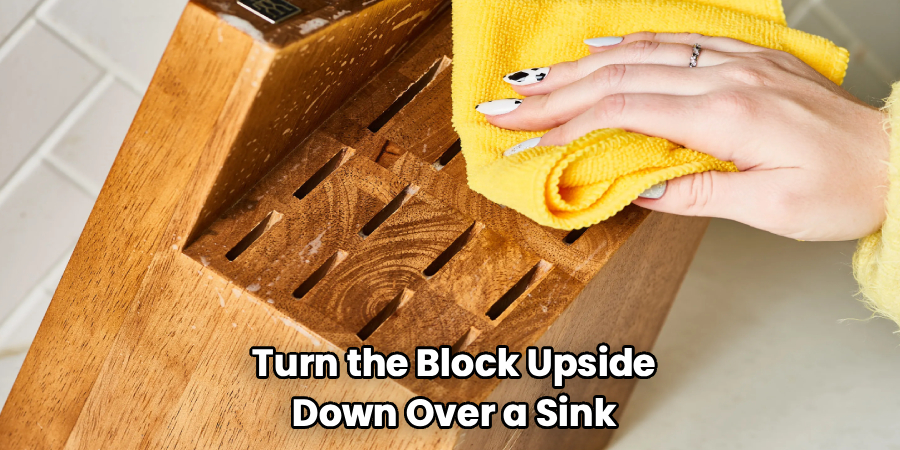
For the last stubborn bits, grab your vacuum and slip the crevice attachment over each slot. The suction pulls out what gravity won’t. You’ll hear the pitch change as debris clears the opening.
This dry-cleaning step matters. Removing loose material now prevents you from pushing wet crumbs deeper into the slots during the wash that follows.
Step 3 – Brush Out the Slots
Reach for your bottle brush or pipe cleaner. Insert it into each slot and work it back and forth with steady pressure.
You’ll feel resistance where residue has hardened against the wood. Twist the brush as you push to scrape the slot walls clean. Pull it out and check the bristles—they’ll come back coated with the gunk you couldn’t see before.
For wide slots, the old toothbrush works well. Scrub the inner walls in short strokes. The dry bristles loosen dried food without soaking the wood.
Repeat on every slot until the brush comes out clean. This is the single most important physical step, since these hidden surfaces hold the bacteria in knife blocks that surface wiping never touches.
Step 4 – Mix a Safe Cleaning Solution
Now prepare your disinfectant. Combine equal parts distilled white vinegar and warm water in a small bowl.
Vinegar kills most common bacteria and breaks down grease without damaging wood. The smell is sharp but fades completely as it dries. Stir the mixture until it’s evenly blended.
For deeper sanitizing, skip the dilution and use 3% hydrogen peroxide straight. It foams slightly on contact with organic matter—that fizzing sound tells you it’s working on residue.
Don’t combine vinegar and peroxide in the same container. Use one, rinse, then the other if you want both. Keep the solution shallow on your cloth or brush. Wood and standing water never mix well, so control how much liquid you introduce.
Step 5 – Clean Inside the Slots
Dip your toothbrush lightly into the vinegar solution. Shake off the excess—you want it damp, not dripping.
Work the brush into each slot and scrub the walls with the same back-and-forth motion as before. The damp bristles lift the last traces of grime that dry brushing missed. You’ll smell the vinegar activate as it meets any lingering film.
Wipe each slot with a barely-damp cloth wrapped around a thin tool, or run a moistened pipe cleaner through to absorb loosened debris. Sanitizing knife storage this way reaches the surfaces your hands never can.
Move slot by slot. Don’t flood the wood. A light, controlled touch cleans effectively while keeping moisture exposure to the minimum the grain can handle.
Step 6 – Wipe Down the Exterior
The outside needs attention too, since hands, splatter, and dust collect there daily.
Dampen a clean cloth with the vinegar solution and wring it well. Wipe every outer surface—top, sides, and base—using firm, even strokes that follow the wood grain. You’ll feel the cloth glide more smoothly as the surface residue lifts away.
Pay attention to the base where the block meets the counter. Grime hides there and traps moisture against the wood.
For sticky spots, a drop of mild dish soap on the cloth cuts through grease fast. Follow immediately with a clean, water-dampened cloth to remove any soap film. The surface should look even and matte, not streaky or shiny.
Step 7 – Dry It Completely
This step makes or breaks everything. Trapped moisture invites mold and warps the wood from the inside.
Start by wiping every surface with a dry microfiber cloth. Then attack the slots—roll a dry cloth around a pipe cleaner or thin dowel and push it through each opening to soak up interior moisture. You’ll see the cloth come out damp the first pass and dry by the third.
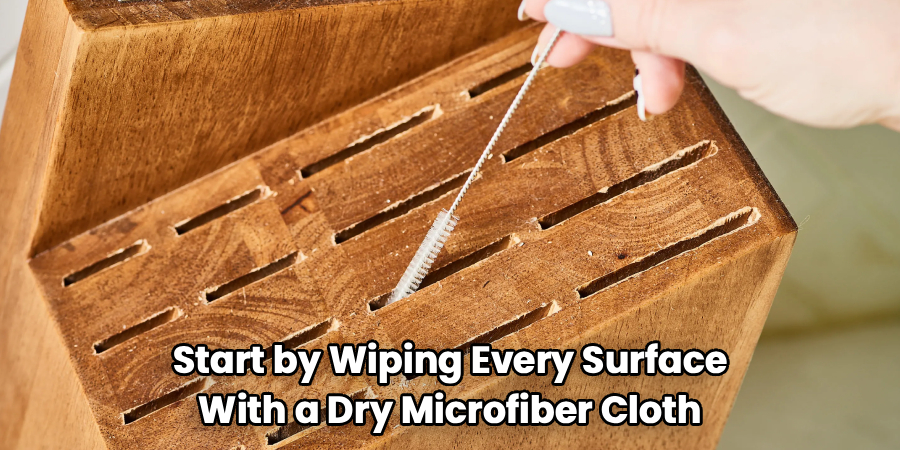
Now turn the block upside down on a towel and let air circulate through the slots. Give it several hours, ideally overnight.
To speed things up, aim a hair dryer on the cool setting into each slot. The moving air pulls water from deep grain. Never use heat—it cracks wood fast.
Step 8 – Condition the Wood
Dry, thirsty wood cracks and stains. Oiling restores it and seals out future moisture.
Pour a small amount of food-safe mineral oil onto a clean cloth. Rub it into all outer surfaces in long strokes along the grain. The wood drinks it in—you’ll watch dull patches turn rich and even within seconds.
For the slots, dab oil onto a pipe cleaner and run it through each one. A light coat is plenty.
Let the oil soak in for several hours or overnight. Then buff off any excess with a dry cloth until the surface feels smooth, not greasy. This food-safe wood oil treatment is what separates a block that lasts ten years from one that splits in two.
Common Mistakes to Avoid
The biggest mistake is submerging the block in water. Wood absorbs liquid like a sponge, and a soaked block warps, swells, and grows mold from the inside where you can’t reach it. Never put a wood knife block in the dishwasher either—the heat and prolonged moisture destroy it in a single cycle.
Another common error is returning wet knives to the block. Even slightly damp blades transfer moisture into the slots, and that trapped dampness breeds bacteria over time. Dry every knife completely before sliding it home.
Many people skip oiling altogether. They clean the block, then ignore it. Without regular conditioning, the wood dries out, cracks form, and those cracks harbor food and bacteria you’ll never fully remove. Oil every few weeks.
Using bleach or harsh chemical cleaners is also risky. These soak into the grain, leave residue near your knives, and can taint food. Stick to vinegar, peroxide, and food-safe oils.
Finally, don’t rush drying. A block that feels dry on the surface often holds moisture deep in the slots. Give it the full air-dry time it needs.
Expert Tips
Store your knife block on its side or upside down between deep cleans. Slots that face down won’t collect airborne crumbs and dust, which cuts your cleaning frequency in half.
Run a deep clean monthly, but do a quick dry-brush and shake-out weekly. Consistent small efforts beat occasional heavy scrubbing.
Match your oil to your wood. Mineral oil works for most blocks, but for dense hardwoods like maple, a beeswax-and-oil blend penetrates better and lasts longer between applications.
Watch the slot openings for dark staining—that’s an early mold warning. Hit those spots with straight hydrogen peroxide before it spreads.
One more pro move: insert knives blade-spine-down rather than edge-down when possible. It protects both your edges and the slot walls from unnecessary friction and wear.
Frequently Asked Questions
How Often Should I Clean My Wood Knife Block?
Do a quick weekly clean—shake out crumbs and dry-brush the slots. Run a full deep clean once a month, including the vinegar wash and a fresh coat of oil. If you cook daily or live in a humid climate, lean toward more frequent cleaning. Consistent small efforts prevent the buildup that leads to bacteria and mold.
Can I Put a Wood Knife Block in the Dishwasher?
No. Never put a wood knife block in the dishwasher. The intense heat and long exposure to water warp the wood, loosen the joints, and crack the surface—often beyond repair after one cycle. Wood needs gentle, controlled cleaning by hand. Always clean it with a damp cloth and brush, then dry it thoroughly.
What Kills Bacteria in a Knife Block?
Distilled white vinegar and 3% hydrogen peroxide both kill most common bacteria safely. Apply either to a damp cloth or brush and work it into the slots, then dry completely. Avoid bleach—it soaks into the grain and leaves residue near your knives. The combination of physical scrubbing plus a food-safe disinfectant gives you the cleanest result.
Why Does My Knife Block Smell Musty?
A musty smell means moisture is trapped inside the slots, and mold or bacteria have started to grow. Empty the block, deep clean every slot with hydrogen peroxide, and dry it thoroughly—ideally overnight upside down. The odor signals you’ve been returning damp knives or skipping the drying step. Fix the moisture, and the smell disappears.
What Oil Should I Use on a Wood Knife Block?
Use food-safe mineral oil. It’s affordable, odorless, won’t go rancid, and penetrates wood grain well. For dense hardwoods, a beeswax-and-mineral-oil blend lasts longer between applications. Never use cooking oils like olive or vegetable oil—they turn rancid, smell bad, and attract bacteria. Apply a thin coat every few weeks to keep the wood sealed and crack-free.
Conclusion
A clean knife block protects your knives, your food, and your wallet. The process comes down to a clear sequence: empty it, brush out the slots, disinfect with vinegar or peroxide, dry it completely, and seal the wood with food-safe oil. None of it requires special skills—just the right method and a little consistency.
Make it a habit. A quick weekly brush-out and a monthly deep clean keep bacteria away and stretch your block’s life from a couple of years to a decade or more.
Now that you know how to clean a wood knife block the right way, you’ve gained a wood-care skill that carries straight over to cutting boards, butcher blocks, and wooden utensils. Grab your brush, mix your solution, and give that block the attention it’s been missing. Your knives—and everyone who eats from your kitchen—will be better for it.
