
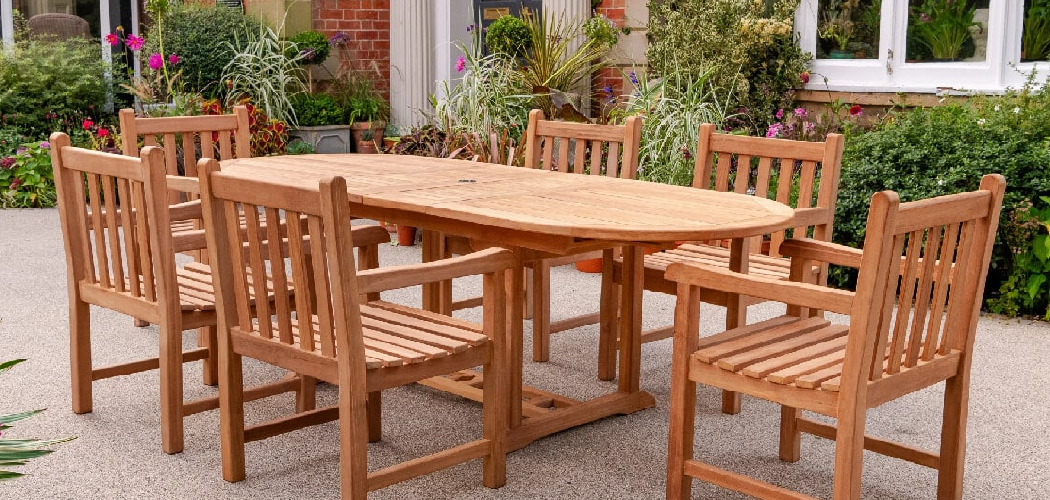
That gray, weathered look on your patio set? It’s not damage. It’s teak doing exactly what it’s built to do. But dirt, mildew, and food stains are a different story, and they dull even the toughest outdoor wood. Cleaning teak the right way restores its color, clears the grime, and adds years to furniture that already costs more than most. Done wrong, you scratch the surface and strip the natural oils that make teak weatherproof. Knowing how to clean teak wood outdoor furniture saves you from both mistakes and from spending hundreds on replacements. This guide walks you through every step — from the gentle wash to the optional oil finish — so your teak looks sharp and lasts for decades.
Why Cleaning Teak Furniture Matters
Teak is an investment. A single dining set runs $1,500 or more, and proper care keeps it serviceable for 50 years or longer. Neglect it, and dirt traps moisture, mildew takes hold, and stains soak into the grain.
Learning this skill saves real money. A bottle of teak cleaner costs under $20. A professional restoration costs $200 to $400. You do the math.
You also gain control. Once you know which methods clean teak safely and which ones gouge the surface, you stop guessing. You handle spills, pollen, and grime as they happen.
And the payoff shows. Clean teak resists rot, sheds water, and keeps that even tone — whether you preserve the silver-gray patina or restore the original honey-brown.
Tools and Materials You’ll Need
Gather everything first. Stopping mid-wash lets cleaner dry into streaks.
- Protect your hands – rubber gloves
- Scrub without scratching – a soft-bristled brush or nylon scrub pad
- Wash the grime – a bucket of warm water
- Cut through dirt – mild dish soap or a dedicated teak cleaner
- Lift mildew and stains – white vinegar or oxygen bleach
- Rinse clean – a garden hose with moderate pressure
- Dry and buff – two or three soft microfiber cloths
- Reach tight joints – an old toothbrush
- Restore color (if desired) – teak oil or teak sealer
- (Optional) Speed the job – a pressure washer with a fan tip set under 1,500 PSI
Step-by-Step Guide on How to Clean Teak Wood Outdoor Furniture
Step 1 – Clear and Inspect the Furniture

Start with an empty, dry surface. Remove cushions, pillows, and any loose debris caught in the slats. Run your hand across the wood and feel for rough patches, raised grain, or sticky buildup.
Look closely at the joints and end grain. That’s where mildew hides as dark gray or black speckles, and where pollen cakes into a yellow film. Spotting trouble now tells you which cleaner you’ll need later.
Check for loose screws or wobbly joints while you’re here. Teak hardware loosens over seasons of expansion and contraction. Tighten anything that shifts.
A quick five-minute inspection saves you from scrubbing around problems you didn’t know were there. You’ll work faster and cleaner once you know exactly what you’re facing.
Step 2 – Mix Your Cleaning Solution
Skip the harsh chemicals. For routine dirt, mix warm water with a few drops of mild dish soap until you see light suds. This handles dust, pollen, and everyday grime without touching the wood’s natural oils.
Dealing with mildew or gray staining? Reach for a stronger blend. Mix one part white vinegar to two parts warm water, or follow the label on a dedicated teak cleaner. Vinegar kills mildew on contact and won’t bleach the wood the way chlorine does.
Keep both solutions close in separate buckets. Match the cleaner to the mess — soapy water for general washing, vinegar for active mildew. Mastering how to clean teak wood outdoor furniture comes down to this: strong enough to cut grime, gentle enough to protect the grain.
Step 3 – Wet the Wood First
Never apply cleaner to bone-dry teak. Dry wood drinks up the solution unevenly and leaves blotchy streaks once it dries.
Hose down the entire piece with moderate pressure. Soak every surface — slats, legs, armrests, and undersides — until the wood darkens slightly and water beads on the surface. This pre-wet layer keeps the cleaner sitting on top of the grain instead of soaking in too fast.
You’ll hear the water hit and watch the color deepen from pale gray to a richer tan. That darkening is your cue the wood is ready.
Work in the shade if you can. Direct sun dries the surface mid-wash and forces you to chase drips. Cool, damp wood gives you the working time you need.
Step 4 – Scrub Along the Grain
Dip your soft brush in the soapy solution and scrub with the grain, never against it. Going across the grain raises fibers and leaves a fuzzy, scratched surface that traps dirt later.
Use steady, light pressure. Let the bristles and cleaner do the work, not your muscle. You’ll hear a soft, even swish and watch gray-brown grime lift into a foamy film.
Work one section at a time so the cleaner doesn’t dry before you rinse. Move from top to bottom, following the natural direction of each board.
Pay attention to texture under the brush. Smooth, slick wood means it’s clean. A gritty drag means dirt is still there — give it another pass before you move on.
Step 5 – Tackle Mildew and Stains
Some spots need more than a wash. Dark mildew speckles, gray patina blotches, and food stains call for your vinegar solution or teak cleaner.

Apply it directly to the trouble areas and let it sit 10 to 15 minutes. This dwell time matters — the solution needs contact to break down mildew at the root, not just the surface you see.
Then scrub gently with the grain. Watch the dark spots fade and the gray lift away. For deep stains, oxygen bleach works without harming the wood, but never use chlorine bleach. Chlorine strips teak’s color and weakens the fibers.
Reach into joints and end grain with an old toothbrush. Those tight corners hold the worst buildup, and a flat brush can’t get in there.
Step 6 – Rinse Thoroughly
Leftover cleaner is your enemy now. Dried soap or vinegar leaves a hazy film and attracts dirt within days.
Rinse the entire piece with your hose, top to bottom, until the water runs clear. Watch for suds hiding in slat gaps and under armrests — those spots hold soap longest.
Run your hand over the rinsed surface. It should feel clean and slightly slick from the water, never soapy or sticky. Any film means you need another rinse.
Take your time here. A rushed rinse is the most common reason freshly cleaned teak looks dull a week later. Flush every groove until the runoff is completely clear and the wood looks uniform from every angle.
Step 7 – Dry the Teak Completely
Moisture left to sit invites mildew right back. Drying matters as much as the wash.
Wipe down the whole piece with a dry microfiber cloth, following the grain. Then let it air-dry fully in a breezy, shaded spot for 24 to 48 hours. Teak is dense, and water hides deep in the grain longer than you’d expect.
Check the end grain and joints before moving on. Press a dry cloth into those areas — if it comes away damp, the wood needs more time.
Fully dried teak looks matte and even, with no dark wet patches. Rushing to oil or seal damp wood traps moisture inside and causes blotchy results. Patience here protects everything you’ve done so far.
Step 8 – Apply Teak Oil or Sealer (Optional)
Decide what look you want. Leave teak bare and it fades to a silver-gray patina that resists weather just fine. Want the warm honey-brown back? Apply teak oil or sealer.
Work on completely dry wood. Pour teak oil onto a clean cloth, never straight on the surface, and rub it in along the grain. Watch the color deepen instantly from pale gray to rich amber.
Apply thin, even coats. Too much oil leaves a sticky film that turns blotchy and feeds mildew. Wipe off any excess after 15 minutes.
For longer protection, a teak sealer outlasts oil and blocks UV fade. Either way, reapply once or twice a season to keep that fresh, restored color holding strong.
Common Mistakes to Avoid
The biggest mistake is reaching for a pressure washer at full blast. High pressure tears soft fibers out of the grain, leaving a rough, fuzzy surface that traps dirt and never looks smooth again. If you use a pressure washer, stay under 1,500 PSI with a fan tip held at least a foot away. A soft brush is safer.
Scrubbing against the grain ranks a close second. It raises the wood fibers and scratches the surface, undoing the clean look you’re after. Always scrub in the same direction as the grain lines.
Chlorine bleach is another trap. People assume it whitens and disinfects, but on teak it strips the natural color, weakens the fibers, and leaves an uneven, washed-out tone. Use white vinegar or oxygen bleach for mildew instead.
Over-oiling causes more problems than it solves. Thick coats stay tacky, attract dust, and actually feed mildew growth. Thin coats, wiped down after application, give the best results.
Finally, oiling damp wood ruins the finish. Trapped moisture causes dark blotches and uneven color. Let teak dry a full 24 to 48 hours before you apply anything.
Expert Tips
Pros know teak doesn’t need oil to survive. The gray patina is a protective layer, not damage. If you like the silvered look, skip the oil entirely and just keep the wood clean. You’ll save money and effort with no loss in durability.
Clean teak twice a year — once in spring, once in fall. This rhythm stops mildew before it digs in and keeps each session quick.
Sand lightly between cleanings if the grain feels rough. A pass with 120-grit sandpaper along the grain smooths raised fibers and restores that silky surface.
Test any new cleaner on a hidden spot first. An armrest underside or back leg tells you how the wood reacts before you commit to the whole piece.
Frequently Asked Questions
Should I Oil My Teak Furniture or Leave It Gray?
That’s your call, and both are fine. Teak oil restores the warm honey-brown color, but you’ll reapply it once or twice a season to maintain it. Left untreated, teak fades to a silver-gray patina that’s equally weatherproof and needs zero oiling. The gray look is purely cosmetic, not a sign of damage. Choose based on the appearance you prefer.
Can I Use a Pressure Washer on Teak?
Yes, but with caution. Keep the pressure under 1,500 PSI, use a fan tip, and hold the nozzle at least 12 inches from the wood. High pressure or a narrow tip tears out soft grain fibers, leaving a rough, permanently damaged surface. For most furniture, a soft brush and garden hose clean just as well with zero risk of gouging the wood.
How Often Should I Clean Outdoor Teak Furniture?
Clean it twice a year for best results — once in spring and once in fall. This schedule clears pollen, mildew, and grime before they soak into the grain and become hard to remove. In humid or coastal climates, you may need a quick wash every few months. Regular light cleaning is faster and easier than one heavy restoration after years of neglect.
What Removes Mildew From Teak Without Damaging It?
White vinegar is your safest first choice. Mix one part vinegar to two parts warm water, apply it to the mildew, and let it sit 10 to 15 minutes before scrubbing with the grain. For stubborn dark stains, oxygen bleach works without harming the wood. Never use chlorine bleach — it strips teak’s natural color and weakens the fibers over time.
Why Did My Teak Turn Black After Cleaning?
Black spots usually mean trapped moisture or mildew that wasn’t fully removed. If you oiled or sealed the wood before it dried completely, moisture got locked inside and caused dark blotches. Strip the finish, clean the area with vinegar, and let it dry a full 48 hours. Black mildew responds to oxygen bleach. Always confirm the wood is bone dry before applying any oil or sealer.
Conclusion
Teak is built to last, and now you have the method to keep it that way. The process holds together at every stage: clear and inspect the piece, mix the right cleaner, wet the wood, scrub with the grain, treat mildew, rinse fully, dry completely, then oil or leave it gray. Follow that order and knowing how to clean teak wood outdoor furniture turns a daunting chore into a steady weekend routine.
The real win is longevity. Clean teak twice a year, skip the harsh chemicals, and your furniture stays strong for decades — not seasons. Catch grime and mildew early and they wipe off in minutes instead of demanding a costly restoration.
So grab your brush, mix that solution, and give your patio set the care it’s earned. Protect the investment, keep the color you love, and trust that the next spill or stain is yours to handle — quickly, safely, and with confidence.
