
Dust settles into shutter slats faster than almost any surface in your home. It clings to the wood finish, dulls the color, and turns every louvered panel gray. Left alone, that grime grinds into the wood and shortens the life of your shutters. Learning how to clean wooden shutters fixes the problem in one afternoon with supplies you already own.
Clean shutters change a room instantly. Bright slats. Smooth wood. Light that filters through clear, dust-free louvers. Whether you own plantation shutters, interior shutters, or classic louvered panels, the method stays the same. This guide walks you through every step — from dry dusting to conditioning — so your shutters look sharp and last for years.
Why This Matters
Neglected shutters wear out fast. Dust buildup traps moisture against the wood finish. Over time, that grime breaks down the protective coating, and bare wood absorbs damp air. Repairs and replacements get expensive.
Regular cleaning costs almost nothing. A few microfiber cloths, mild soap, and a bottle of wood conditioner run under fifteen dollars. Compare that to refinishing warped slats or replacing a full set of plantation shutters. Maintenance wins every time.
You also build real skill. Wood care feels intimidating until you do it once. After that, you handle trim, cabinets, and furniture with the same confidence.
Most important, you protect an investment. Quality interior shutters last decades when you maintain the finish. Clean wood stays smooth, bright, and solid long after neglected shutters need rescue.
Tools and Materials You’ll Need
Gather everything first. A complete setup keeps the job fast and clean.
- Microfiber cloths — lift dust without scratching the wood finish.
- Soft-bristle brush or paintbrush — sweep grime from tight slat edges.
- Vacuum with brush attachment — pull loose dust off louvered shutters before washing.
- Mild soap — cuts grime safely on sealed wood.
- Two bowls or buckets — separate your cleaning solution from rinse water.
- Cotton swabs — clean the corners where slats meet the frame.
- Wood conditioner — restores the finish and shields the wood.
- Old towel — catch drips and protect your floor or windowsill.
- Optional: a slat-cleaning tool — wipes both sides of each shutter slat in one pass.
Keep your cloths lint-free and your water lukewarm. Hot water softens some finishes. Cold water leaves grime behind.
Step-by-Step Guide on How to Clean Wooden Shutters
Step 1 – Dust the Slats Dry First
Start dry. Wiping a dusty slat with a wet cloth drags grit across the wood finish and leaves fine scratches.
Tilt the louvers fully open and run a dry microfiber cloth along each slat, top to bottom. You’ll feel the surface go from gritty to smooth as the dust lifts. Flip the slats the other way and repeat, since dust collects on both faces.
For heavy dust buildup, use a vacuum with a soft brush attachment. You’ll hear the bristles pull grime from the edges where a flat cloth can’t reach.
Work the corners with a soft-bristle brush. When every slat feels clean and dry to the touch, you’re ready to wash.
Step 2 – Mix a Gentle Cleaning Solution
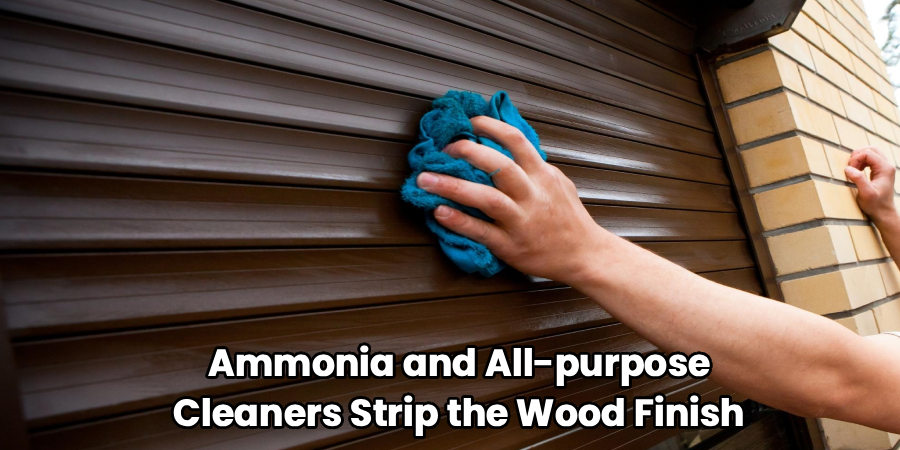
Skip harsh sprays. Ammonia and all-purpose cleaners strip the wood finish and dull the slats for good.
Fill one bowl with lukewarm water and add a few drops of mild soap. Swirl until you see light suds. Keep it barely soapy — too much detergent leaves a film that grabs more dust later.
Fill your second bowl with plain warm water for rinsing. Two bowls keep dirty solution off your clean wood.
Test the mix on a hidden spot first, like the back edge of a bottom slat. Wipe, wait a minute, and check. If the finish stays even and unharmed, your solution is safe for every shutter slat in the room.
Step 3 – Wipe Down Each Slat
This is where how to clean wooden shutters starts paying off. Dip a microfiber cloth in the soapy water and wring it until it’s just damp — never dripping.
Wipe each slat along its length in steady strokes. You’ll watch the dull film lift and the wood color deepen as the grime comes off. The cloth turns gray fast, so rinse it often.
Work one slat at a time, top to bottom. This keeps water from pooling on the wood. Standing moisture is the enemy of any wood finish.
Tilt the louvers and wipe the opposite faces too. Both sides of plantation shutters collect dust, and skipping one shows the moment light hits the panel.
Step 4 – Reach the Tight Corners
Slat ends and frame joints trap grime a flat cloth can’t touch. Switch tools for these spots.
Dip a cotton swab in your soapy water, squeeze out the excess, and run it along each corner where the slat meets the frame. You’ll see the swab darken as it pulls out hidden dirt.
Use a soft-bristle brush for the tilt rod and the channels along the sides. You’ll hear the bristles work grime loose from grooves your fingers can’t reach.
Don’t let water pool around the hinges or pivot pins. Those joints hold moisture and lead to swelling. Patience here makes the whole set of louvered shutters look maintained, not just surface-wiped.
Step 5 – Tackle Stubborn Grime and Sticky Spots
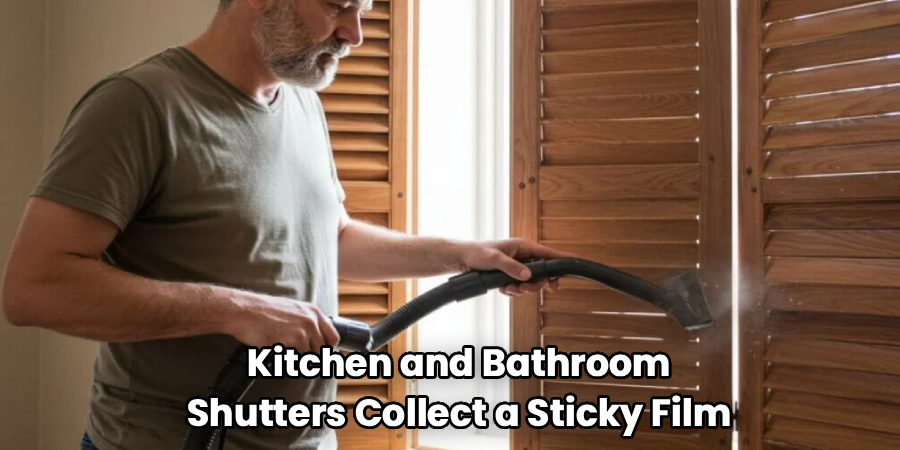
Kitchen and bathroom shutters collect a sticky film that plain soap resists. Cooking film and humidity bake onto the wood.
Dampen a cloth with your soapy solution, wring it well, and rub the sticky spot in small circles. You’ll feel the residue release as the film breaks down.
For thicker buildup, let the damp cloth rest on the spot for thirty seconds to soften it, then wipe. Never scrape with anything hard. A plastic edge through a cloth is as aggressive as you should get on a shutter slat.
Wipe the area with plain water right after to lift any leftover soap. Stubborn grime takes a second pass — that’s normal. Patience beats pressure on a delicate wood finish.
Step 6 – Rinse Away Residue
Soap left on wood attracts dust and dries into a hazy film. Most people skip this step. Don’t.
Dip a fresh microfiber cloth in your clean rinse water, wring it nearly dry, and wipe every slat again. Work along the length, one slat at a time, just like you washed.
You’ll see the surface brighten as the leftover soap lifts away. The wood should look clear and even, with no streaky residue catching the light.
Change your rinse water when it turns cloudy. Wiping with dirty water defeats the purpose. When the slats feel smooth — not slick or filmy — your rinse is done and the wood is ready to dry.
Step 7 – Dry the Wood Completely
Standing water damages wood finishes. Dry the slats right after rinsing, before moisture seeps into joints or seams.
Take a clean, dry microfiber cloth and buff each slat along its length. You’ll feel the surface go from cool and damp to dry and smooth. Pay extra attention to the corners and frame edges, where water hides.
Tilt the louvers both ways and check every face. Open a window or run a fan to speed drying and pull lingering moisture from the grooves.
Run your hand over each slat once more. Any cool or damp spot needs another pass with the dry cloth. Bone-dry wood is what you want before you condition.
Step 8 – Condition and Protect the Finish
The final step in how to clean wooden shutters is protection. A quality wood conditioner restores the glow and shields the slats from future dust buildup.
Apply a small amount to a clean cloth — never pour it straight on the wood. Rub it into each slat in thin, even strokes. You’ll watch the color deepen as the surface gains a soft sheen.
Don’t overdo it. Too much conditioner leaves a sticky layer that grabs dust faster than bare wood.
Buff with a separate dry cloth until each slat feels smooth and looks even, not greasy. This thin layer protects the finish and keeps your interior shutters bright between cleanings.
Common Mistakes to Avoid
The biggest mistake is soaking the wood. People grab a dripping cloth and run it across the slats. Excess moisture seeps into joints, swells the wood, and lifts the finish. Always wring your cloth until it’s barely damp. Wood rewards a light touch, not a flood.
Using harsh chemicals comes next. All-purpose sprays, ammonia, and bleach strip the protective finish and dull the grain permanently. Mild soap handles almost everything. Keep aggressive cleaners far from your shutters.
Skipping the dry dusting step causes real damage. When you wipe a dusty slat with a wet cloth, you grind grit into the wood finish and leave fine scratches. Always dust before any liquid touches the wood.
Many beginners forget to rinse. Soap residue dries into a hazy film that attracts dust faster than before. Your louvered shutters look worse within a week. A clean-water rinse takes a few minutes and makes the difference.
Finally, people ignore the slat backs and corners. Dust hides on the underside of each louver and in the frame joints. Clean only the front, and the grime shows the moment sunlight passes through. Tilt the slats both ways and reach every corner.
Expert Tips
Clean your shutters on a dry, low-humidity day. Wood releases moisture faster in dry air, so slats dry quickly and resist water marks.
Dust your shutters weekly with a dry microfiber cloth or a vacuum brush attachment. A quick pass prevents the heavy dust buildup that forces a deep clean later.
Match your product to your finish. Use a wax-based conditioner on oiled or waxed wood and a sealant-safe conditioner on polyurethane finishes. The wrong product streaks or refuses to absorb.
For painted shutters, skip the conditioner. A damp cloth and mild soap are all painted wood needs — conditioner just smears across the surface.
Wipe along the grain, always. Cross-grain strokes leave faint swirls that show every flaw under direct window light.
Frequently Asked Questions
How Often Should I Clean My Wooden Shutters?
Dust your shutters weekly and deep-clean them every two to three months. Rooms near a kitchen or bathroom need more frequent attention, since cooking film and humidity speed up grime buildup. A quick weekly pass with a dry cloth prevents heavy dust, so deep cleans stay fast and easy. Watch for a dull or sticky feel — that’s your cue to wash.
Can I Use Water on Wooden Shutters?
Yes, but use it sparingly. Dampen your cloth with mild soapy water and wring it until barely moist — never dripping. Standing water seeps into joints, swells the wood, and lifts the finish. Wipe each slat, rinse with plain water on a fresh cloth, then dry immediately. Light moisture cleans safely. Soaking ruins a wood finish fast.
What’s the Best Cleaner for Wooden Shutters?
Mild soap in lukewarm water is the safest, most effective cleaner for sealed wood. It cuts grime without stripping the finish. Use just a few drops per bowl — too much leaves a film. For routine dusting, a dry microfiber cloth alone removes most loose dust. Skip ammonia, bleach, and all-purpose sprays, which damage the protective coating.
How Do I Clean Hard-to-Reach Shutter Slats?
Use a cotton swab or a soft-bristle brush for tight corners and frame joints. Dip the swab in soapy water, squeeze out the excess, and run it along each edge where the slat meets the frame. A slat-cleaning tool wipes both faces of a louver in one pass. Tilt the slats fully open to reach every surface.
Should I Condition Painted Shutters?
No. Conditioner smears on painted surfaces and never absorbs the way it does on bare or sealed wood. Painted shutters need only a damp cloth and a few drops of mild soap. Wipe gently, rinse with plain water, and dry with a clean cloth. For sticky spots, dab with soapy water and wipe the area dry right away.
Conclusion
Clean shutters do more than look sharp. They protect the wood finish, extend the life of every slat, and let light pass through clear, dust-free louvers. The whole process comes down to a simple sequence: dust dry, wash with mild soap, reach the corners, rinse clean, dry fully, and condition to protect.
Knowing how to clean wooden shutters saves you real money. Regular care costs a few dollars and an afternoon. Neglect costs you a refinishing job — or a full replacement. The choice is easy.
Keep your touch light, your cloth damp not wet, and your cleaners mild. Wipe along the grain, rinse away every trace of soap, and dust weekly to stay ahead of buildup. Do those things, and your plantation shutters stay smooth, bright, and solid for years.
Grab your cloths and a bowl of warm, soapy water. Tilt the slats open and start at the top. Your shutters will look brand new by the time you reach the bottom.
