
Cutting a clean curve out of wood feels like magic the first time you pull it off. One minute you have a flat board. The next, you hold a smooth circle, a star, or a custom sign you designed yourself. That skill opens the door to hundreds of projects.
Most beginners think shape-cutting takes years of practice or a workshop full of machines. It doesn’t. With the right saw, a steady hand, and a few simple techniques, you can cut crisp shapes on your first try. Learning how to cut shapes out of wood gives you control over every project you tackle next.
This guide walks you through the entire process — from picking your saw to sanding the final edge — so your cuts come out clean, accurate, and ready to use.
Why This Matters
Custom wood shapes cost a fortune when you buy them pre-cut. Learn to make your own, and you stop paying premium prices for simple cuts. A single jigsaw pays for itself after two or three projects.
The skill also builds real confidence. Once you cut your first clean curve, bigger projects stop feeling out of reach. Shelves, signs, toys, furniture trim — they all start with the same basic cuts.
You also dodge expensive mistakes. Hand a board to a shop and one wrong measurement wastes money and time. Do it yourself, and you control every line. You fix small errors before they cost you a fresh sheet of plywood.
Master shape-cutting, and you unlock the foundation for nearly every woodworking project. It’s the one skill that makes the rest possible.
Tools and Materials You’ll Need
Gather your gear before you start. A complete setup keeps the work smooth and safe.
- Jigsaw — handles curves, corners, and tight shapes on most boards.
- Scroll saw — delivers fine detail and intricate inside cuts.
- Band saw — powers through thick stock and long curves fast.
- Wood blade set — fine-tooth blades for clean edges, coarse for speed.
- Pencil and template — transfer your shape accurately to the wood.
- Clamps — lock the board down so it can’t shift mid-cut.
- Safety glasses and dust mask — protect your eyes and lungs.
- Sandpaper — smooth every cut edge, from 80 to 220 grit.
- Workbench or sawhorses — keep the board steady at a comfortable height.
- Optional: orbital sander — speeds up edge cleanup on bigger projects.
Match your blade to your wood. Hardwood and plywood each cut best with the right tooth count.
Step-by-Step Guide on How to Cut Shapes Out of Wood
Step 1 – Choose the Right Saw for Your Shape
Pick your saw based on the shape, not the wood. The tool you choose decides how clean your cut comes out.
Use a jigsaw for general curves and corners on plywood or boards up to two inches thick. It’s the most forgiving tool for beginners.
Reach for a scroll saw when your design has tight curves, sharp inside corners, or fine detail. The thin blade turns on a dime.
Grab a band saw for thick stock or long, sweeping curves. You’ll hear it hum steady through hardwood that would bog down a jigsaw. Match the saw to the job, and every cut gets easier from there.
Step 2 – Draw or Trace Your Template
A clean cut starts with a clear line. You can’t follow a shape you can’t see.
Sketch your design straight onto the wood with a sharp pencil, or print a template and trace around it. For repeat shapes, cut a stiff cardboard template once and reuse it.
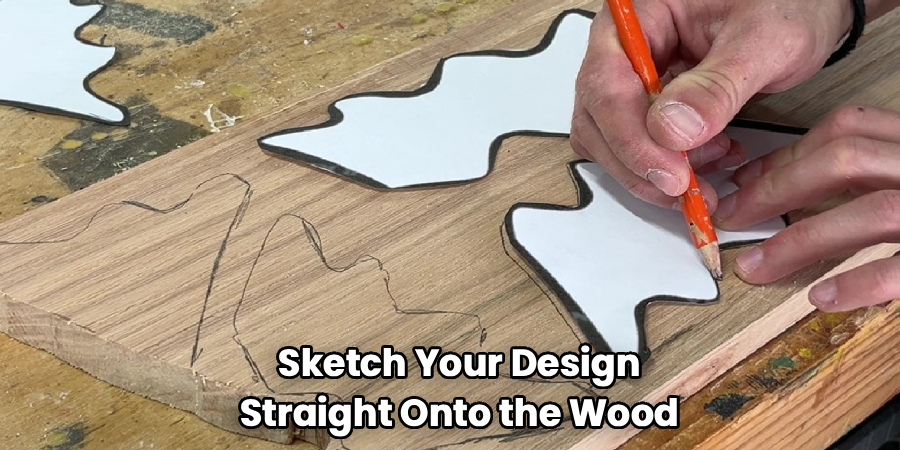
Press firmly so the line stays dark and visible against the wood grain. A faint line disappears the moment sawdust covers it.
Mark your inside cuts and corners clearly too. You’ll thank yourself when the blade reaches a tight turn. A crisp, bold outline is the difference between a confident cut and a guessing game.
Step 3 – Secure the Wood Firmly
This is where how to cut shapes out of wood gets serious. A loose board ruins cuts and causes accidents.
Clamp your wood to a workbench or sawhorses so it can’t shift. You’ll feel the difference instantly — a locked board lets you focus on the line, not on holding it down.
Position the clamps away from your cut path so the blade clears them. Test the board with a quick push. If it wiggles, tighten up.
For curved cuts, leave the edge you’re cutting hanging off the bench so the blade has room to move below. Solid clamping turns a shaky cut into a smooth, controlled line every time.
Step 4 – Set Up Your Blade
The wrong blade tears wood. The right one slices clean. Match your blade to the cut before you flip the switch.
Fine-tooth blades give smooth edges on plywood and finish work. Coarse-tooth blades cut faster through thick stock but leave a rougher edge.
Install the blade with the teeth pointing up toward the saw on a jigsaw, or down through the table on a scroll saw. Check that it’s seated tight and square.
Run the saw for a second before it touches wood. A wobbling blade tells you something’s loose. A steady, even hum means you’re ready to make your first shape.
Step 5 – Make Your Straight Cuts First
Tackle the easy lines before the hard ones. Straight cuts build your rhythm and free up the board for curves.
Line the blade up just outside your pencil line, on the waste side. Cutting on the waste side leaves your shape full size and ready to sand.
Move the saw forward in a slow, steady push. Let the blade do the work — forcing it leaves burn marks and chipped edges. You’ll feel the saw glide when your speed is right.
Watch the line, not the blade. Your eye naturally guides the cut where you look. A smooth straight cut sets the stage for clean curves next.
Step 6 – Cut the Curves and Corners
Curves test your control. Slow down here and let the blade follow the bend.
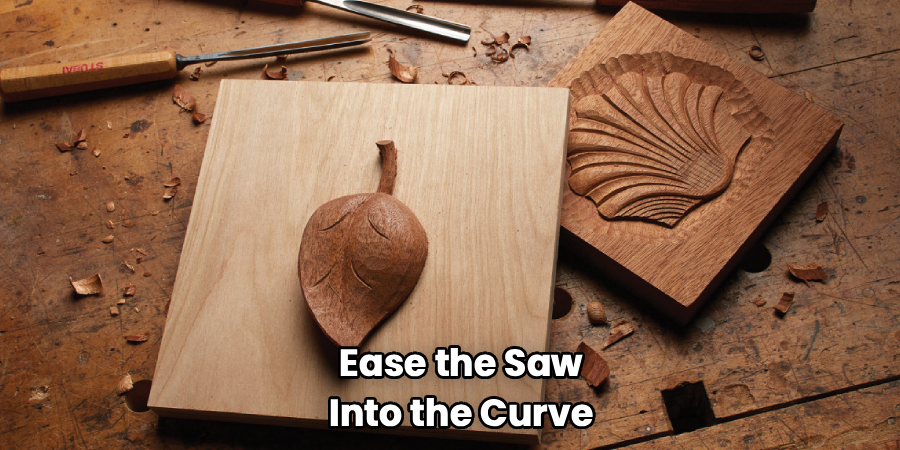
Ease the saw into the curve, turning the board and the blade together. Push too fast and the blade flexes, leaving a beveled, uneven edge. You’ll hear the motor strain when you’re forcing it.
For tight inside corners, cut a relief notch into the waste first. This gives the blade room to pivot without binding.
Keep both hands steady and your eyes on the line. A smooth curve comes from slow, even motion — not speed. When the cut piece drops free, you’ll see your shape take form for the first time.
Step 7 – Handle Inside Cuts
Some shapes need a hole cut from the middle — a letter, a handle slot, a window. These inside cuts take one extra move.
Drill a starter hole inside the waste area, large enough for your blade to fit through. Feed the blade into the hole, then start your cut from there.
On a scroll saw, thread the blade through the hole before clamping it back in place. This lets you cut enclosed shapes no outside cut can reach.
Follow your line slowly, just like any curve. You’ll feel the blade settle into a rhythm once it clears the hole. Inside cuts look tricky but follow the same steady-hand rule.
Step 8 – Sand the Edges Smooth
A raw cut edge feels rough and shows every saw mark. Sanding turns it into a finished surface.
Start with 80-grit sandpaper to knock down saw marks and even out the line. Work your way up to 120, then 220 for a smooth, ready-to-finish edge.
Sand with the wood grain on straight sections. On curves, follow the bend with a sanding sponge or rolled paper. You’ll feel the edge go from gritty to glass-smooth under your fingers.
Run your hand along the finished shape. Any rough spot or splinter needs another pass. A clean, smooth edge is what separates a beginner cut from a pro result.
Common Mistakes to Avoid
The most common mistake is rushing the cut. Beginners push the saw hard, expecting speed. Instead, the blade flexes, burns the wood, and wanders off the line. Slow down. Let the blade cut at its own pace, and your edges come out clean every time.
Skipping clamps comes next. A board that shifts mid-cut throws off your line and puts your fingers in danger. Always lock the wood down before the blade touches it. A steady board is the foundation of every accurate cut.
Using the wrong blade ruins good work. A coarse blade on plywood splinters the surface and chips the edge. A dull blade burns and binds. Match your blade to your wood and replace it the moment it stops cutting clean.
Many beginners cut directly on the line instead of beside it. That removes the line itself and leaves your shape undersized. Always cut on the waste side, just outside your mark, then sand to the exact line.
Finally, people forget to plan inside cuts. They start sawing with no way to reach an enclosed shape. Drill a starter hole first, and the whole cut goes smoothly.
Expert Tips
Keep a spare blade within reach. A dull blade is the hidden cause of most rough cuts. Swap it the second you notice burning or extra effort, and your edges stay crisp.
Cut slightly outside your line on purpose, then sand to the exact shape. This gives you a margin to correct small wanders without ruining the piece.
For repeated shapes, cut one perfect master from scrap and use it as a template. You’ll get identical results across every copy.
Tape over your cut line with painter’s tape before sawing delicate plywood. The tape holds the surface fibers down and stops splintering on the top face.
Plan your cut path so the blade never gets trapped. Cut from the open edge toward enclosed corners, and you’ll avoid binding the blade halfway through.
Frequently Asked Questions
What Is the Best Saw for Cutting Shapes Out of Wood?
A jigsaw is the best all-around saw for beginners. It cuts curves, corners, and straight lines on most boards and plywood, and it’s affordable and easy to control. For fine detail and tight inside cuts, choose a scroll saw. For thick hardwood or long curves, a band saw cuts faster and cleaner. Match the saw to your shape.
How Do I Cut Curves Without Splintering the Wood?
Use a fine-tooth blade and slow your cutting speed. Splintering happens when a coarse blade tears through the surface fibers too fast. Cover your cut line with painter’s tape to hold the top fibers down, then cut just outside your line. Sand the edge smooth afterward. A sharp blade and patience prevent nearly all splintering on plywood.
Can I Cut Shapes Without Power Tools?
Yes. A coping saw cuts curves and shapes by hand on thin stock. A fret saw handles even finer detail. Both take more time and effort than power tools, but they give you full control and produce clean results on small projects. Clamp your wood firmly, cut slowly on the waste side, and sand the edge to finish.
How Do I Cut a Hole in the Middle of a Board?
Drill a starter hole inside the waste area first. Make it large enough for your saw blade to pass through. Feed the blade into the hole, then cut along your line from the inside. On a scroll saw, thread the blade through the hole before securing it. This method handles letters, slots, and any enclosed shape.
What Wood Is Easiest for Beginners to Cut?
Plywood and softwoods like pine are the easiest to cut. Plywood resists splitting and holds a clean edge, while pine is soft enough to cut with little effort. Both are affordable, so you can practice without wasting money. Avoid dense hardwoods like oak or maple until your technique improves and your blade choice is dialed in.
Conclusion
Cutting shapes out of wood comes down to a simple sequence: pick the right saw, draw a clear line, clamp the board tight, and cut slow on the waste side. Sand the edge smooth, and your shape is ready for any project.
Knowing how to cut shapes out of wood transforms what you can build. You stop buying pre-cut pieces. You design your own signs, shelves, toys, and trim. Every project you tackle next builds on this one core skill.
Keep your blade sharp, your speed slow, and your board locked down. Cut just outside the line and sand to the finish. Those few habits turn shaky first attempts into clean, confident cuts.
Grab a scrap board and your saw. Draw a simple curve and follow it through. The first clean shape you cut proves you can make the next one — and the dozens after that. Start cutting, and watch your skills take shape.
