
A chain link fence mounted to wood posts gives you the best of both worlds: the warm, natural look of timber and the durability of galvanized mesh. The problem? Most people guess at the hardware and end up with sagging fabric, loose rails, and a fence that leans within a season. Learning how to connect chain link fence to wood post the right way solves that. You get a tight, square, long-lasting barrier that holds its shape for years.
This guide walks you through every step in plain language. You’ll learn which fasteners to buy, how to set tension correctly, and how to spot the difference between a job done right and one that will fail. By the end, you’ll be able to attach chain link fabric to wooden posts with confidence and skip the costly do-overs.
Why This Matters
Hiring a fence contractor costs hundreds, sometimes thousands, of dollars. Doing it yourself cuts that bill to the price of materials. That alone makes this skill worth learning.
But the savings go deeper. A poorly attached fence loosens fast. Fabric pulls away from the post. Rails twist. You end up repairing the same fence twice. Get the connection right the first time and your fence lasts 15 to 20 years with minimal upkeep.
There’s also the confidence factor. Once you’ve mounted chain link to a wood post, you can tackle gates, repairs, and extensions without hesitation. You stop depending on contractors for small jobs. You protect your property, your pets, and your investment — and you build a real, transferable DIY skill in the process.
Tools and Materials You’ll Need
Gather everything before you start. Stopping mid-job to buy a missing bracket wastes time and breaks your rhythm.
- Power drill and driver bits — drive lag screws and fence staples fast
- Heavy-duty fence staples or wood-to-chain-link brackets — anchor the fabric to timber
- Tension bar — one per terminal and gate post for a straight, taut edge
- Tension bands and brace bands — clamp the bar and rails to the post
- Galvanized lag screws (5/16″ x 2″) — secure brackets without rusting
- Top rail and rail clamps — keep the fabric from sagging at the top
- Come-along or fence stretcher — pull the mesh tight before fastening
- Tape measure, level, and marker — keep everything square and plumb
- Work gloves and safety glasses — protect against cut wire ends
- Pliers or fence pliers — twist tension wire and trim fabric
- Optional: a cordless impact driver — speeds up lag screw installation and saves your wrist
Step-by-Step Guide on How to Connect Chain Link Fence to Wood Post
Knowing how to connect chain link fence to wood post comes down to sequence. Follow these steps in order and you’ll keep the fabric square and the tension even from start to finish.
Step 1 – Inspect and Prep Your Wood Posts
Start at the posts. They carry every pound of tension, so they need to be solid. Push hard against each one. If it wobbles or you hear a soft, hollow creak, the post isn’t set deep enough or the wood has rotted at the base.
Run your hand along the surface. Splintered, gray, or punky wood won’t hold a screw. Replace any post that fails the push test before you go further.
Confirm each post is plumb with a level. A post leaning even a few degrees throws off the entire line. Tighten or reset anything that’s off. Clean timber with a firm base and a true vertical edge is your foundation for a fence that stays tight.
Step 2 – Measure and Mark Your Layout
Run a taut mason’s string from your first terminal post to the last. This line is your reference for height and straightness. Pull it tight enough that it stops sagging — you want a crisp, level guide.
Mark the fabric height on every post with a pencil or marker. Standard residential chain link runs 48 inches, so measure up from the ground and make a clear tick. Keep the marks consistent or your top edge will wave.
Measure twice. A half-inch difference between posts looks fine on paper but shows up as a visible dip once the fabric is stretched. Accurate marks now save you from a crooked, amateur-looking fence later.
Step 3 – Attach Tension Bands and Brace Bands
Slide tension bands onto each terminal and gate post. For a 4-foot fence, three bands per post works well — one near the top, one in the middle, one near the bottom. The flat side faces the direction the fabric will pull.
Add a brace band near the top to hold your rail later. Secure each band with a galvanized lag screw driven straight into the wood. You’ll feel the screw bite and hear the band pull snug against the post.
Don’t fully tighten yet. Leave a little play so you can adjust spacing once the fabric goes up. The bands should sit flush but still rotate with light hand pressure.
Step 4 – Weave the Tension Bar into the Fabric
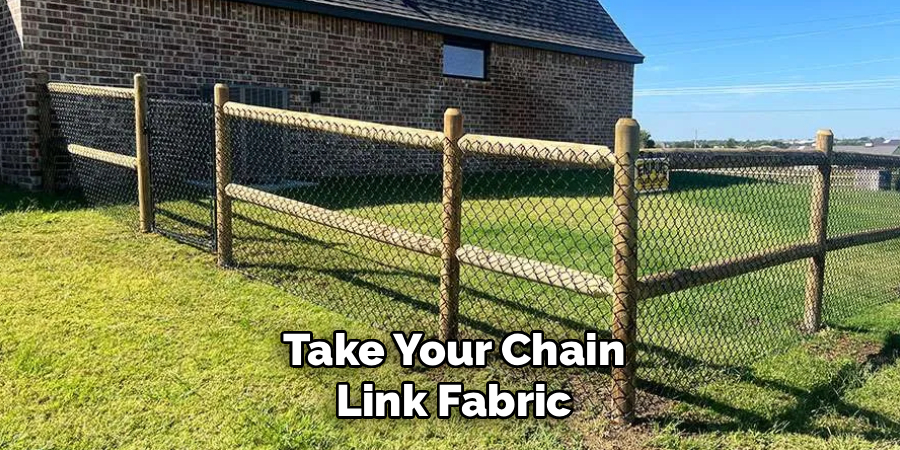
Take your chain link fabric and stand it against the terminal post. Thread the tension bar vertically through the end row of diamonds. Push it through one diamond at a time until it runs the full height of the fabric.
You’ll hear the steel slide and click through each link. The bar should sit straight and snug — no gaps, no skipped diamonds. A correctly woven bar feels rigid and stays vertical on its own.
If the bar buckles or the fabric bunches, you’ve missed a diamond. Pull it back and rethread. This bar is what lets you attach the fabric to the post evenly, so take the extra minute to get it clean and true.
Step 5 – Bolt the Tension Bar to the Post
Line up the woven tension bar with the tension bands on your post. Slip the band’s slot over the bar, then drive the bolt through to lock them together.
Tighten each bolt with steady pressure. You want the bar pinned flat against the post with no rattle. Give the fabric a tug — a solid connection won’t shift or rock.
Work top to bottom, keeping the bar vertical as you go. If the bar twists or pulls to one side, loosen the bolts, straighten it, and retighten. A crooked bar drags the whole fabric off-square. When done right, the edge of your chain link sits flush and plumb against the wood post, ready for stretching.
Step 6 – Install the Top Rail and Rail Clamps
Run your top rail through the loop caps or rail clamps along the line posts. The rail keeps the upper edge of the fabric from flopping and gives the fence its rigid backbone.
At each wood post, secure a rail clamp or brace band, then fasten the rail end into it. Drive the lag screw firm. You’ll hear a dull, solid thunk when the rail seats correctly against the timber.
Sight down the rail with your eye. It should run dead straight from post to post. Any visible bow means a clamp is loose or a post is off. Fix it now — a wavy top rail is the first thing people notice on a sloppy fence install.
Step 7 – Stretch the Chain Link Fabric Tight
This step makes or breaks the job. Hook your come-along or fence stretcher to the far end of the fabric and pull. The mesh should pull taut and the diamonds should narrow slightly into even, uniform shapes.
Listen for a faint, high ringing as the wire tightens. That sound tells you the tension is building correctly. Press your palm flat against the fabric — it should feel firm, almost like a drumhead, with very little give.
Too loose and the fence sags and bellies out. Over-tighten and you’ll deform the diamonds or stress the posts. Aim for taut but not strained. Once it feels right, hold the tension while you move to the final attachment.
Step 8 – Secure the Fabric and Tie It Off
With the fabric stretched, fasten the far end to its tension bar and bands the same way you did the first post. Then drive heavy-duty fence staples or wood-to-chain-link brackets along each line post to lock the mesh to the timber.
Space the staples every 12 to 16 inches. Drive them snug but don’t crush the wire flat against the wood. You want the fabric held firm with the diamonds still open.
Finish by weaving tension wire along the bottom edge and twisting it tight with pliers. Step back and look. A finished fence stands straight, sits tight, and shows clean, even diamonds across the entire run.
Common Mistakes to Avoid
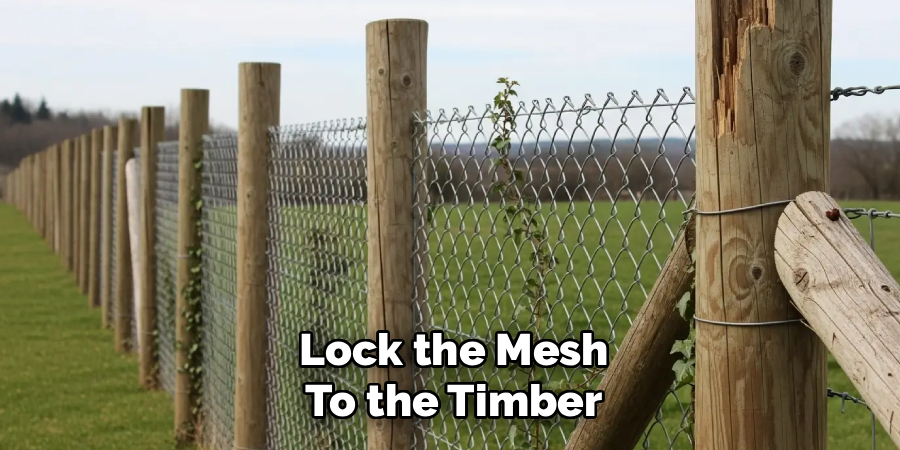
The biggest mistake is skipping the tension bar. Many beginners staple the raw edge of the fabric straight to the post. It looks fine for a week, then the end links pull loose and the whole edge curls away from the wood. The tension bar spreads the load across the full height of the post and keeps that edge locked in place.
Another common error is mounting hardware to weak or rotted posts. If the wood is soft, the screws strip out under tension. Always test your posts first and replace anything that wobbles or crumbles. Strong posts are non-negotiable.
Under-stretching the fabric is just as bad. A loose fence sags, bellies, and looks unfinished. People often stop pulling too early because the come-along gets stiff. Push through to a firm, drumhead tension before you tie off.
Using cheap, non-galvanized fasteners is a slow-motion failure. Bare steel rusts, stains your wood, and snaps within a few seasons. Spend the extra dollar on galvanized lag screws, staples, and bands.
Finally, ignoring the top rail leaves your fence floppy at the top and far less secure overall.
Expert Tips
Pre-drill pilot holes in hardwood posts before driving lag screws. It stops the wood from splitting and lets the screw seat flush — something most beginners learn the hard way after cracking a post.
Stretch your fabric on a warm day when possible. Steel expands in heat and contracts in cold. Fabric stretched tight on a freezing morning can pull dangerously tight by summer.
Wrap a strip of rubber or use a fence-tension puller bar instead of hooking the come-along directly to the end diamonds. This spreads the pull and prevents you from bending the wire.
Always work from terminal post to terminal post in one continuous run. Tackling sections out of order leaves uneven tension that shows. And keep a magnetic tray for your lag screws — dropping galvanized hardware in tall grass costs more time than you’d think.
Frequently Asked Questions
Can I attach chain link fence directly to a wood post without brackets?
No, not reliably. Stapling raw fabric straight to wood without a tension bar lets the end links pull loose under tension. Use a tension bar woven through the fabric and clamped to the post with tension bands. This spreads the load evenly and keeps the fabric locked in place for years instead of curling away within a season.
What size lag screws work best for wood fence posts?
Use galvanized lag screws around 5/16 inch in diameter and 2 inches long for most residential posts. They bite deep enough to hold tension bands and rail clamps without splitting standard 4×4 timber. Pre-drill a pilot hole in dense or older wood. Galvanized hardware resists rust, so it won’t stain your posts or weaken over time.
How tight should chain link fabric be?
The fabric should feel firm, like a drumhead, with very little give when you press your palm against it. The diamonds narrow into even shapes when tension is correct. Too loose and it sags and bellies out; too tight and you deform the wire or stress the posts. Aim for taut but not strained, and stretch in warmer weather when you can.
Do I need a top rail with wood posts?
Yes, a top rail makes a big difference. It keeps the upper edge of the fabric from sagging and gives the fence a rigid backbone. Without it, the top flops, looks unfinished, and the fence is easier to push down. Run the rail through clamps or brace bands at each post and fasten it firmly for a straight, secure finish.
Will mixing wood posts and chain link cause rust problems?
Not if you use galvanized hardware throughout. Bare steel fasteners rust, stain the wood, and fail fast. Galvanized lag screws, staples, tension bands, and fabric resist corrosion even against damp timber. The wood and mesh themselves don’t react badly together — the failure point is always cheap, uncoated hardware. Spend a little more upfront and the connection lasts.
Conclusion
You now have a complete roadmap for how to connect chain link fence to wood post the right way. Start with solid, plumb posts. Mark your layout carefully. Weave the tension bar, clamp it with galvanized bands, run your top rail, then stretch the fabric to a firm, even tension before you tie it off. Each step builds on the last, and skipping any one of them is where most fences fail.
The payoff is real. You save the cost of a contractor, avoid repeat repairs, and end up with a fence that stays tight and square for 15 to 20 years. More than that, you gain a skill you can use again on gates, repairs, and future projects.
Gather your tools, test your posts, and take it one step at a time. Done with care, this is a weekend job that protects your property and pays you back for years. Grab your drill and get started.
