
Teak is tough. It resists rot. It shrugs off rain. It holds up for decades when other woods rot away. But here’s what most people miss: even teak benefits from a little help. Left alone, it fades to a soft silver-gray. Knowing how to seal teak wood lets you lock in that warm, golden color and shield the grain from sun, water, and grime. The good news?
This is a job you can do yourself in an afternoon, no special skills required. You just need the right steps and a bit of patience. This guide walks you through every stage of sealing teak the right way, so your furniture, decking, or trim stays beautiful and protected for years.
Why Sealing Teak Wood Matters
Teak is expensive. You paid for it. Why let it weather faster than it should?
Sealing matters for three plain reasons. It saves money. It saves time. It saves regret. A sealed surface repels water before it soaks in. It blocks UV rays that bleach the color out. It keeps mildew from settling into the grain.
Skip this step and you face cracked boards, gray patches, and rough spots that splinter. Then you’re sanding, scrubbing, and refinishing far sooner than you planned.
Learning teak maintenance early builds confidence. You stop guessing. You stop wasting product. You extend the life of every piece you own. That’s the quiet payoff of doing it once and doing it right.
Tools and Materials You’ll Need
Gather everything before you start. Stopping halfway to find a brush wastes drying time and tests your patience.
- Fine-grit sandpaper (120 and 220 grit) for smoothing the surface
- Teak sealer or a quality wood sealer made for outdoor use
- Clean lint-free cloths for wiping and applying
- A natural-bristle brush or foam applicator for even coverage
- Mild soap and water for cleaning
- A stiff nylon brush for scrubbing out dirt and old residue
- Painter’s tape to protect nearby surfaces
- Plastic gloves to keep oils and sealers off your skin
- A tack cloth to lift fine dust before sealing
- A foam sanding block (optional) for comfortable, even hand-sanding on flat panels
That’s it. Simple tools. Honest work.
Step-by-Step Guide on How to Seal Teak Wood
Follow these steps in order. Don’t skip ahead. Each one sets up the next.
Step 1 – Clear and Set Up Your Workspace
Pick a spot with shade and good airflow. Direct sun dries sealer too fast and leaves streaks. A garage with the door open works well.
Lay down a drop cloth or old newspaper. Sealers can splash and stain concrete or grass.
Move your teak piece onto a stable surface at a comfortable height. Your back will thank you later.
Use painter’s tape to mask any metal hardware, hinges, or glass. This saves you scraping dried sealer off later.
Check the weather if you’re working outdoors. You want a dry day with low humidity. Damp air slows drying and can cloud the finish. Set everything within arm’s reach. Then you’re ready.
Step 2 – Clean the Teak Thoroughly
Dirt blocks sealer. You can’t protect a surface you haven’t cleaned.
Mix mild soap with warm water. Dip your stiff nylon brush and scrub along the grain, never against it. Listen for the soft swish of bristles lifting grime from the pores.
Pay attention to corners and joints. Dirt loves to hide there.
If your teak has gone gray or grown mildew spots, a dedicated teak cleaner pulls that out fast. You’ll watch the gray lift and the warmer tone return.
Rinse with clean water until no suds remain. Wipe away standing water with a cloth. The wood should feel clean, slightly damp, and smell faintly fresh. That clean base is everything.
Step 3 – Let the Wood Dry Completely
Patience pays here. Sealing damp teak traps moisture inside, and that leads to cloudy patches and poor bonding.
Give the wood at least 24 to 48 hours to dry fully. Outdoor furniture in dry air may need less. Thick decking may need more.
Touch the surface. It should feel dry and cool, not cold or sticky. Press a dry cloth against the grain. If it picks up any dampness, wait longer.
Avoid the urge to rush this with a heat gun or hair dryer. Forced heat dries the surface but leaves the core wet.
Dry wood drinks in sealer evenly. Wet wood fights it. Let time do the work.
Step 4 – Sand the Surface Smooth
Now you smooth things out. Start with 120-grit sandpaper. Move with the grain in long, steady strokes. You’ll hear a gentle, even rasp and feel the rough fibers give way.
Sanding against the grain leaves scratches that show up the moment sealer hits the wood. Always follow the lines.
Switch to 220-grit for the final pass. Run your palm across the surface. It should feel like smooth glass, not gritty paper.
For flat panels, that optional foam sanding block keeps pressure even and saves your fingers. Knowing how to seal teak wood properly starts with this prep, because sealer only looks as good as the surface beneath it.
Wipe away the dust as you go. A clean surface reveals what still needs work.
Step 5 – Remove All Dust and Debris
Fine dust is the enemy of a smooth finish. It settles into the grain and shows up as tiny bumps under the sealer.
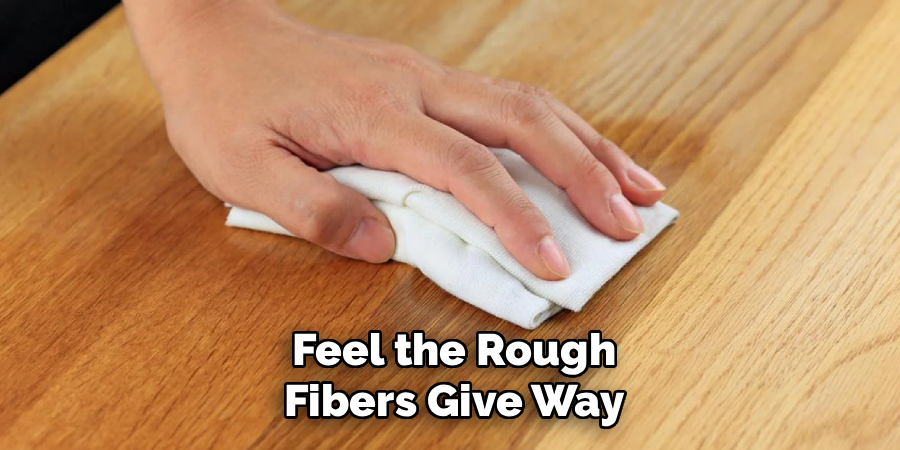
Start with a dry brush or vacuum to clear the bulk of it. Then take your tack cloth and drag it lightly across every surface. The cloth’s sticky fibers grab particles a brush leaves behind.
Run your hand over the wood one more time. It should feel clean and bare, with no powdery film.
Don’t use a wet rag here. Adding moisture undoes your drying work. Stay dry and thorough.
Check corners, edges, and carved details closely. Dust hides where light doesn’t reach. A truly clean surface is your last checkpoint before sealing.
Step 6 – Apply the First Coat of Sealer
This is the moment. Shake or stir your teak sealer well so the protective ingredients mix evenly.
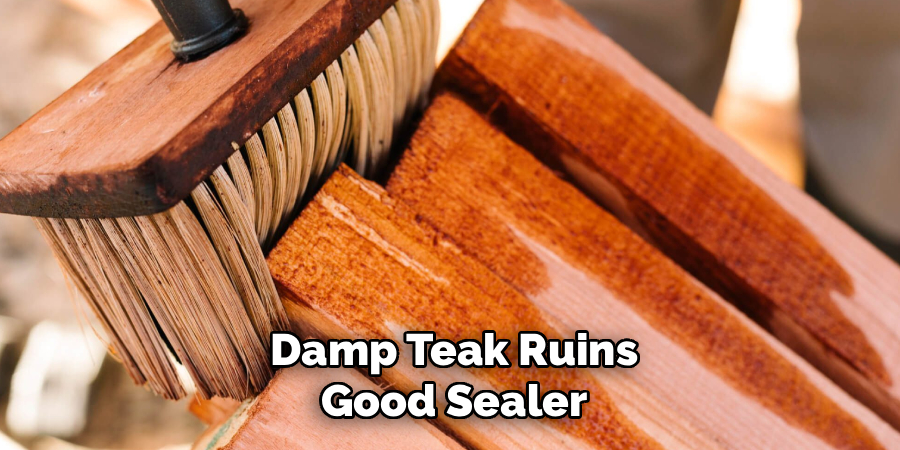
Dip your natural-bristle brush or foam applicator and load a modest amount. Apply in thin, even strokes along the grain. Thin coats beat thick ones every time. A heavy coat puddles, drips, and dries blotchy.
Watch the color deepen as the sealer soaks in. That warm, rich tone is the sign you’re doing it right.
Work in sections so no edge dries before you blend the next stroke. Listen for the quiet drag of the brush as the wood absorbs the product.
Wipe off any excess that won’t soak in after 15 minutes. Pooled sealer turns sticky and uneven.
Step 7 – Let It Cure, Then Add a Second Coat
Give the first coat time to dry. Most sealers need 4 to 8 hours, but always check the label.
Touch a hidden spot. It should feel dry, not tacky. If your finger sticks, wait longer.
A light scuff with 220-grit between coats helps the next layer grip. Wipe the dust away after.
Apply the second coat exactly like the first. Thin, even, with the grain. This layer builds deeper UV protection and stronger weatherproofing.
Two coats handle most indoor pieces. Outdoor furniture exposed to harsh sun and rain often needs three. Mastering how to seal teak wood means matching coats to conditions. More exposure means more protection. Let each coat fully cure before the next.
Step 8 – Inspect, Clean Up, and Let It Set
Step back and look closely. Run your eyes across the surface for drips, thin patches, or dull spots. Catch them now while touch-ups blend easily.
Feel the finish with a clean hand. It should be smooth, dry, and slightly satin to the touch.
Peel off your painter’s tape slowly before the sealer fully hardens. Wait too long and the tape can lift the finish at the edge.
Clean your brushes right away with the solvent your sealer recommends. Dried sealer ruins good brushes fast.
Let the piece cure undisturbed for a full day before you use it. Move it too soon and you’ll leave marks in the soft finish. Good work deserves the wait.
Common Mistakes to Avoid
The biggest mistake is rushing the drying stages. People clean their teak, then seal it the same hour. Trapped moisture clouds the finish and weakens the bond. Always let the wood dry for a day or two first. Damp teak ruins good sealer every time.
Another common error is applying sealer too thick. Beginners assume more product means more protection. The opposite is true. Thick coats puddle, stay tacky, and peel. Thin layers soak in and last. Build protection through multiple light coats, not one heavy one.
Sanding against the grain trips up many first-timers too. Cross-grain scratches stay invisible on bare wood but jump out the second sealer hits them. Always sand in the direction of the lines.
Skipping the cleaning step is another trap. Sealing over dirt or old gray oxidation locks in the grime. The finish never bonds right and fades fast.
Finally, many people seal in direct sun or high humidity. Heat dries the surface too quickly and leaves lap marks. Damp air clouds the coat. Pick a mild, dry, shaded spot and your finish stays clear and even.
Expert Tips
Test your sealer on a hidden spot first. Different teak takes color differently, and you want no surprises on the visible face.
Wipe with the grain, not in circles. Circular motions leave swirl marks that catch the light once the finish dries.
Here’s something pros know: a thin maintenance coat once a year beats a full strip-and-reseal every few years. Catch fading early and you save hours of sanding.
Warm the sealer slightly on a cool day by setting the can in warm water. It flows smoother and soaks in deeper.
Keep one clean, dry cloth in your other hand while you apply. You can lift drips the instant they form. Small habits like these separate a flawless finish from a frustrating one.
Frequently Asked Questions
How Often Should I Reseal Teak Wood?
For outdoor teak furniture, plan to reseal every one to two years, depending on sun and rain exposure. Indoor pieces last much longer and may only need attention every three to four years. Watch the color. When the warm tone starts fading toward gray, that’s your signal. A light annual maintenance coat keeps the finish strong and saves you a full refinish.
Can I Use Teak Oil Instead of a Sealer?
You can, but they do different jobs. Teak oil soaks into the grain and enriches color, while a wood sealer forms a protective layer that resists water and UV rays. Oil needs reapplying more often and can encourage mildew outdoors. For lasting weatherproofing, a quality sealer wins. If you love the freshly-oiled look, oil first, then seal once it dries.
Do I Need to Sand Teak Before Sealing?
Yes, light sanding makes a real difference. It opens the grain, removes old residue, and smooths rough spots so the sealer bonds evenly. Start with 120-grit, finish with 220-grit, and always sand with the grain. For brand-new teak that’s already smooth, a quick once-over with fine paper is enough. Skipping this step leaves a patchy, weaker finish.
Why Does My Teak Turn Gray Over Time?
Gray teak is the result of UV rays and weather breaking down the surface oils. It’s natural and not harmful to the wood’s strength, but it does dull the rich color. Sealing slows this fading by blocking sunlight and moisture. If your teak has already grayed, a teak cleaner restores the warm tone before you seal it back to its original glow.
Can I Seal Teak Outdoors in Cold Weather?
It’s best to avoid it. Most sealers need temperatures above 50°F to cure properly, and cold air slows drying dramatically. Damp, chilly conditions can cloud the finish or leave it tacky for days. If you must work in cooler months, choose a dry, mild afternoon and bring the piece into a heated garage to cure. Warmth and dry air give you the cleanest result.
Conclusion
Sealing teak isn’t hard. It just takes order, patience, and care. Clean it. Dry it. Sand it. Seal it. Let it cure. Follow those steps and your teak stays warm, golden, and protected for years.
Remember the core lessons. Thin coats beat thick ones. Dry wood drinks in sealer; damp wood fights it. Always work with the grain. And never rush the drying time between stages.
Now you know how to seal teak wood the right way, and that knowledge pays off every season. You’ll spend less on repairs. You’ll spot fading before it spreads. You’ll keep furniture, decking, and trim looking their best with minimal effort.
The best part? Once you’ve done it once, it stops feeling like a chore. It becomes a quick, satisfying ritual that protects something you value.
So grab your brush this weekend. Pick one piece. Seal it well. Then step back and see the difference for yourself.
