
Store-bought dowels rarely match what your project actually needs. The diameter is wrong, the wood species is off, or the price stacks up fast when you need a dozen. Cutting your own solves all three problems. Learning how to cut dowels from wood gives you full control over size, material, and finish—and it’s far easier than most beginners expect.
You don’t need a workshop full of expensive machines. With a few common tools and a steady hand, you can produce clean, accurate dowel rods that fit your joints perfectly. Whether you’re building furniture, making repairs, or pinning a wobbly chair leg, custom dowels deliver better results than anything off the shelf.
This guide walks you through every step, from choosing your stock to sanding the final rod.
Why Cutting Your Own Dowels Matters
Pre-cut dowels limit you. You get standard diameters, generic wood, and lengths that almost never match your plans. Cutting your own removes those limits.
You save money first. A single board yields multiple dowel rods at a fraction of the cost of buying them packaged. You match wood species next—oak dowels for oak furniture, walnut for walnut, so the grain and color blend seamlessly into the finished piece.
You also build skill. Every cut teaches you to read wood grain, control your tools, and dial in precise measurements. That confidence carries into bigger projects. And when a repair calls for an odd size at midnight, you make it yourself instead of waiting on a store. Custom dowels keep your woodworking joints tight and your projects moving.
Tools and Materials You’ll Need
Gather these before you start. The right setup makes clean cuts faster and safer.
- Straight-grained hardwood stock — oak, maple, birch, or walnut for strong, splinter-free dowels
- Miter saw or fine-tooth handsaw — for cutting stock to length
- Drill press with a dowel plate — for shaping rods to exact diameter
- Dowel jig — for drilling matching holes in your joints
- Calipers or a tape measure — for verifying diameter and length
- Sandpaper (120 and 220 grit) — for smoothing the finished rod
- Clamps — to hold stock steady during cutting
- Safety glasses and dust mask — non-negotiable protection
- Wood lathe with a roundover bit setup (optional) — for producing long, perfectly round custom dowels in batches
Sharp blades and bits matter more than expensive ones. Dull edges tear grain and burn wood.
Step-by-Step Guide on How to Cut Dowels From Wood
Step 1 – Select the Right Wood Stock
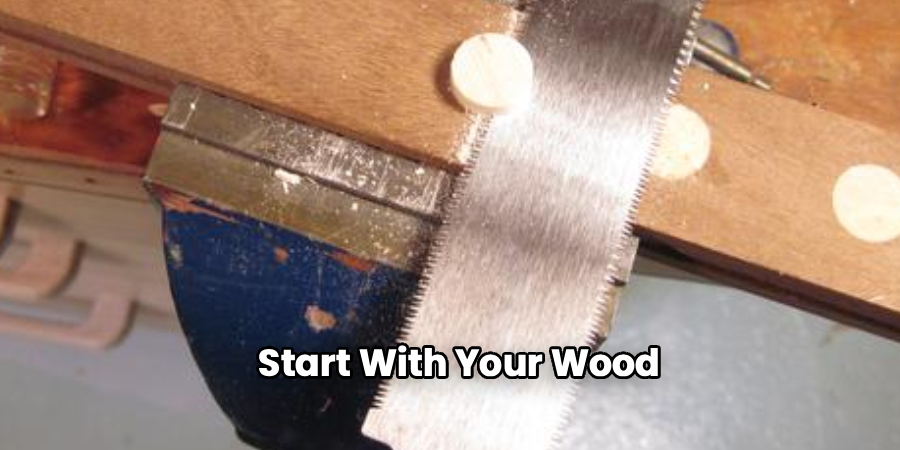
Start with your wood. Choose straight-grained hardwood for dowels that resist splitting under pressure. Oak, maple, and birch hold up best.
Run your hand along the board and check the grain direction. You want long, parallel lines flowing down the length—not wild swirls or knots. Knots create weak points that snap when you drive the dowel into a joint.
Hold the board up to the light. A flat, even surface tells you the stock is stable. Cupping or twisting means trouble ahead.
Mastering how to cut dowels from wood begins with this choice. Good stock cuts cleanly and shapes evenly. Bad stock fights you at every step and wastes time you can’t get back.
Step 2 – Mark Your Diameter and Length
Measure twice before you cut. Decide the dowel diameter your project needs—1/4 inch, 3/8 inch, 1/2 inch—and mark it on the end of your stock.
Use calipers for accuracy. Eyeballing leads to dowels that won’t seat in your woodworking joints. Mark the length too, adding a small margin you’ll trim later.
Draw your cut lines with a sharp pencil. Press a square against the wood to keep lines perfectly perpendicular. Crooked marks become crooked cuts.
Rip the stock into square strips first if you’re starting from a wide board. Each strip should be slightly larger than your target diameter—you’ll round it down next. Clean, accurate marks here prevent every problem that follows.
Step 3 – Rip the Stock Into Square Strips
Turn your board into manageable strips. Set your table saw or use a miter saw to rip the stock into square blanks slightly wider than your final dowel diameter.
Listen to the saw. A steady, even hum means the blade is cutting clean. Screeching or bogging tells you to slow your feed rate or check for a dull blade.
Keep your strips uniform. A 1/2-inch dowel starts as a roughly 9/16-inch square blank, giving you material to remove during shaping. Consistency across all strips means consistent dowels.
Run your fingers along each cut edge. Smooth surfaces shape easily. Rough, fibrous edges signal a blade problem you should fix before moving on. Clamp the wood firmly throughout.
Step 4 – Shape the Dowel With a Dowel Plate
Now make it round. A dowel plate is a hardened steel plate with graduated holes. You drive your square blank through the hole, and the edges shear off to form a round rod.
Mount the plate over a hole or a vise. Set your blank on the largest matching hole, then tap it through with a mallet. You’ll hear sharp, rhythmic knocks as the corners shave away.

Move down to progressively smaller holes for a precise diameter. Each pass smooths the rod further. The shavings curl off in thin ribbons when you’re doing it right.
Knowing how to cut dowels from wood this way produces tight, accurate rods without a lathe. The finished dowel should slide snugly through your final hole.
Step 5 – Use a Drill Press for Consistent Results
For batches of identical dowels, the drill press shines. Chuck your square blank and spin it against a shaping tool or rounding jig to true it into a cylinder.
Set a moderate speed. Too fast burns the wood and leaves dark scorch marks; too slow tears the grain. You want a clean, whirring spin and pale, even shavings.
Feed the blank steadily. Rushing causes chatter—you’ll feel vibration and hear an uneven rattle. Smooth, constant pressure gives you a round rod with no flat spots.
Check your work with calipers as you go. A consistent diameter along the full length means the dowel will seat perfectly in every matching hole. This method delivers repeatable, professional results.
Step 6 – Smooth and Round the Edges
A raw dowel won’t slide into a hole easily. Sharp end edges catch and split. Round them.
Run 120-grit sandpaper along the length first to remove tool marks and high spots. Move to 220-grit for a satin-smooth finish that glides into your woodworking joints.
Chamfer the ends. Hold the dowel at an angle against the sandpaper and rotate it, easing the edge into a slight bevel. This lead-in helps the dowel start straight into its hole without binding.
Feel the surface. A properly sanded dowel is silky and uniform under your fingertips—no ridges, no fuzz. If you have a roundover bit, you can ease longer edges quickly. Wipe away dust before fitting.
Step 7 – Test the Fit in Your Joint
Never assume the fit. Drill a test hole in scrap wood using the same bit you’ll use on the real piece, then push the dowel in.
A correct fit takes firm hand pressure or a light mallet tap—snug but not forced. If it slides in loose, the dowel is undersized and your joint will fail. If it won’t enter, sand a touch more.
A dowel jig helps here. It aligns your holes perfectly so the dowel seats straight every time. Twist the dowel as you insert it to feel for tight spots.
Listen for a soft, solid thunk when it bottoms out. That sound means a clean, tight connection ready for glue and clamping.
Common Mistakes to Avoid
The biggest mistake is choosing the wrong wood. Beginners grab whatever scrap is handy, including softwoods or knotty boards that split the moment you drive them into a joint. Straight-grained hardwood prevents this. Always check grain direction before cutting.
Skipping measurement is the next trap. People rush straight to cutting without marking diameter or length precisely. A dowel that’s even slightly oversized won’t seat, and one that’s undersized leaves a sloppy, weak joint. Use calipers every time, not your eyes.
Forcing a dull blade or bit ruins good stock. Dull edges burn the wood, tear the grain, and leave rough surfaces that need extra sanding. You’ll smell scorching and see dark marks. Sharpen or replace your tools before they cost you material.
Rushing the shaping process is another frequent error. Driving a blank through a dowel plate too aggressively splits the rod. Tap steadily and let each hole do its work.
Finally, many woodworkers skip the test fit. They cut a full batch, then discover none of them seat properly. Always test one dowel in scrap before committing to the rest of your project.
Expert Tips
Cut your blanks slightly oversized, then shape down. Removing material is easy; adding it back is impossible. A 1/16-inch margin gives you room to dial in a perfect diameter.
Wax your dowels before final assembly. A thin coat of paste wax on the rod—not the glue area—helps it slide into tight holes without scuffing the wood. Keep wax off any surface you plan to glue.
Match your drill bit to your actual dowel, not the listed size. Wood swells and shrinks with humidity, so measure the real diameter with calipers and pick the bit that gives a snug press fit.
Batch your work. Set up your dowel plate or drill press once, then run all your blanks through together. Consistent setup produces consistent custom dowels and saves serious time.
Frequently Asked Questions
What Is the Best Wood for Making Dowels?
Straight-grained hardwoods make the best dowels. Oak, maple, birch, and walnut offer strength and resist splitting under pressure. Avoid softwoods like pine for load-bearing joints—they crush and snap easily. Choose stock with long, parallel grain and no knots. For furniture, match the dowel species to your project wood so the color and grain blend into the finished piece.
Can I Make Dowels Without a Lathe?
Yes. A dowel plate is the most reliable lathe-free method. You drive a square blank through graduated steel holes to shear it into a round rod. A drill press with a rounding jig also works for batches. Both produce accurate dowels with common shop tools. A lathe helps for long rods, but it isn’t required for most DIY projects.
How Do I Get the Exact Diameter I Need?
Start with an oversized square blank and shape it down gradually. Use a dowel plate’s graduated holes or a drill press to remove material in small passes. Check the diameter with calipers as you work, stopping when you hit your target. Always test the fit in a scrap hole drilled with your actual bit—a snug press fit is the goal.
Why Does My Dowel Split When I Insert It?
Splitting usually means the dowel is oversized, the hole is too tight, or the wood has hidden grain weakness. Sand the dowel down slightly and chamfer the ends so it leads in straight. Drill your hole with the correct bit and verify the fit in scrap first. Choosing knot-free, straight-grained stock prevents most splitting before it starts.
How Long Should a Dowel Be for a Strong Joint?
Aim for a dowel that enters each piece by about 1.5 to 2 times its diameter. A 3/8-inch dowel should sit roughly 5/8 inch into each board. Deeper engagement creates more glue surface and a stronger joint. Don’t bottom out the dowel tightly—leave a small gap for glue and trapped air to escape.
Conclusion
Cutting your own dowels puts you in control. You match the wood, dial in the exact diameter, and produce rods that fit your joints better than anything from a store. The process comes down to good stock, accurate measurement, careful shaping, and a solid test fit.
Start with straight-grained hardwood. Mark your dimensions with calipers. Shape your blanks with a dowel plate or drill press, then sand and chamfer for a clean lead-in. Test one dowel in scrap before you cut the rest. Each step builds the precision that keeps your woodworking joints tight for years.
You now know how to cut dowels from wood with confidence and accuracy. The skill saves money, sharpens your craft, and frees you from the limits of pre-cut packs. Grab a board, set up your tools, and cut your first batch. The more dowels you make, the faster and cleaner your results become—and your projects will show the difference.
