
A block of plain wood holds a face inside it. Your job is to find it. That idea sounds romantic, but the work behind it is simple, patient, and within reach of any beginner. You don’t need a workshop full of machines. You need a few sharp tools, a soft piece of wood, and the willingness to make slow cuts.
People have carved folk art dolls by hand for centuries, long before factories existed, and you can join that tradition this weekend. If you’ve ever wanted to learn how to make wooden dolls that feel personal and handmade, you’re starting in the right place. This guide walks you through every stage, from choosing your wood to the final coat of finish, so you can carve a charming, sturdy wooden doll from start to finish.
Why Making Wooden Dolls Matters
Store-bought toys break. Plastic cracks, fades, and lands in a drawer. A hand-carved doll lasts for decades and gets handed down.
But the real reward isn’t the doll. It’s what the carving does to you.
You learn to read grain. You learn to make a controlled cut. You learn to slow down when your hands want to rush. Each skill carries straight into bigger woodworking projects later.
There’s confidence in that. Your first doll will look rough. Your fifth will surprise you. By the tenth, your hands move with quiet certainty.
Carving also costs almost nothing. A single block of basswood and one good knife can produce a dozen dolls. You spend pennies on materials and gain a craft you keep for life. That trade is hard to beat.
Tools and Materials You’ll Need
Gather your gear before the first cut. A calm start depends on having everything within arm’s reach, and most of these items fit in a small box.
- Basswood block – soft, even-grained, and ideal for beginners
- Carving knife – a sharp, fixed-blade whittling knife
- Detail or hook knife – for tight curves and facial features
- Pencil and paper – to sketch your design and mark cuts
- Sandpaper – 120-grit, 220-grit, and 320-grit
- Wood burning tool – to add eyes, mouths, and fine detail
- Cut-resistant glove – protects the hand holding the wood
- Mineral oil or beeswax finish – food-safe and child-safe
- Soft cloth – to apply finish and wipe away dust
Optional but handy: a small wood vise or carving clamp holds the block steady and frees both hands for detailed work.
Step-by-Step Guide on How to Make Wooden Dolls
Step 1 – Sketch Your Doll Design
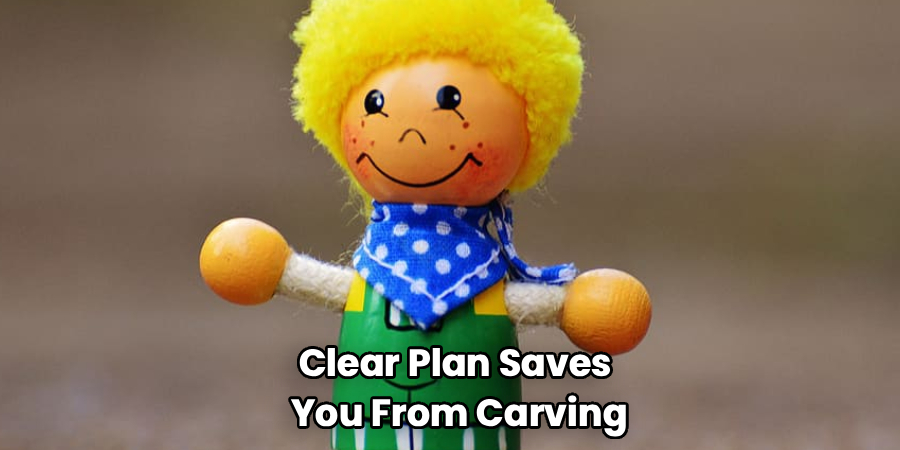
Start on paper, not wood. A clear plan saves you from carving away a feature you wanted to keep.
Draw your doll from the front and the side. Mark the head, the body, the arms, and the base. Keep the shape simple for your first attempt, since rounded forms forgive small mistakes better than sharp edges do.
Picture the proportions before you commit. A head that’s too small looks odd. A base that’s too narrow tips over.
Hold your basswood block and imagine the doll inside it. The figure should fit with wood to spare on every side. Learning how to make wooden dolls begins with this quiet planning, long before any blade touches the grain. Take the extra minutes here.
Step 2 – Choose and Prepare the Wood
Run your thumb along the block before you carve. Good basswood feels smooth and dry, with a pale, even color and no dark streaks. It’s the favorite of folk art carvers for a reason: it cuts like firm cheese and rarely splinters.
Sight down the grain like you’re aiming a dart. Straight, tight grain carves clean. Wild or twisting grain fights your knife at every turn.
Tap the block. Sound wood rings crisp. Damp or punky wood thuds dull and soft.
Set aside anything cracked, knotted, or stained with water marks. A knot is a stone in your path, and it will dull your blade and tear your cut. Sound, straight basswood now means smooth carving later.
Step 3 – Rough Out the Basic Shape
Now remove the bulk. Transfer your sketch onto the block with a pencil, marking the rough outline on all four sides.
Make slow, controlled cuts away from your body. Slice off the large corners first to turn the square block into a rounded mass. Each pass should peel a thin, curling shaving, not gouge a deep chunk.
Listen as you work. A clean cut makes a soft, slicing whisper. A tear or a crack means you’re cutting against the grain, so flip direction and try again.
Don’t chase detail yet. You’re finding the silhouette, not the face. Step back often and turn the doll in your hands. The body should emerge as a smooth, balanced form before you sharpen a single feature.
Step 4 – Carve the Head and Neck
The head sets the whole character, so slow your pace here. Mark a gentle ring where the neck meets the body, then carve a shallow groove around it with small, careful cuts.
Round the top of the head with light strokes, working from high points down to low ones. The wood should feel like it’s giving way in thin ribbons under your blade.
Watch your depth. Cut too deep on the neck and the head wobbles loose. Leave it thick and the doll looks stiff.
Keep both sides even. Turn the doll constantly and compare left to right. A symmetrical head reads as friendly and finished. A lopsided one catches the eye for all the wrong reasons. Patience here pays off in every later step.
Step 5 – Shape the Body, Arms, and Base
Bring the figure to life. Define the arms by carving shallow channels down each side of the body. Keep them close to the torso for strength, since arms that stick out snap easily.
Carve a flat, stable base at the bottom so your doll stands on its own. Test it on a level surface. A true base sits flat with no rock or wobble.
Feel the form with your fingers as you go. Smooth, flowing curves mean you’re on track. Sharp ridges or flat spots tell you where to keep cutting.
This is where many beginners learn how to make wooden dolls that feel solid and grounded rather than fragile. Take your time rounding every transition until the body flows as one continuous shape.
Step 6 – Refine the Facial Features
Switch to your detail knife. The face needs small, precise cuts, so trade your big blade for the fine one now.
Mark the eyes, nose, and mouth lightly in pencil first. Carve shallow. You can always remove more wood, but you can never put it back.
Make tiny stop cuts to outline each feature, then pare away the wood around them. The nose rises as a gentle bump. The eyes sit as soft hollows.
Go slow and breathe. A rushed cut here can ruin an hour of work in one slip.
Hold the doll at arm’s length and check the expression. A balanced face looks calm and alive. A crooked one feels off, even if you can’t say why. Keep adjusting until it feels right.
Step 7 – Sand for a Smooth Finish
Trade cutting for smoothing. Start with 120-grit sandpaper to knock down tool marks and rough spots, always working with the grain, never across it.

Move to 220-grit next, then finish with 320-grit for a silky surface. Each finer grit erases the scratches left by the one before it.
Run your fingertips over the wood between passes. Smooth basswood glides under your hand with no catch. Rough patches snag and tell you exactly where to keep sanding.
Pay attention to the curves around the face and neck. These spots show every flaw once the finish goes on. Fold the sandpaper to reach tight grooves.
Blow or wipe away the fine dust often. A clean surface lets you see the true smoothness and spot any spot you missed.
Step 8 – Add Detail with Wood Burning
Now bring out the features. Heat your wood burning tool and test it on a scrap piece first to learn its speed.
Trace the eyes, the mouth, and any hair or clothing lines with a light, steady hand. The tip should glide and leave a thin, dark line, not a deep scorched trench. Move too slow and you burn a hole; move too fast and the line fades.
Listen for a faint sizzle as the hot tip meets the wood. That sound means you’re moving at the right pace.
Keep your lines simple and clean. A few well-placed marks read better than a cluttered face. Let the tool cool fully before you set it down, and your hand-carved doll now wears a clear, lasting expression.
Step 9 – Apply a Safe Finish
Protect your work with the right finish. For a doll a child might hold, choose a food-safe option like mineral oil or beeswax. Both seal the wood without harsh chemicals.
Pour a small amount onto a soft cloth and rub it into the wood in slow circles. Watch the grain deepen and glow as the oil soaks in. The basswood drinks the first coat fast.
Wipe away any excess after a few minutes so the surface doesn’t stay sticky. Let it dry, then add a second thin coat for extra protection.
Run your hand over the finished doll. It should feel smooth, warm, and lightly sealed, with a soft sheen rather than a glossy shine. A proper finish guards your doll against dirt and handling for years.
Common Mistakes to Avoid
The most common error is cutting toward your own hand. New carvers grip the wood tight and slice straight at their thumb. One slip draws blood. Always cut away from your body and wear a cut-resistant glove on your holding hand. Safety isn’t optional; it’s the first skill.
Another frequent slip is rushing the rough-out stage. You see the doll in your mind and start carving details before the basic shape exists. The result is a face with no head to sit on. Find the silhouette first, then refine. Big cuts before small ones, every time.
Many beginners also fight the grain. They push the blade against the wood fibers, tearing the surface instead of slicing it. When a cut catches or splinters, stop and flip your direction. The wood tells you which way it wants to be cut, so listen to it.
Choosing the wrong wood trips up plenty of first-timers too. Hard, knotty lumber dulls your knife and cracks under pressure. Stick to soft, clear basswood until your hands know the craft.
Finally, don’t skip the sanding progression. Jumping straight to fine grit leaves deep scratches that the finish only highlights. Work through each grade in order.
Expert Tips
A few habits separate a clean doll from a clumsy one. Keep your knife scary sharp. A dull blade slips and tears, while a sharp one cuts exactly where you aim it. Strop your knife often, even mid-project.
Carve when the light is good. Side lighting throws shadows that reveal every bump and hollow, so you spot uneven spots before they become problems.
Save your scrap basswood. Use it to test cuts, finishes, and your wood burning tool before touching the real doll. A test piece costs nothing and saves your best work.
Work in short sessions. Tired hands make sloppy cuts. When your grip aches or your focus drifts, set the doll down and come back fresh. The wood will wait for you.
Frequently Asked Questions
What Is the Best Wood for Carving Dolls?
Basswood is the best choice for beginners and pros alike. It’s soft, pale, and has a tight, even grain that carves cleanly without splintering. Butternut and pine work too, but pine’s grain can be uneven and frustrating. Start with basswood while you build your skills, then experiment with harder woods once your hands and blade control improve. It’s forgiving, affordable, and widely available.
Do I Need Expensive Tools to Start Carving?
No. You can carve a complete doll with a single sharp whittling knife and a block of basswood. Add a detail knife later for fine features. The most important factor isn’t the price of your tools; it’s how sharp you keep them. A cheap, well-stropped knife outperforms an expensive, dull one every time. Start small and add tools as your projects grow.
How Long Does It Take to Carve a Wooden Doll?
A simple doll takes most beginners three to five hours, spread across a weekend. Rough shaping goes quickly, but detail work and finishing demand patience. Don’t rush. Carving in short, focused sessions produces cleaner results than one long, tiring marathon. As your skills sharpen, you’ll carve faster while making fewer mistakes. The finishing and drying stages add extra time but require little effort.
Are Hand-Carved Wooden Dolls Safe for Children?
Yes, when finished correctly. Sand the doll smooth so there are no splinters or sharp edges, and seal it with a food-safe finish like mineral oil or beeswax. Avoid small carved pieces that could break off and become choking hazards for very young children. A well-sanded, properly sealed doll makes a safe, durable toy that can last for generations of play.
How Do I Keep My Carving Knife Sharp?
Strop your knife often using a leather strop with polishing compound. A few passes before and during each carving session keep the edge keen. When stropping no longer restores sharpness, move to a sharpening stone to rebuild the edge. A sharp knife is safer than a dull one because it cuts where you aim instead of slipping. Test sharpness on scrap basswood.
Conclusion
Carving a doll by hand is one of the most satisfying ways to enter woodworking. You start with a plain block and end with a figure that carries your patience in every curve. Along the way, you build real skills: reading grain, making controlled cuts, and finishing wood safely. Those skills follow you into every project that comes next.
Remember the keys. Plan on paper first. Choose soft, clear basswood. Cut away from your body, big shapes before small details. Sand through each grit in order, then seal with a safe finish.
Your first doll will look rough, and that’s exactly as it should be. Each one teaches your hands a little more. Now that you understand how to make wooden dolls from sketch to final coat, nothing stands between you and your first carving. Pick up your knife. Choose your block. Make the first cut this weekend, and watch the face hiding in the wood slowly come to life.
