
That crack in your favorite oak table didn’t appear overnight. Wood moves. It dries, swells, and splits as humidity shifts through the seasons. The good news? You don’t need to replace the piece or call a pricey restorer. Learning how to repair cracked wood furniture puts the fix back in your hands.
A clean repair restores strength and hides the damage so well that most people will never spot it. You’ll work with simple materials, basic tools, and a bit of patience. Whether it’s a hairline split or a wide gap, the process follows the same logic every time.
This guide walks you through each step, from cleaning the crack to matching the finish, so you can restore your furniture with confidence.
Why Repairing Cracked Wood Furniture Matters
A new solid-wood table runs hundreds of dollars. A tube of wood filler costs a few. The math speaks for itself. Repairing your own furniture saves money you’d otherwise hand to a restoration shop.
It also builds real skill. Once you fix one crack, you understand how wood behaves — how it absorbs glue, how it sands, how it takes stain. That confidence carries into bigger projects.
Repairs extend the life of pieces you actually care about. A handed-down dresser or a desk you’ve used for years deserves better than the curb. You keep its character intact instead of trading it for something mass-produced.
And you avoid costly mistakes. A small crack ignored becomes a full break. Fix it early, and you protect the structure for decades.
Tools and Materials You’ll Need
Gather everything before you start. Stopping mid-repair to hunt for supplies invites mistakes and lets glue set before you’re ready.
- Wood glue — bonds tight cracks and reinforces joints
- Epoxy wood filler — fills wide gaps and dries rock-hard
- Putty knife — presses filler deep into the crack
- Sandpaper — 120, 220, and 320 grit for smoothing stages
- Clamps — hold split sections closed while glue cures
- Wood stain — matches the repair to the original color
- Clean cloths — wipe excess glue and dust
- Painter’s tape — protects surrounding wood during finishing
- Finish or sealant — locks in the repair and restores sheen
- Vacuum or compressed air (optional) — clears debris from deep cracks faster than a brush
Choose stain and finish that match your existing piece. Test both on a hidden spot first.
Step-by-Step Guide on How to Repair Cracked Wood Furniture
Step 1 – Inspect and Assess the Crack
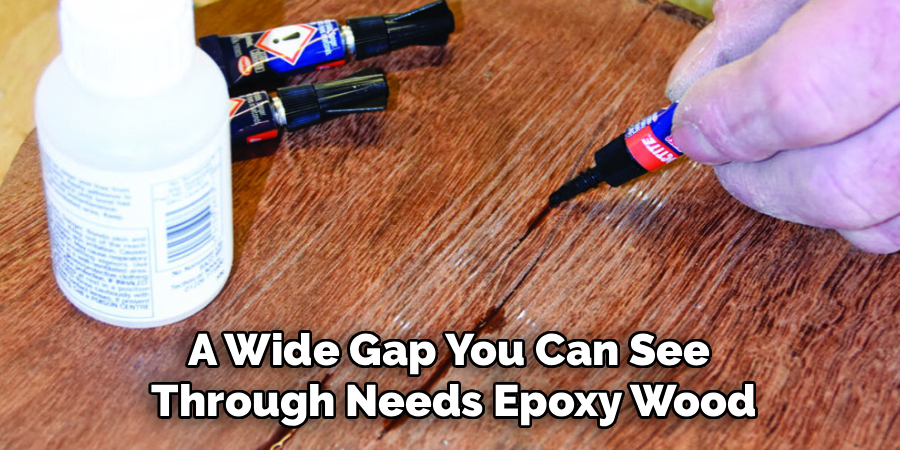
Start by reading the damage. Run your finger along the crack. A hairline split that barely catches your nail needs glue. A wide gap you can see through needs epoxy wood filler.
Check whether the crack moves. Press both sides together. If they shift and close cleanly, you have a candidate for a glued repair. If the edges are crumbling or warped, you’ll fill instead.
Look at the grain direction too. Cracks usually follow the grain, which helps you plan how the repair will blend. Good light matters here — angle a lamp across the surface to reveal the full length and depth.
Knowing exactly what you’re dealing with sets up every step that follows. Rushing this part leads to weak fixes.
Step 2 – Clean the Crack Thoroughly
Glue and filler bond to clean wood, not dust. Clear out every speck of debris before you apply anything.
Work a thin blade or stiff brush into the crack to loosen old finish, dirt, and loose splinters. You’ll feel grit give way as the channel opens up. Compressed air or a vacuum clears the deep spots faster.
Wipe the surrounding surface with a dry cloth. Avoid water — it swells the wood and weakens the bond. If old wax or polish coats the area, a light pass with mineral spirits cuts through it. Let it flash off completely.
When the crack looks clean and the edges feel crisp under your fingertip, you’re ready. A clean crack is the foundation of a strong cracked wood repair.
Step 3 – Apply Wood Glue to Tight Cracks
For splits that close cleanly, wood glue does the heavy lifting. Squeeze a bead directly into the crack, then work it in.
Use a thin blade or a toothpick to push glue deep, not just along the surface. You want it coating both inner faces. Listen for the slight squelch as the glue spreads — that tells you it’s reaching where it counts.
Don’t be stingy. Excess glue squeezes out when you clamp, and you wipe that away. A dry, starved joint fails fast.
If the crack runs long, work in sections so the glue doesn’t skin over before you clamp. Move with purpose. Most wood glues give you five to ten minutes of open time before they grab.
Step 4 – Clamp and Hold the Repair
Pressure makes the bond. Position your clamps across the crack and tighten until the edges pull flush.
You’ll see a thin line of glue squeeze out along the seam. That’s the sign of full contact. Wipe it immediately with a damp cloth — dried glue resists stain and shows through the finish as a pale streak.
Protect the wood from clamp jaws with scrap blocks or cloth pads. Metal pressed straight onto a finished surface leaves dents you’ll have to repair next.
Check that the surface stays level as you tighten. Over-cranking can bow thin panels. Snug is enough. Leave the clamps on for the full cure time listed on the glue — usually 24 hours for a structural hold.
Step 5 – Fill Wide Gaps with Epoxy
Some cracks won’t close. For these, reach for epoxy wood filler. It fills the void and hardens into a stable, sandable mass that won’t shrink.
Mix the two parts until the color turns uniform — no streaks. Press it into the gap with a putty knife, packing it tighter than the surface. Overfill slightly; filler settles and sands down, so a small mound now saves you a second pass later.
Drag the knife flush along the grain to smooth the top. You’ll feel resistance as the filler grabs the wood edges. Work fast, because most epoxy sets within minutes.
This is where careful work on how to repair cracked wood furniture pays off. A solid fill now means a seamless finish later.
Step 6 – Sand the Repair Smooth
Once everything cures hard, sand it level. Start with 120-grit to knock down ridges and excess filler.
Sand along the grain, never across it. Cross-grain scratches catch stain and stand out badly. Run your palm over the area as you go — your hand feels high spots your eyes miss.
Move up to 220-grit to refine the surface, then 320 for a finish-ready smoothness. The repair should disappear under your fingers, with no bump or dip where the crack used to be.
Wipe away dust with a clean, dry cloth between grits. Dust trapped under finish ruins the look. When the patched area feels identical to the surrounding wood, you’ve sanded enough.
Step 7 – Stain to Match the Wood
Color brings the repair into hiding. Test your wood stain on a scrap or hidden area first, since filler and bare wood absorb differently than the aged surface.
Apply stain with a cloth or brush in thin coats, wiping back the excess. Build the color slowly. One heavy coat looks blotchy; two or three light passes blend far better.
Watch how the repaired spot takes the color. Epoxy filler often grabs less pigment, so you may need to dab on extra or blend with a fine brush to fake grain lines.
Step back and check under natural light. The patch should melt into the surrounding wood. If it looks off, adjust before the stain fully sets.
Step 8 – Seal and Finish
Lock in your work with a protective finish. Match the sheen of the original piece — gloss, satin, or matte — so the repair stays invisible.
Brush or wipe on a thin, even coat. Let it dry fully, then scuff lightly with 320-grit and apply a second coat. Two thin layers beat one thick one every time. You’ll feel the surface turn smooth and slick as the finish builds.
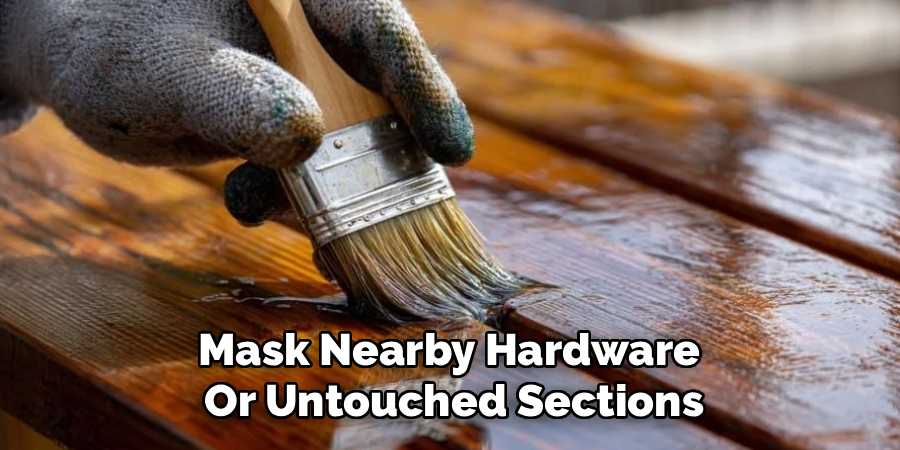
Mask nearby hardware or untouched sections with painter’s tape if you’re spot-finishing. This keeps fresh finish off areas that don’t need it.
Give the final coat a full day to cure before you use the piece. The result: a furniture restoration that holds up and looks like the crack never happened.
Common Mistakes to Avoid
The biggest mistake is skipping the cleaning step. People squeeze glue into a dusty crack and wonder why it fails weeks later. Glue bonds to clean wood — not to grime, wax, or old finish. Take the extra five minutes.
Another common error is over-clamping. Beginners crank the clamps as tight as they’ll go, thinking more pressure means a stronger bond. Instead, they squeeze out all the glue and bow the panel. Snug, even pressure is all you need.
Using the wrong filler causes endless frustration. Lightweight indoor putty shrinks and cracks again under stress. For structural gaps, epoxy wood filler holds firm and won’t move with seasonal changes.
Many people also rush the cure time. They unclamp after an hour because the surface feels dry. The bond inside hasn’t set, and the crack reopens. Respect the full drying window on the label.
Finally, plenty of beginners stain over a poorly sanded repair. Cross-grain scratches and leftover dust grab pigment unevenly, leaving a blotchy patch that screams “repair.” Sand thoroughly, wipe clean, and test your color first.
Expert Tips
Match grain before color. When you fill a crack, drag a fine brush through wet filler to fake the wood’s natural lines. This small trick makes the repair vanish far better than stain alone.
Keep glue squeeze-out off the surface entirely. Dried glue blocks stain, so any spot you miss shows up as a pale ghost line later. Wipe while wet, then check again once it tackifies.
Warm the wood slightly before applying epoxy in cold rooms. Cold wood slows the cure and weakens the bond. A few minutes with a hair dryer on low helps it set right.
For antique pieces, use reversible hide glue instead of modern wood glue. It lets future restorers undo your work without damaging the original — a courtesy that preserves value.
Frequently Asked Questions
Can You Repair a Crack in Wood Without Replacing the Piece?
Yes. Most cracks repair cleanly with glue or epoxy wood filler. Tight splits close with wood glue and clamps, while wide gaps fill with epoxy. After sanding, staining, and sealing, the repair blends into the surrounding wood. Replacement is only necessary when the wood is rotted, badly warped, or structurally beyond saving.
What Is the Best Filler for Cracked Wood Furniture?
Epoxy wood filler is the best choice for structural cracks. It dries rock-hard, won’t shrink, and accepts sanding and stain well. For tiny hairline cracks, wood glue often works better since it bonds the wood directly. Match your filler to the crack size and the stress the piece will take.
How Long Does Wood Glue Take to Dry?
Most wood glues form a clamp-ready bond within 30 minutes to an hour. For a full structural cure, leave the clamps on for 24 hours. Temperature and humidity affect drying — cold or damp conditions slow it down. Always check the label, and don’t rush. An early unclamp reopens the crack.
Will the Repair Be Visible After Staining?
Not if you do it right. Sand the area smooth along the grain, test your stain on a hidden spot, and apply thin coats. Epoxy filler grabs less pigment, so you may need to dab extra color or paint in grain lines. Done carefully, the repaired area blends seamlessly into the original finish.
How Do I Stop the Crack From Coming Back?
Control moisture. Wood cracks when it dries out or swells with humidity changes. Keep your furniture away from direct heat, sunlight, and damp areas. Use a quality finish to seal the wood and slow moisture movement. A proper epoxy fill that won’t shrink also prevents the gap from reopening over time.
Conclusion
Fixing a split in your furniture comes down to a clear sequence: assess the damage, clean the crack, bond or fill it, then sand, stain, and seal. Follow those steps in order, and you get a repair that holds strong and hides in plain sight.
You save money. You skip the restoration bill. And you keep a piece you actually care about instead of replacing it with something forgettable.
The skills carry forward, too. Once you understand how wood glue grips, how epoxy fills, and how stain blends a patch, every future repair gets easier. Cracks stop being a crisis and become a quick weekend task.
Knowing how to repair cracked wood furniture turns damage into a chance to restore and protect what you own. Gather your tools, take your time on each step, and trust the process. Your furniture will look the part — and last for years to come.
