
Green wood fights you. It hisses in the fire. It warps in your project. It rots before you ever get to use it. That feels frustrating, especially when you waited months and got nothing.
Here is the truth most beginners miss. Wood does not dry on your schedule. It dries on its own. But you can change the conditions. You can speed the process. You can cut the wait from years down to weeks.
That is exactly what this guide covers. Learning how to season wood faster gives you usable timber sooner, whether you burn it, build with it, or finish it.
This guide walks you through the tools, the steps, and the small details that separate damp, useless wood from dry, ready stock.
Why Seasoning Wood Faster Matters
Wet wood costs you. It costs you money. It costs you time. It costs you good projects.
Burn green firewood and you lose heat. The water inside soaks up energy instead of releasing it. Your stove smokes. Your chimney coats with creosote. That is a fire risk hiding in plain sight.
Build with damp lumber and the problem follows you. The board shrinks after you cut it. The joint loosens. The finish peels. You did good work, but the wood betrayed you.
Dry wood behaves. It holds its shape. It glues tight. It takes stain evenly. It burns hot and clean.
Faster seasoning means you stop waiting and start using. You save fuel. You save lumber. You build confidence with every batch.
Tools and Materials You’ll Need
Gather your gear before you start. The right setup makes the whole job smoother.
- Wood moisture meter — your most important tool for tracking moisture content
- A chainsaw or bow saw — for cutting logs to length
- A splitting maul or axe — split wood dries far faster than whole rounds
- Pallets, scrap lumber, or a raised rack — to keep wood off the wet ground
- A tarp or metal sheeting — to cover the top and shed rain
- Work gloves and safety glasses — protect your hands and eyes
- A sunny, breezy spot — sunlight and airflow do most of the work
- A box fan (optional) — a simple way to push air through your stack indoors or in a shed and speed drying
Step-by-Step Guide on How to Season Wood Faster
Step 1 – Cut the Wood to Final Length First
Start with length. Cut your logs to the size you actually need before anything else.
Why? Wood loses most of its moisture through the cut ends, not the bark. The grain runs like a bundle of straws. Open both ends and water escapes fast.
Listen as you cut. Green wood gives a wet, heavy thud. The blade pulls through slowly. Sawdust clumps instead of scattering. That is the sound of high moisture content.
Keep your pieces uniform. For firewood, aim for lengths that fit your stove with a few inches to spare. For lumber, cut slightly long to allow for trimming later.
Short, open-ended pieces are the foundation of how to season wood faster. Skip this and everything after it slows down.
Step 2 – Split the Wood Into Smaller Pieces
Now split. Take those rounds and break them down.
A whole log holds water like a sealed bottle. Split it and you expose the inner wood to air. More surface means faster drying. It is that simple.
Swing the maul and watch the wood. Green pieces split with a dull, sticky tear. You will see damp, pale fibers inside. Sometimes water beads on the fresh face. That moisture is your enemy, and now it has a way out.
Aim for pieces no thicker than your wrist for firewood. Thinner splits dry quicker, but very thin pieces burn too fast. Find the balance.
For lumber and slabs, the principle holds. Thinner stock seasons sooner than thick beams. Plan your cuts with drying in mind.
Step 3 – Choose the Right Drying Location
Location decides everything. Pick wrong and you wait forever.
You need three things. Sun. Wind. Drainage. Find a spot that gets all three.
Sun warms the wood and drives moisture to the surface. Wind carries that moisture away. Without airflow, the damp air just sits, and the wood stays wet.
Avoid shady corners against the house. Avoid low ground where puddles form. Avoid tucking wood tight against a wall where no breeze reaches.
Walk your property on a windy day. Feel where the air moves. That is your spot.
A south-facing area with open exposure works best in most climates. Press your hand to the ground. If it feels damp, raise your stack higher or move it.
Step 4 – Stack the Wood Off the Ground
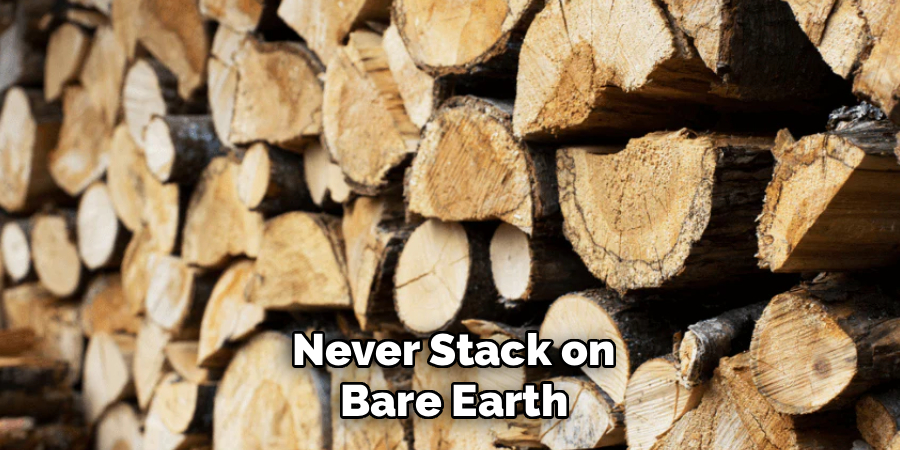
Never stack on bare earth. The ground feeds moisture straight into your wood.
Lay down pallets, scrap boards, or metal pipes first. Build your stack on top. Even a few inches of clearance makes a real difference. Air moves underneath and pulls dampness from below.
When stacking firewood, leave gaps. Do not pack pieces tight like bricks. You want air channels running through the whole pile. A loose stack breathes. A tight stack traps water.
Run your stack so the open ends face the prevailing wind. Crisscross the end pieces for stability if you build tall.
Watch the wood over days. Properly stacked pieces lighten in color at the ends. You will see fine cracks, called checking, spreading from the center. That is good. That is drying.
Step 5 – Maximize Airflow Around the Stack
Air is the engine. Without it, nothing dries.
Space your rows apart. Leave a hand’s width between parallel stacks. Crowded piles fight each other for breeze and lose.
Keep the sides open. Resist the urge to wrap the whole pile in a tarp. A fully covered stack becomes a sweat lodge. Moisture rises, hits the cover, and drips right back down.
If you dry wood in a shed or garage, set a box fan at one end of the stack. Point it down the air channels. This single trick can shave weeks off your timeline. You will hear the steady hum and feel the breeze moving through the gaps.
Mold and a sour, musty smell mean trapped moisture. Fresh, woody scent means good airflow. Trust your nose.
Step 6 – Cover Only the Top of the Stack
Cover smart. Protect the top. Leave the sides open.
Rain and snow soak into a bare stack and undo your progress. So you need a roof. But only a roof.
Lay a tarp, a sheet of metal, or scrap plywood across the top. Let it overhang the edges by a few inches to shed water away from the pile. Weigh it down with a couple of split pieces so wind does not lift it.
The sides stay exposed to sun and wind. The top stays dry. This is the balance that beats the weather without smothering your wood.
Check after storms. A pooled, sagging cover holds water against the wood. A taut, sloped cover sends it running off. Reset it whenever it slips.
Step 7 – Use Sun and Heat to Your Advantage
Heat accelerates everything. Use what you have.
Direct sun is free and powerful. On hot days, the surface of split wood can climb well above air temperature. That warmth pushes moisture out fast. Feel a sun-baked split. It feels dry and warm, almost light in your hand.
For small batches, a sunny window or a homemade solar kiln works wonders. A simple clear-plastic frame over a stack traps heat like a greenhouse. Inside temperatures soar, and drying time drops sharply.
This is the homeowner’s version of kiln drying, scaled down and nearly free. Commercial kilns do the same thing with controlled heat and humidity.
Just watch for too much, too fast. Slabs and thick lumber can crack if you rush the heat. Firewood handles aggressive drying with no problem.
Step 8 – Check Moisture Content With a Meter
Stop guessing. Measure.
A wood moisture meter takes the mystery out of seasoning. Press the two pins into a fresh split face, not the weathered outside. The reading tells you exactly where you stand.
For firewood, aim for 20 percent or below. Burn anything wetter and you waste heat and choke your chimney. For furniture and indoor projects, push down to 6 to 8 percent.
Test the inside, not the surface. The outside dries first and lies to you. Split a piece open and check the center for the honest number.
Tap two dry pieces together. They ring with a sharp, hollow knock. Green wood gives a dull thud. Your ears confirm what the meter shows. Together, they tell you when the wood is truly ready.
Common Mistakes to Avoid
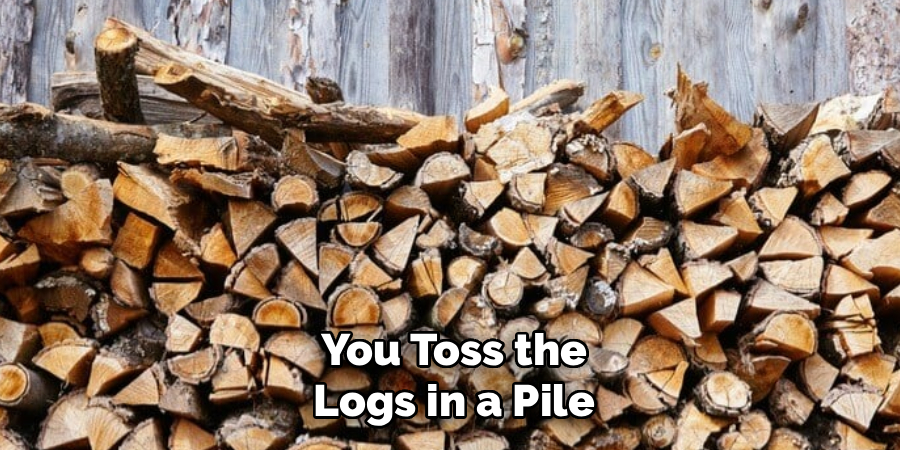
The biggest mistake is leaving wood in whole rounds. You toss the logs in a pile and wait. A year later they are still wet inside. Whole rounds trap moisture behind the bark. Split them, and you cut drying time in half or better.
Stacking on bare ground ruins good wood. The earth wicks moisture upward into the bottom layers. Those pieces rot while the top looks fine. Always raise your stack on pallets or boards, even just a few inches.
Wrapping the entire pile in a tarp is another classic error. It feels protective. It is the opposite. A sealed pile sweats. Trapped humidity drips back onto the wood and breeds mold. You will see black spots and smell that sour, musty odor. Cover only the top and let the sides breathe.
Trusting your eyes over a meter trips up many beginners. Dry-looking ends fool you every time. The surface seasons long before the core. Without testing the inside, you burn or build with hidden moisture.
Finally, picking a shady, still corner kills airflow. No sun, no wind, no drying. Move your stack into the open and let nature work.
Expert Tips
Here is what years on the woodpile teach you.
Season wood in late winter or early spring. You catch the dry, breezy months that follow, and a full summer of sun does the heavy lifting before you need the wood.
Mix your species smartly. Softwoods like pine dry in months. Dense hardwoods like oak need a year or more, even split. Stack the slow movers first so they get a head start.
Paint or seal the cut ends of valuable lumber and slabs. Ends dry faster than the rest and that uneven shrinkage causes splitting. A coat of sealer slows the ends and keeps the whole board cracking-free.
And weigh a marked piece over time. When it stops losing weight, it has stopped losing water. That is your finish line.
Frequently Asked Questions
How Long Does It Normally Take to Season Wood?
It depends on the species and your method. Softwoods like pine can season in three to six months. Dense hardwoods like oak often need one to two years with standard air drying. Split the wood, stack it off the ground, and add sun and airflow, and you can shorten these times significantly, sometimes to just a few weeks for thin firewood.
Can I Use Wet or Green Wood in a Fireplace?
You can, but you really should not. Green wood holds too much water, so it burns cool and smokes heavily. That unburned moisture coats your chimney with creosote, a serious fire hazard. You also waste most of the heat boiling off water. Always aim for a moisture content of 20 percent or lower before burning anything in your fireplace or stove.
Does Kiln Drying Work Better Than Air Drying?
Kiln drying is faster and more controlled. It uses heat and managed humidity to pull moisture out in days rather than months. Air drying is slower but free and gentle. For most home projects and firewood, air drying with good sun and airflow works perfectly. Kiln drying shines when you need furniture-grade lumber at very low moisture in a hurry.
What Moisture Content Should Wood Reach Before Use?
The target depends on the job. Firewood should hit 20 percent or below to burn clean and hot. Outdoor projects do well around 12 to 15 percent. Indoor furniture and flooring need a much drier 6 to 8 percent, since heated rooms pull moisture out further. A wood moisture meter is the only reliable way to confirm you have reached your number.
Why Is My Stacked Wood Growing Mold?
Mold means trapped moisture and poor airflow. You likely packed the stack too tight, covered the whole pile with a tarp, or placed it in a damp, shady spot. Open up the stack to let air flow through. Cover only the top, never the sides. Move it into sun and wind. Good airflow stops mold and gets your seasoning back on track.
Conclusion
Green wood does not have to slow you down. You hold the controls.
Cut it short. Split it small. Raise it off the ground. Open it to sun and wind. Cover only the top. Then measure with a meter and trust the number, not your eyes.
Each step removes water faster. Together, they turn years of waiting into weeks of progress.
Knowing how to season wood faster changes everything you build and burn. Your firewood lights easy and throws real heat. Your lumber holds its shape, glues tight, and takes a clean finish. You stop wasting fuel. You stop ruining projects. You start trusting your own stock.
The wood will not dry itself on your schedule. But you can change the conditions. You can speed the process. You can take control of the whole timeline.
So pick your spot this weekend. Split a few rounds. Build one good stack and check it in a week. Will you start today?
