

Your grandmother’s oak dresser survives in a hot garage. Or it doesn’t. The difference comes down to what you do before you walk away. Wood is alive even after it leaves the tree. It breathes. It swells in summer humidity. It shrinks in dry winter air. Leave it unprotected, and the seasons go to work on it without your permission.

That is silent damage. The good news? You can stop it. Learning how to store wood furniture without climate control is not about expensive equipment or a perfect room. It is about understanding how wood moves and getting ahead of it. This guide walks you through the exact steps to protect your wood furniture in a garage, attic, or basement — no thermostat required.
Why Storing Wood Furniture Properly Matters
A solid wood table costs hundreds. Sometimes thousands. Replacing one because it warped in storage hurts twice — your wallet and your pride.
Here is what most beginners miss. The damage is invisible at first. You wrap a chair, shove it in the garage, and forget it. Six months later, the joints crack. The veneer bubbles. Mildew spots the legs.
You did not see it coming. That is the danger.
Storing furniture the right way saves you money. It saves you from refinishing projects you never planned. It extends the life of pieces you cannot easily replace. For a DIY beginner, this skill builds real confidence. You learn how wood behaves, and that knowledge follows you into every future build, repair, and finish.
Tools and Materials You’ll Need
Gather your supplies before you start. Scrambling mid-project leads to shortcuts, and shortcuts cause damage.
- Moving blankets or cotton furniture pads — breathable protection that won’t trap moisture against the wood
- Microfiber cloths — for cleaning surfaces before wrapping
- Mild wood cleaner or a damp-and-dry cloth method — to lift grime without soaking the grain
- Wood paste wax or furniture polish — seals the surface and slows moisture exchange
- Desiccant packs (silica gel) or moisture absorbers — pull dampness from the surrounding air
- Plastic sheeting or a tarp — for the floor barrier only, never wrapped tight against wood
- Wooden pallets or 2×4 risers — keep pieces off cold, damp concrete
- Painter’s tape and soft padding — protect corners and secure loose parts
- Optional: a small hygrometer — this handy gadget reads humidity so you know exactly what your storage space is doing
Step-by-Step Guide on How to Store Wood Furniture Without Climate Control
Knowing how to store wood furniture without climate control comes down to following these steps in order. Skip one, and you leave a door open for moisture, pests, or warping.
Step 1 – Clean Every Surface Thoroughly
Dust is not harmless. It holds moisture against the wood. It feeds mildew. Trapped under a blanket for months, that thin film becomes a problem.
Start with a dry microfiber cloth. Wipe down every surface, every leg, every carved detail. You will feel the grit lift away under your fingers. For sticky spots, use a barely damp cloth, then dry immediately. The wood should feel smooth and clean, never tacky.
Pay attention to undersides and joints. These hidden spots collect the most grime. A clean surface tells you you’re ready. A streaky, dusty one means go back over it.
Let the piece air-dry completely. Any leftover moisture will get sealed in. That defeats the entire effort.
Step 2 – Inspect and Repair Before Storing
Look closely. Run your hand along every edge. Loose joints, lifting veneer, small cracks — these get worse in storage, not better.
A wobbly joint feels slightly springy when you press it. A solid one does not move. If you find play, glue and clamp it now. Storing a damaged piece guarantees a bigger repair later.
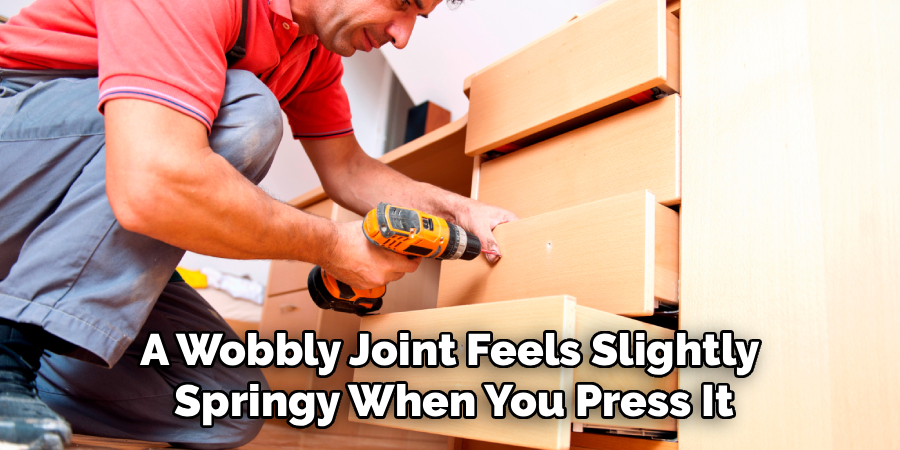
Check for any signs of existing pests. Tiny holes or fine sawdust trails mean wood-boring insects. Deal with that before it spreads to nearby items.
Tighten loose hardware. Remove anything that rattles. The goal is a stable, sound piece going into storage. Fixing problems now is far cheaper than fixing them after months of neglect.
Step 3 – Apply a Protective Finish
A clean surface deserves a barrier. This step slows down how fast moisture moves in and out of the wood.
Rub a thin coat of paste wax or quality furniture polish into the grain. Work in the direction of the wood, not against it. You will feel the cloth glide more smoothly as the wax fills the surface.
Buff it gently. A soft sheen means you’re doing it right. A cloudy, gummy film means you applied too much — wipe back the excess.
This layer matters most for pieces going into a garage or basement, where humidity swings hard. The wax acts like a raincoat. It cannot stop wood movement entirely, but it buys you time and protection against moisture damage.
Step 4 – Disassemble What You Can
Tables come apart. So do bed frames, shelving units, and many chairs. Take legs off. Remove drawers. Detach removable tops.
Disassembly does two things. It reduces stress on joints during the long stillness of storage. It also makes pieces flat and stackable, which protects them better.
Bag every screw, bolt, and bracket. Tape the bag to the underside of the matching piece. You will thank yourself when reassembly day comes and nothing is missing.
Wrap small parts separately. A loose drawer knocking around inside a wrapped cabinet scratches everything it touches. Keep components organized and padded. The fewer moving parts left assembled, the less can shift, loosen, or break while you’re not watching.
Step 5 – Wrap with Breathable Materials
This is where people go wrong. Plastic wrap feels protective. It is not. Sealed plastic traps humidity against the wood and grows mildew in the dark.
Use moving blankets or cotton furniture pads instead. They breathe. They cushion. They let the wood release moisture instead of stewing in it.
Drape each piece fully. Secure the blanket with tape or stretch bands — but tape the blanket, never the wood finish. Tape leaves a sticky residue that ruins your surface.
Pad the corners first. These take the hardest hits. A well-wrapped piece feels firm and fully covered, with no bare spots peeking out. That snug, breathable layer is your main defense in any space without climate control.
Step 6 – Raise Furniture Off the Floor
Concrete is a moisture sponge. It wicks dampness from the ground straight into anything resting on it. Cold floors also pull warmth from the wood, inviting condensation.
Lay down wooden pallets or 2×4 risers first. Set a tarp or plastic sheet on the floor beneath them as a vapor barrier — this is the one place plastic belongs.
Place your wrapped furniture on the risers. You want a few inches of air between the wood and the floor. Air movement keeps the underside dry.
Run your hand under a piece after a week. It should feel dry and cool, never damp. Damp means the floor is winning, and you need a better barrier underneath.
Step 7 – Control Moisture in the Space
You cannot run a thermostat. You can still fight humidity.
Place desiccant packs or moisture absorbers near and around your stored pieces. Silica gel pulls dampness out of the surrounding air. In a damp basement, a larger moisture absorber tub works harder.
Crack a window or vent if the space allows. Stagnant air holds moisture. Moving air carries it away.
If you bought a hygrometer, check it weekly. You want readings between 40 and 55 percent. Above 60, mildew thrives. Below 30, wood dries out and cracks.
This balance is the heart of how to store wood furniture without climate control. Manage the moisture, and you manage almost every risk that comes with garage, attic, or basement storage.
Step 8 – Position and Space Everything Correctly
How you arrange pieces matters as much as how you wrap them. Crowded furniture cannot breathe.
Leave gaps between items. Air needs room to circulate around every surface. Pushed tight against each other, pieces trap pockets of humid air that never dry out.
Keep everything away from exterior walls. These walls run hottest in summer and coldest in winter, and they sweat condensation. A few inches of clearance protects against that.
Never stack heavy items on delicate ones. Weight presses on joints over months and slowly deforms them. Put the sturdiest pieces on the bottom.
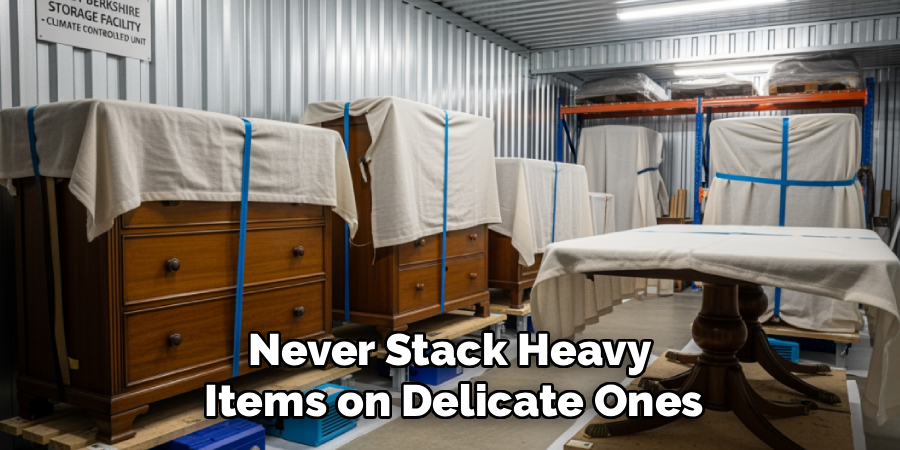
Walk the space when you finish. You should see clear air around each piece. No tight clusters, no leaning towers.
Common Mistakes to Avoid
The biggest mistake is wrapping wood in plastic. It feels right. It looks neat. But sealed plastic traps every bit of moisture against the surface, and within months you open it to mildew, musty smells, and a ruined finish. Always choose breathable covers.
Skipping the cleaning step is another quiet killer. Dust and oils left on the wood become trapped grime that stains and feeds mold. A surface that looks “good enough” today turns ugly after six months under wraps. Take the extra twenty minutes.
Setting furniture directly on a concrete floor invites moisture damage from below. Concrete pulls dampness from the ground year-round, and your furniture absorbs it silently. Always raise pieces onto pallets or risers with a vapor barrier underneath.
Many beginners also forget about wood movement. They wedge pieces tightly together or against walls, leaving no room for the natural swelling and shrinking that happens with temperature swings. This pressure cracks joints and splits panels over time.
Finally, people store and forget. They walk away for a year and never check on anything. Conditions change with the seasons. A quick monthly look lets you catch a damp spot or a fallen blanket before it becomes permanent damage.
Expert Tips
Here is what years of hands-on work teach you. Acclimate your furniture before and after storage. When you bring a piece into a hot attic or cold garage, let it sit unwrapped for a day or two so it adjusts slowly to the new conditions. Sudden change is what cracks wood, not the temperature itself.
Place a cedar block inside drawers and cabinets. Cedar repels insects naturally and absorbs small amounts of moisture, all while leaving a clean scent instead of a musty one.
Photograph each piece before wrapping. If you ever file an insurance claim or just need a reference, you will have proof of condition.
And label everything. Future you, digging through a crowded garage, will be grateful for clear tags.
Frequently Asked Questions
Can I Store Wood Furniture in an Unheated Garage Over Winter?
Yes, you can. Cold alone rarely damages wood — rapid temperature swings and humidity do. Clean and wax each piece, wrap it in breathable blankets, and raise it off the cold concrete onto pallets. Add desiccants to manage moisture. The bigger winter risk is condensation when temperatures shift, so good airflow and a vapor barrier matter far more than the cold itself.
How Do I Prevent Mildew on Wood Furniture in a Basement?
Mildew needs moisture and stagnant air to grow. Beat it on both fronts. Keep humidity between 40 and 55 percent using moisture absorbers or silica gel. Raise furniture off the damp floor and leave space for air to circulate around every piece. Never seal wood in plastic. A small fan or cracked vent keeps air moving, and that movement alone stops most mildew before it starts.
Is It Safe to Store Wood Furniture in a Hot Attic?
It can be, with care. Attics get hot and dry, which risks shrinking and cracking more than warping. Apply a protective wax coat to slow moisture loss, and avoid storing antiques or veneered pieces in extreme attic heat. Keep furniture away from the roof line where heat peaks. Check on it seasonally, and watch for hairline cracks that signal the air is too dry up there.
Should I Wrap Wood Furniture in Plastic for Storage?
No, never wrap wood directly in plastic. Sealed plastic traps humidity against the surface, creating the perfect conditions for mildew and finish damage. Use moving blankets or cotton pads instead — they protect against scratches while letting the wood breathe. Plastic has one job here: a floor vapor barrier underneath your pallets, kept well away from the wood surfaces themselves.
How Often Should I Check Stored Furniture?
Check it monthly if you can, and at minimum every season. Conditions change as the weather shifts, and a quick look catches problems early. Feel for dampness, look for mildew spots, and make sure blankets haven’t slipped. Confirm your desiccants still work and replace saturated ones. Five minutes of checking saves you from discovering serious moisture damage a year too late.
Conclusion
Wood survives storage when you respect how it moves. That is the whole secret. Clean it. Repair it. Seal it. Wrap it so it can breathe. Raise it off the floor. Manage the moisture around it. Each step removes one more way the seasons can sneak in and cause harm.
You do not need a fancy climate-controlled unit. You need attention and a little know-how. Learning how to store wood furniture without climate control puts that power in your hands. It saves your money. It protects pieces you love. It builds skills that carry into every wood project you take on next.
The furniture cannot protect itself. That part is on you.
So here is your test. Pick one piece this week. Clean it, wax it, wrap it in a breathable blanket, and set it on risers with a moisture absorber nearby. Watch how it holds up.
Will you give your wood the care it needs to last?
