
Dust and grime hide what makes petrified wood special. The rich reds, ambers, and grays locked inside the stone disappear under a film of dirt. Knowing how to clean petrified wood brings those colors back and protects your specimen for years.
Petrified wood is fossil wood that turned to stone over millions of years. Minerals replaced the original plant fibers, leaving you with a durable, beautiful piece of natural history. But that stone surface still collects dust, oils, and mineral deposits that dull its shine.
You do not need expensive products or special training. You need patience, a few household items, and the right technique. This guide walks you through every step to clean your petrified wood safely, restore its natural luster, and keep it looking sharp on display.
Why Cleaning Petrified Wood Matters
A neglected specimen loses value and beauty fast. Grime builds up in cracks and pores, dulling the polish and hiding the detail that took millions of years to form. Clean it correctly, and you protect both its appearance and its worth.
Good petrified wood care saves you money. Specimens with preserved polish and clear color command higher prices and last for generations. Skip the maintenance, and you risk staining, scratching, or weakening fragile sections.
Learning this skill builds confidence too. Once you handle one piece well, you can care for an entire collection. You avoid the costly mistakes that ruin display specimens—harsh chemicals, abrasive scrubbing, and improper drying. Treat your fossil wood right, and it stays a centerpiece instead of a forgotten rock.
Tools and Materials You’ll Need
Gather everything before you start. The right supplies make the job faster and safer.
- Soft-bristle brush — loosens surface dust without scratching the stone.
- Mild dish soap — cuts oils and grime without damaging mineral surfaces.
- Two buckets or basins — one for washing, one for rinsing.
- Distilled water — prevents new mineral deposits from forming on the surface.
- Microfiber cloths — dry and buff without leaving lint or streaks.
- Soft toothbrush — reaches tight grooves and crevices.
- Cotton swabs — clean detailed areas around cracks and edges.
- Plastic scraper or wooden pick — lifts stubborn debris without gouging.
- Rubber gloves — protect your hands during longer cleaning sessions.
- Mineral oil or stone polish (optional) — restores depth and shine after cleaning.
Keep your work area padded with a towel. Dropping a specimen on a hard surface can chip even solid silicified wood.
Step-by-Step Guide on How to Clean Petrified Wood
Step 1 – Inspect the Specimen First
Start by examining your piece in good light. Turn it slowly and look for cracks, loose sections, or fragile edges. These weak spots need gentle handling later.
Run your fingers across the surface. You will feel smooth, polished areas and rougher zones where the stone wood broke or weathered. Note where dirt sits thickest, usually in grooves and around the base.
Check the color too. Dust often hides the true tones, so a dull gray surface might reveal deep reds once clean. Knowing how to clean petrified wood starts with understanding what you are working with.
This inspection takes two minutes and prevents damage. You will know which spots need a soft touch and which can handle firmer scrubbing.
Step 2 – Dry-Brush Loose Dust
Before any water touches the stone, knock off loose dirt. Hold the specimen over a trash bin or sink. Use your soft-bristle brush and sweep in short, light strokes.
You will hear a faint scratching sound as the bristles glide across the surface. Watch the dust lift and fall away. Work from the top down so debris does not resettle on cleaned areas.
For tight grooves, switch to a dry toothbrush. Push the bristles gently into each crevice. Avoid pressing hard—you want to free the dust, not grind it deeper.
Skipping this step turns surface dust into muddy paste once it meets water. Dry-brushing first keeps your wash water cleaner and your results sharper.
Step 3 – Mix a Gentle Cleaning Solution
Fill one basin with lukewarm distilled water. Add a few drops of mild dish soap and swirl gently until small suds form. Skip hot water—sudden temperature changes can stress cracked sections.
Keep the solution mild. A heavy soap concentration leaves residue that dulls the finish. You want just enough to break down oils and grime without coating the stone.
Fill your second basin with plain distilled water for rinsing. Distilled water matters here. Tap water carries minerals that dry into white spots and chalky films on your fossil wood.
Test the temperature with your hand. It should feel pleasantly warm, never hot. This simple, balanced natural stone cleaner handles most everyday dirt without any risk to the specimen.
Step 4 – Wash the Surface Gently
Dip your soft-bristle brush into the soapy water and shake off the excess. Work the brush across the surface in small circles. You will see the grime lift and the water cloud as dirt releases.
Move section by section. Cover the smooth faces first, then the textured edges. The surface should feel slick under the suds, and you will notice colors brightening as the film washes away.
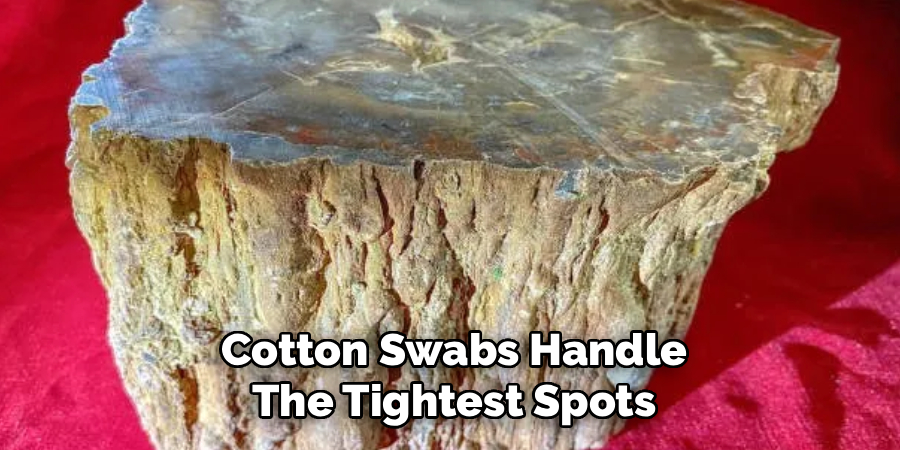
For deep grooves, use the soft toothbrush. Apply light pressure and let the bristles do the work. Cotton swabs handle the tightest spots around cracks.
Never scrub hard or use steel wool. Aggressive cleaning scratches the polish and leaves dull lines across your display specimen. Patience beats pressure every time.
Step 5 – Tackle Stubborn Mineral Deposits
Some specimens carry hardened mineral deposits or crusty buildup that soap alone cannot shift. Reach for your plastic scraper or wooden pick. Work the edge under the deposit at a low angle and lift gently.
You will feel slight resistance, then the buildup will pop free. Stay patient. Forcing the scraper can gouge the surface or chip the stone.
For chalky white films, a paste of baking soda and distilled water helps. Apply it with a cotton swab, let it sit briefly, then brush away. Knowing how to clean petrified wood means matching the method to the mess.
Avoid metal tools and acids. They scratch the polish and can react with the minerals, leaving permanent damage on your silicified wood.
Step 6 – Rinse Thoroughly
Move the specimen to your second basin filled with clean distilled water. Swish it gently or pour water over every surface. You need to flush out all soap residue.
Leftover soap dries into a hazy film that flattens the natural shine. Rinse until the water runs clear and the surface feels clean, not slippery. Run your fingers across it—any slick feeling means soap remains.
Pay attention to grooves and cracks where suds hide. Use a cotton swab dipped in clean water to flush these spots. Tilt the piece to drain trapped water from deep crevices.
A complete rinse makes the difference between a dull finish and a bright one. Take your time and rinse twice if needed.
Step 7 – Dry the Specimen Properly
Pat the surface with a dry microfiber cloth. Press gently and lift, working across each face. Avoid rubbing hard, especially near cracks where the stone is weakest.
The cloth should glide smoothly and pick up any remaining moisture. You will feel the surface change from wet to merely damp.
Let the piece air-dry completely afterward. Set it on a clean, dry towel in a spot with good airflow but no direct sunlight. Harsh sun can heat the stone unevenly and stress fragile sections.
Give it several hours, or overnight for larger pieces. Trapped moisture in deep crevices causes problems later, so make sure every part feels dry before you move on.
Step 8 – Buff and Restore Shine
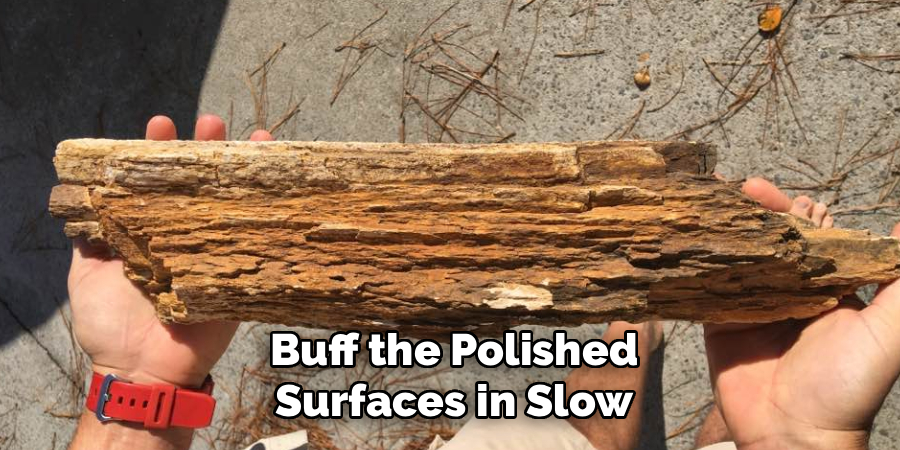
Once the specimen is fully dry, bring back its luster. Take a clean, dry microfiber cloth and buff the polished surfaces in slow circles. You will watch the colors deepen and the shine return.
For an extra glow, apply a thin coat of mineral oil or rock polish. Put a small amount on the cloth, never directly on the stone. Work it across the surface in even strokes.
The oil sinks into the pores and richens the reds, golds, and grays. Wipe off any excess so the finish looks natural, not greasy. This final touch on your stone wood makes the patterns pop and protects the surface for display.
Common Mistakes to Avoid
The biggest mistake is using harsh chemicals. Bleach, vinegar, and acidic cleaners might seem powerful, but they react with the minerals in petrified wood and cause permanent etching or discoloration. Stick to mild soap and distilled water. Your specimen survived millions of years—it does not need aggressive products now.
Scrubbing too hard ranks a close second. People grab steel wool or stiff brushes thinking force removes grime faster. Instead, they scratch the polish and leave dull lines across the surface. Let gentle pressure and patience do the work.
Tap water causes another common problem. The minerals in tap water dry into chalky white spots and films, undoing your hard work. Always rinse with distilled water to keep the finish clean and clear.
Many beginners skip the drying step or rush it. Trapped moisture in cracks leads to spotting and, in fragile pieces, can worsen existing fractures. Dry every crevice fully.
Finally, do not over-oil the surface. A heavy coat leaves a greasy film that attracts dust and looks artificial. A thin, even layer is all your fossil wood needs to shine.
Expert Tips
Identify the deposit before you treat it. White chalky films usually mean tap-water minerals and respond to a baking soda paste. Brown or yellow stains often come from oils and need patient soap work. Matching the method to the stain saves time and protects the polish.
Work in natural daylight whenever possible. It reveals subtle color shifts and missed spots that artificial light hides. You will catch streaks and residue before they dry.
For valuable display specimens, test any new product on the base or an unseen edge first. This simple habit prevents disasters on the visible faces.
Finally, clean lightly but often. A quick dry-dusting every few weeks keeps grime from building up, so deep cleaning happens rarely. Consistent, gentle care preserves both the beauty and the value of your sedimentary stone.
Frequently Asked Questions
Can You Use Vinegar to Clean Petrified Wood?
No. Vinegar is acidic and can react with the minerals in petrified wood, causing etching, dullness, or permanent discoloration. Stick to mild dish soap and distilled water for safe results. If you face stubborn buildup, use a gentle baking soda paste instead. Acids may speed up cleaning, but they damage the polish and value of your specimen in the process.
How Often Should You Clean Petrified Wood?
Dust your specimen lightly every few weeks to prevent buildup. A full wash with soap and water is only needed once or twice a year for most display pieces, or whenever grime becomes visible. Regular light dusting keeps deep cleaning rare and protects the polished surface. Pieces kept in dusty rooms or near windows may need slightly more frequent attention.
Does Petrified Wood Need to Be Sealed?
Petrified wood does not require sealing because it is already stone. However, a thin coat of mineral oil or rock polish enhances the colors and adds a protective layer. This is optional and purely for appearance. If you choose to oil it, apply sparingly and buff off the excess. Avoid heavy sealants, which can leave an artificial, plasticky finish.
Why Are There White Spots on My Petrified Wood?
White spots usually come from mineral deposits left behind by tap water. When hard water dries, it leaves chalky films on the surface. Prevent this by always rinsing with distilled water. To remove existing spots, apply a paste of baking soda and distilled water with a cotton swab, let it sit briefly, then gently brush and rinse away.
Can You Polish Petrified Wood at Home?
Yes. After cleaning and fully drying your specimen, buff it with a dry microfiber cloth to bring out shine. For deeper luster, apply a small amount of mineral oil or commercial rock polish to the cloth, then work it across the surface. Wipe off any excess. For a mirror finish on raw pieces, professional tumbling or lapidary equipment delivers the best results.
Conclusion
Petrified wood deserves care that matches its remarkable history. With mild soap, distilled water, soft brushes, and patience, you can restore its natural colors and protect it for years. The process is simple: inspect, dry-brush, wash gently, rinse with distilled water, dry fully, and buff to a shine.
Avoid the common traps—harsh chemicals, hard scrubbing, and tap-water rinses—and your specimen stays bright and undamaged. A little regular dusting goes a long way toward keeping deep cleaning rare and easy.
Now that you know how to clean petrified wood, you can confidently care for any piece in your collection. Whether you found it on a hike or bought it for display, proper cleaning brings out the beauty locked inside the stone. Trust your hands, take your time, and let those ancient reds, ambers, and grays shine again. Your fossil wood will reward the effort with years of natural beauty on display.
