
Your sauna wood collects sweat, body oils, and moisture every time you use it. Left alone, that buildup turns into stains, odors, and mold. The good news? Knowing how to clean sauna wood is simpler than most people think, and it protects an expensive investment.
You don’t need harsh chemicals or special skills. You need the right approach, a few basic supplies, and a steady routine. Whether you have a cedar barrel sauna or a built-in home unit, the cleaning principles stay the same.
Clean wood smells fresh, feels smooth, and lasts for decades. Dirty wood warps, darkens, and rots. The difference comes down to maintenance habits you can build today. This guide walks you through every step to keep your sauna wood clean, hygienic, and looking new.
Why Cleaning Sauna Wood Matters
Skip cleaning, and your sauna wood pays the price. Sweat soaks into untreated cedar and hemlock. Bacteria multiplies in the warm, damp environment. Within months, you see dark stains and smell sour odors that no amount of heat will mask.
Regular cleaning saves you money. Replacing sauna benches and wall panels costs hundreds of dollars. A few minutes of upkeep prevents that expense entirely and extends the life of your wood by years.
Clean wood also protects your health. A sauna should detoxify you, not expose you to mold spores and bacteria. Proper sauna hygiene keeps every session safe.
Beginners often wait until damage shows. Don’t. Consistent cedar wood maintenance avoids costly mistakes and keeps your sauna performing at its best.
Tools and Materials You’ll Need
Gather these basics before you start. Most are already in your home.
- Remove loose debris fast — a soft-bristle brush or scrub brush
- Lift sweat and oil stains — fine-grit sandpaper (120–150 grit)
- Disinfect without damage — a mild dish soap or sauna-specific cleaner
- Tackle stubborn marks — white vinegar or hydrogen peroxide
- Wipe surfaces clean — a few microfiber cloths
- Rinse residue away — a bucket of warm water
- Protect your hands — rubber gloves
- Refresh the scent — a vacuum with a brush attachment for tight corners (optional)
Avoid bleach, ammonia, and anything heavily fragranced. These chemicals soak into bare wood, release fumes when heated, and break down the fibers. Stick to gentle, wood-safe options for the best results.
Step-by-Step Guide on How to Clean Sauna Wood
Follow these steps in order. Each one builds on the last to deliver clean, fresh wood without damage. This is how to clean sauna wood the right way.
Step 1 – Ventilate and Cool the Space
Open the sauna door and any vents first. Let the room cool completely before you touch anything. Hot wood reacts poorly to water and cleaners, and you risk burns on heated surfaces.
Give it at least an hour. You want the wood at room temperature and the air circulating freely. This dries surface moisture and makes stains easier to see in natural light.
As the space cools, you’ll notice the wood lightening slightly. That’s normal. Damp boards always look darker. Run your hand across a bench—if it feels warm or sticky, wait longer. Cool, dry wood gives you a clean working surface and prevents cleaner from evaporating too fast before it does its job.
Step 2 – Remove Loose Debris
Grab your soft-bristle brush and sweep every surface. Work from the top benches down to the floor so debris falls and collects in one place. You’ll loosen hair, dust, and dried sweat flakes that cling to the grain.
Listen for the dry scratch of bristles against wood. That sound tells you you’re reaching into the grain instead of skimming the surface. Pay extra attention to bench slats and corners where buildup hides.
For tight gaps, switch to your vacuum with the brush attachment. It pulls out debris your hand can’t reach. Clearing this layer first matters—scrubbing dirty wood just grinds grime deeper. A clean, dust-free surface sets you up for the wash that follows.
Step 3 – Mix a Gentle Cleaning Solution
Fill your bucket with warm water and add a small squirt of mild dish soap. Stir until you see light suds. You want the water cloudy, not foamy—too much soap leaves residue that traps dirt later.
For sauna bench cleaning where odors linger, swap soap for a 1:1 mix of white vinegar and water. Vinegar cuts through oil and kills bacteria without coating the wood in chemicals.
Dip a microfiber cloth and wring it out hard. The cloth should feel damp, never dripping. Excess water is the enemy of sauna wood—it swells the grain and invites mold. A barely-damp cloth carries enough cleaner to lift grime while keeping the wood from soaking.
Step 4 – Wipe Down All Surfaces
Wipe every board following the direction of the grain. Start high and move low, covering walls, backrests, and benches. You’ll feel the cloth glide over clean spots and drag slightly over oily ones—that drag shows you where to focus.
Rinse the cloth often in your bucket. Cloudy water means you’re lifting real grime. Fresh cloth, fresh water, repeat. Don’t let dirty water dry back onto the wood.
Look for the wood color evening out as you go. Streaks and dark patches should fade. If a spot stays sticky, dampen it again and give it a moment before wiping. Knowing how to clean sauna wood means working patiently, section by section, instead of rushing the whole space at once.

Step 5 – Spot-Treat Stains and Mold
Some marks need extra muscle. For dark stains or visible mold, apply hydrogen peroxide directly to the spot with a cloth. Let it sit for ten minutes. You’ll often see the stain lighten as the peroxide works.
For mold prevention going forward, vinegar wiped over problem areas kills lingering spores. Mold loves damp, dark corners under benches, so check there carefully.
Scrub gently with your brush in small circles. You’ll feel resistance ease as the stain loosens. Don’t gouge the wood—steady, light pressure wins. If a black mark won’t budge, it has likely penetrated the fibers and needs sanding. Spot-treating early stops small problems from spreading across the whole bench.
Step 6 – Sand Rough or Stubborn Spots
Reach for your 120-grit sandpaper when stains resist cleaning or the wood feels rough. Sand lightly along the grain, never against it. You’ll hear a smooth, even rasp and see fine dust rise from the surface.
Focus on sweat-darkened patches and splintered edges. A few passes usually restores the pale, fresh wood underneath. Run your fingers over the area—it should feel silky, not gritty.
Don’t over-sand. You’re refreshing the top layer, not reshaping the board. Pressing too hard creates dips you’ll notice every time you sit down. Wipe away the dust with a dry microfiber cloth when you finish. Sanding revives tired, stained benches and makes your cedar wood maintenance pay off for years.
Step 7 – Rinse and Wipe Clean
Empty your dirty bucket and refill it with clean, warm water. Dampen a fresh cloth, wring it out, and wipe down every surface you cleaned. This removes soap film, vinegar, and loosened grime that could otherwise dry into the grain.
Work in the same top-to-bottom order. You’ll feel the wood turn smooth and clean under the cloth, with no sticky residue left behind.
Change the water if it clouds up. A final pass with a clean cloth confirms the surfaces are truly rinsed. Skip this step, and leftover cleaner attracts dirt and dulls the wood. A thorough rinse leaves your sauna wood looking even-toned and ready to dry.
Step 8 – Dry Thoroughly and Air Out
Drying is the step beginners skip most—and it matters most. Wipe all surfaces with a dry microfiber cloth to pull off surface moisture. Then leave the sauna door and vents wide open for several hours.
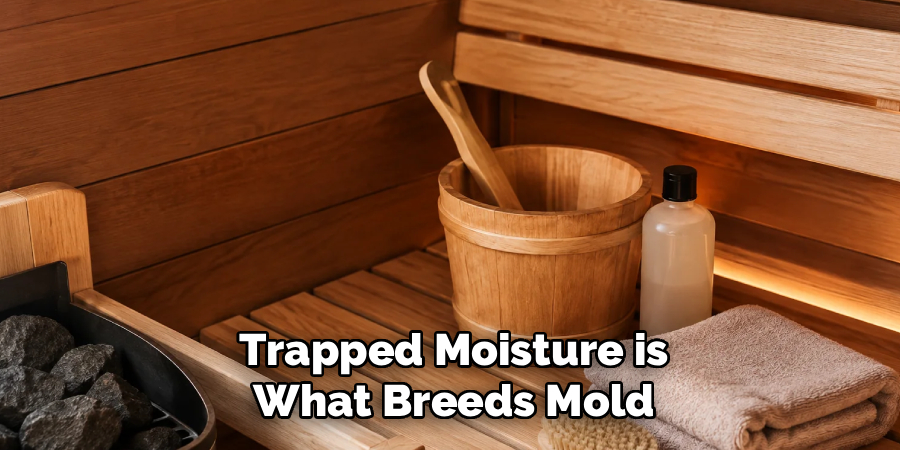
Good airflow drives out the last traces of dampness. You want the wood bone-dry before the next use. Trapped moisture is what breeds mold and warps boards over time.
Run your hand across the benches once they’ve aired out. They should feel dry, smooth, and cool. If any spot still feels damp, leave the door open longer. Patience here protects all the work you just did and keeps your sauna fresh between sessions.
Common Mistakes to Avoid
The biggest mistake is using too much water. Wood drinks it in, swells, and warps. Once boards cup or crack, no cleaning fixes them. Always wring your cloth until it’s barely damp, and never pour water directly onto the wood.
Harsh chemicals cause the second-most damage. Bleach, ammonia, and strong fragranced cleaners soak into bare wood and release toxic fumes when you fire up the sauna. You’re breathing those in during every session. Stick to mild soap, vinegar, or hydrogen peroxide, which clean effectively without lingering.
Many people also seal or varnish their sauna wood, thinking it adds protection. It doesn’t. Sealants trap heat, blister, and peel in high temperatures. Sauna wood is meant to breathe—leave it bare.
Another common error is cleaning against the grain. Scrubbing sideways scratches the surface and traps grime in the marks you create. Always work with the grain.
Finally, people clean but forget to dry. Damp wood is mold’s perfect home. Skipping the drying step undoes everything and shortens your sauna’s lifespan dramatically.
Expert Tips
Wipe down the benches with a towel after every sauna session. This single habit removes fresh sweat before it soaks in and cuts your deep-cleaning frequency in half.
Place towels under your body during use. They catch most of the sweat and oils, protecting the wood directly where contact happens.
Deep clean once a month for home saunas and weekly for shared or commercial ones. Match your routine to how often the sauna runs.
Keep a small spray bottle of diluted vinegar nearby for quick mold checks on dark corners. Pros catch spores early, before stains form.
Never paint, stain, or oil sauna wood. Bare wood handles heat and moisture far better than any coating. Let it do its job.
Frequently Asked Questions
How Often Should You Clean Sauna Wood?
Deep clean your home sauna once a month and wipe benches after every session. Commercial or shared saunas need weekly deep cleaning due to heavier use. Frequency depends on how often you run it and how many people use it. Regular wipe-downs prevent sweat buildup, so you spend less time on intensive scrubbing later and keep the wood fresh year-round.
Can You Use Bleach on Sauna Wood?
No. Bleach soaks into bare wood and releases harsh fumes when the sauna heats up, which you then breathe in. It also breaks down wood fibers over time. Use hydrogen peroxide or white vinegar instead. Both kill mold and bacteria effectively, lighten stains, and won’t release dangerous vapors during your next session.
How Do You Remove Mold From Sauna Benches?
Apply hydrogen peroxide or undiluted white vinegar directly to the moldy area and let it sit for ten minutes. Scrub gently with a soft brush along the grain. For deep-set mold, sand the spot with 120-grit sandpaper. Always dry the area completely afterward and improve ventilation, since trapped moisture is what allowed the mold to grow in the first place.
Should You Seal or Treat Sauna Wood?
No. Sauna wood is designed to stay bare so it can breathe and handle heat and moisture naturally. Sealants, varnish, and oil trap heat, blister, and peel at high temperatures. They can also release fumes. If your wood looks worn, light sanding restores its fresh appearance far better than any coating or treatment ever will.
Why Does Sauna Wood Turn Dark Over Time?
Sweat, body oils, and moisture absorb into the wood grain, causing dark stains and discoloration. Poor ventilation accelerates this by trapping dampness. Regular wiping and monthly deep cleaning slow the process significantly. When boards do darken, sanding lightly along the grain removes the stained top layer and reveals the pale, fresh wood underneath.
Conclusion
Clean sauna wood lasts longer, smells better, and keeps every session safe. You now know how to clean sauna wood from start to finish—cool the space, clear debris, wipe with a gentle solution, spot-treat stains, sand when needed, rinse, and dry thoroughly.
The work pays off. A few minutes of regular maintenance saves you from replacing warped benches and stained panels down the road. You protect both your investment and your health.
Build the habit. Wipe benches after each use, deep clean on schedule, and never reach for bleach or sealants. Bare wood, gentle cleaners, and proper drying are all you need.
Your sauna should feel like a fresh, hygienic retreat every single time you step inside. With the right routine, it will. Start your first deep clean this week, and you’ll notice the difference immediately—smoother wood, cleaner air, and benches that look as good as the day they were installed.
