
Dull, scratched, or mismatched shelves drag down a whole room. A fresh coat of paint fixes that fast. Learning how to paint wood shelves gives you a clean, durable finish without hiring anyone or buying new furniture. The work is simple once you know the order: prep, prime, paint, protect. Skip a step and you get drips, peeling, or visible brush marks. Follow the right sequence and you get a smooth, factory-quality surface that holds up for years.
This guide walks you through every stage, from sanding to the final coat. You’ll learn the tools that matter, the mistakes to dodge, and the small tricks pros use. By the end, you can transform tired shelves into a finish you’re proud to show off.
Why Painting Wood Shelves Matters
New shelving costs money. Paint costs a fraction of it. A solid shelf with worn finish doesn’t need replacing — it needs refreshing. That’s the first win: you save cash and keep furniture out of the landfill.
The second win is durability. Bare or chipped wood absorbs moisture, stains, and grime. A proper paint job seals the surface and extends the life of the wood by years. You protect your investment with a few hours of work.
The third win is confidence. Painting shelves is the perfect entry project. It teaches sanding, priming, and finishing — skills that carry over to cabinets, doors, and bigger builds. Master a small DIY shelf makeover and you’ll tackle larger jobs without hesitation.
Tools and Materials You’ll Need
Gather everything before you start. Stopping mid-project to find supplies leads to dried brushes and uneven coats.
- Sandpaper in 120-grit and 220-grit for smoothing and finishing
- Tack cloth to remove dust before painting
- Wood primer to seal the surface and lock in color
- Latex paint or oil-based paint, depending on your durability needs
- Angled paint brush (2-inch) for edges and detail
- Small foam roller for flat, smooth coverage
- Painter’s tape to protect walls and hardware
- Drop cloth to catch drips and overspray
- Wood filler for nail holes and dents
- Clear polyurethane for a protective topcoat
- Mineral spirits or warm water for cleanup (matched to your paint type)
- Optional: a paint pyramid stand to lift shelves off your work surface for clean edges
Step-by-Step Guide on How to Paint Wood Shelves
This is the core of how to paint wood shelves the right way. Work through each step in order. Rushing one stage shows up in the final coat.
Step 1 – Remove and Clear the Shelves
Take the shelves down and clear off every item. Painting in place leads to drips on walls and missed spots underneath. Set up your workspace in a ventilated area — a garage, basement, or open patio works well.
Lay down a drop cloth and arrange the shelves flat. If your unit is fixed to the wall, mask the surrounding surfaces with painter’s tape. Remove any hardware, brackets, or knobs and bag them so nothing gets lost.
Wipe each board with a damp rag to lift loose dust and grease. You’ll feel the grit lift away under your fingers. A clean, dry surface is your starting line. Skip cleaning and paint won’t grip properly.
Step 2 – Fill Holes and Repair Damage
Inspect each shelf for nail holes, dents, and cracks. Press wood filler into every gap with a putty knife. Overfill slightly — filler shrinks as it dries.
Smooth the surface with the edge of the knife so the patch sits flush. You’ll see the filler turn from dark and wet to a lighter, matte tone as it cures. That color change tells you it’s ready to sand.
Wait the full drying time listed on the container, usually 30 minutes to an hour. Rushing this stage leaves soft spots that crumble under sandpaper. Solid repairs now mean a flat, seamless finish later. This groundwork separates an amateur job from a clean one.
Step 3 – Sand the Surface Smooth
Sanding gives paint something to hold. Start with 120-grit sandpaper and work along the grain, never across it. Cross-grain scratches show through paint like fingerprints on glass.
Apply steady, even pressure. You’ll hear a consistent scratching sound and feel the surface turn smooth under your palm. Sand down old gloss until it loses its shine — that dull, matte look means the paint will bond.
Pay attention to edges and corners where finish builds up. Once the whole shelf feels uniform, switch to 220-grit for a final pass. The wood should feel like satin, not sandpaper. Run your hand across it. Any rough patch you feel now will feel ten times worse under paint.
Step 4 – Wipe Away All Dust
Sanding leaves a fine powder that ruins a smooth coat. Brush off the bulk with a dry rag, then go over every surface with a tack cloth.
The tack cloth is slightly sticky and grabs particles a dry rag misses. Drag it slowly across the board and you’ll watch the dust disappear. Don’t forget the edges, undersides, and corners.
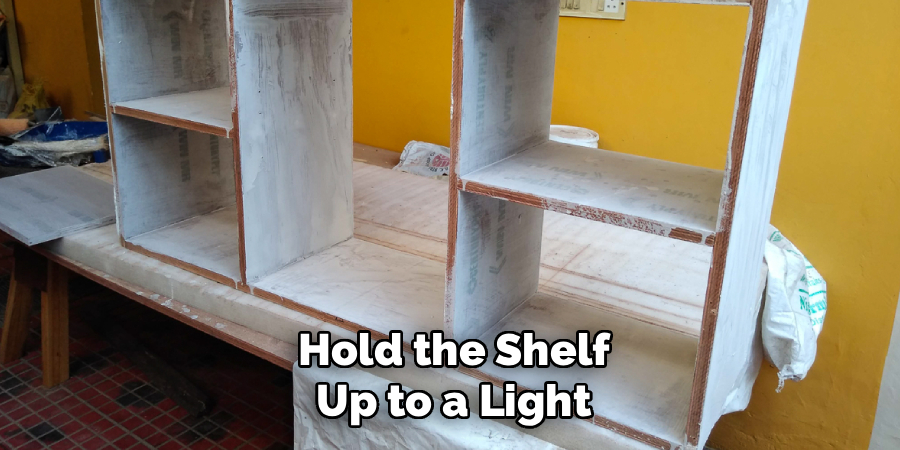
Hold the shelf up to a light at an angle. Dust shows up as tiny specks against the glare. If you see any, wipe again. A truly clean surface looks and feels bare and smooth.
Let the shelves sit a few minutes so any airborne dust settles before you prime. Patience here pays off in the finish.
Step 5 – Apply Wood Primer
Primer seals the wood, blocks stains, and helps paint stick. Skip it and you’ll need extra coats and still risk peeling.
Stir the primer well. Load your angled brush and cut in the edges and corners first. Then switch to the foam roller for the flat faces. Work in thin, even strokes along the grain.
You want full coverage without pooling. Thick primer leaves ridges and takes forever to dry. A light, uniform layer looks slightly translucent and feels smooth when cured.
Let it dry completely — check the label, but plan on two to four hours. Once dry, run your hand over it. You’ll feel a faint roughness from raised grain. That’s normal and gets fixed next.
Step 6 – Sand the Primer Lightly
A quick scuff between coats is the secret to a glass-smooth finish. Take your 220-grit sandpaper and lightly pass over the primed surface.
Use gentle pressure. You’re knocking down raised grain and tiny bumps, not stripping the primer. The surface should turn from slightly gritty to silky in seconds. You’ll see a faint white dust appear — that’s the sign you’re doing it right.
If you sand through to bare wood in spots, just touch up with a dab of primer and let it dry. Wipe everything with the tack cloth again when you finish.
This step takes ten minutes and makes the difference between a decent job and a professional one. Don’t skip it.
Step 7 – Paint the First Coat
Now the color goes on. Stir your latex or oil-based paint thoroughly. Cut in the edges with your angled brush, then roll the flat areas with the foam roller.
Apply thin coats. Thick paint sags, drips, and dries unevenly. Move in long, overlapping strokes along the grain to keep the surface consistent. You’ll hear the soft hiss of the roller laying down an even film.
Don’t try to cover everything in one pass. The first coat will look patchy and streaky — that’s expected. Resist the urge to overwork it.
Let the first coat dry fully, usually two to four hours for latex and longer for oil-based. Touching it too soon leaves fingerprints and pull marks you can’t hide.
Step 8 – Apply the Second Coat
The second coat delivers the rich, even color you want. Scuff lightly with 220-grit again if the surface feels rough, then wipe with the tack cloth.
Load your roller and brush the same way as before. This coat covers the patchiness and builds depth. Work methodically and keep your strokes consistent in direction.
Watch the light as you go. A wet sheen across the whole surface means even coverage. Dull dry spots mean you missed a section — hit them before the paint sets.
For darker colors or high-traffic shelves, a third coat adds durability. Let each layer cure fully. The wait tests your patience, but it’s the foundation of a finish that lasts.
Step 9 – Seal with a Protective Topcoat
A clear topcoat shields paint from scratches, moisture, and daily wear. It’s optional for display shelves but smart for anything holding books, dishes, or heavy items.
Use a water-based polyurethane over latex paint to avoid yellowing. Apply it thin with a clean brush or foam applicator. Work in one direction and avoid going back over tacky areas — that creates cloudy streaks.
You’ll see the surface deepen slightly and gain a soft sheen. Let it dry, then apply a second thin coat for extra protection.
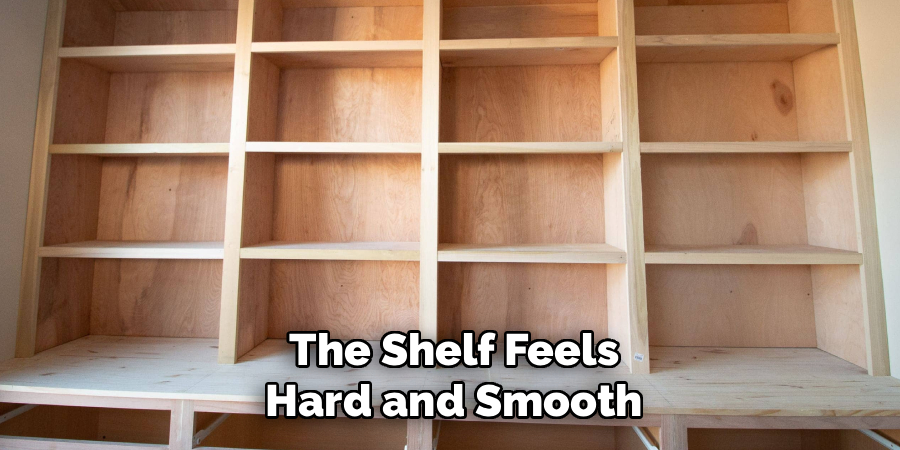
Once fully cured, the shelf feels hard and smooth, almost like glass. Reinstall the hardware, mount the shelves, and load them up. Your finished surface should look clean, even, and built to last.
Common Mistakes to Avoid
The biggest mistake is skipping prep. People want to jump straight to color, but bare or glossy wood won’t hold paint. Without sanding and priming, your finish peels, chips, and looks blotchy within months. Prep work is boring, but it determines everything.
The second mistake is applying paint too thick. A heavy coat feels faster, yet it drips, sags, and dries with an orange-peel texture. Two or three thin coats always beat one thick one. Thin layers level out smooth and cure evenly.
Rushing dry times causes the third problem. Paint that feels dry on top may still be soft underneath. Stacking items or adding a coat too soon leaves dents, smears, and lifted patches. Always wait the full time on the label, then add a buffer.
Another common error is ignoring the grain direction. Sanding or brushing across the grain creates scratches and streaks that show through every coat. Always work with the grain for a clean result.
Finally, many beginners forget to remove dust between steps. A single sweep of the tack cloth prevents the gritty, bumpy finish that ruins otherwise careful work.
Expert Tips
Strain your paint before the final coat. Pour it through a paint filter or old nylon to catch dried bits and lint. This removes the tiny specks that mar a flawless surface — a trick most beginners never learn.
Control your environment. Paint cures best between 60 and 80 degrees with low humidity. Too cold and it won’t level. Too humid and it stays tacky for hours.
Use a foam roller, not a bristle one, for flat shelf faces. Foam leaves a smooth, spray-like finish with no brush marks.
Keep a “wet edge” as you work. Always overlap into paint that’s still wet, never into a section that’s already setting. This prevents visible lap lines and gives you one continuous, even film across the whole shelf.
Frequently Asked Questions
Do I Need to Prime Wood Shelves Before Painting?
Yes, in almost every case. Wood primer seals the surface, blocks stains and tannins, and gives paint a solid grip. Without it, paint absorbs unevenly, needs more coats, and peels faster. Bare wood, stained wood, and glossy finishes all benefit. The only exception is paint-and-primer-in-one products on already-painted shelves in good condition.
What Kind of Paint Works Best on Wood Shelves?
Latex paint is the easiest choice for most shelves — it dries fast, cleans up with water, and resists yellowing. Oil-based paint offers a harder, more durable finish for high-traffic or heavy-use shelves, but it dries slowly and needs mineral spirits for cleanup. For interior shelving, a quality latex in satin or semi-gloss balances durability and looks.
How Many Coats of Paint Do Wood Shelves Need?
Plan on two coats over primer for most projects. The first coat looks patchy and uneven, which is normal. The second coat builds full, rich color and smooths the surface. Darker colors, bare wood, and high-use shelves may need a third coat for complete coverage and added durability. Always let each layer dry fully before adding the next.
How Long Should Paint Dry Between Coats?
Latex paint usually needs two to four hours between coats, while oil-based paint can take 8 to 24 hours. Check the label for exact times, since temperature and humidity affect drying. Paint may feel dry on top before it fully cures underneath, so add a buffer. A clear topcoat needs full curing, often 24 hours, before you load the shelves.
Can I Paint Over Already-Painted Wood Shelves?
Yes. Clean the shelves, then scuff-sand the old finish with 220-grit sandpaper to dull the gloss. This gives the new paint something to grip. Wipe away all dust with a tack cloth. If the old paint is chipping or peeling, scrape and sand those areas smooth first. A quick primer coat over patched spots ensures an even, lasting finish.
Conclusion
A worn shelf doesn’t need replacing — it needs a coat of paint and a little patience. Now that you know how to paint wood shelves the right way, the process is simple: clean and repair, sand, prime, paint thin coats, and seal. Each step builds on the last, and skipping any one shows in the final result.
The work rewards you on every front. You save money, protect your wood for years, and gain skills that carry into bigger projects. Prep carefully, apply thin even coats, respect the dry times, and you’ll get a smooth, durable finish that rivals store-bought furniture.
Start small. Pick one tired shelf this week and put these steps to work. Once you see the transformation, you’ll look around your home for the next project. Grab your sandpaper, load your brush, and turn that dull board into something you’re proud to display.
