
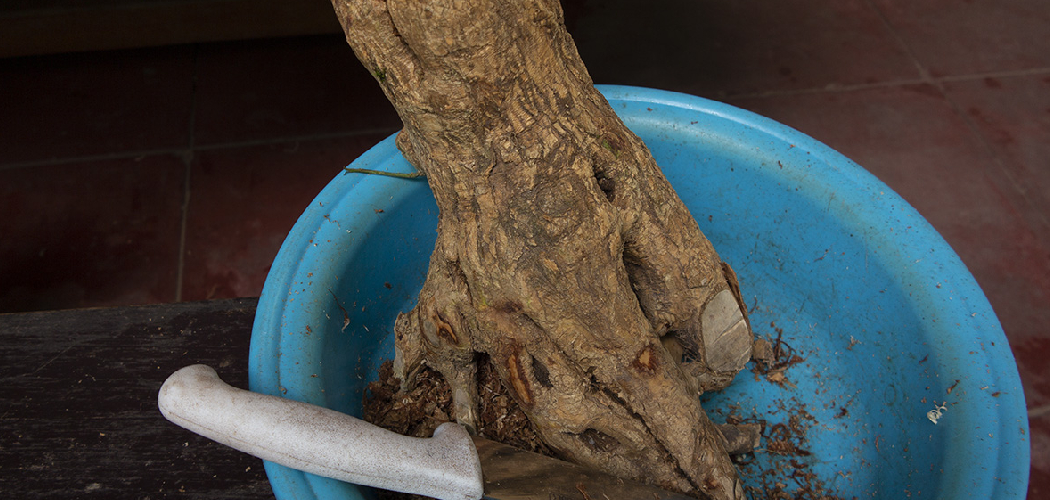
You found the perfect piece of driftwood. Smooth curves, silver-gray color, a shape that begs to become art. Then a week later it cracks, molds, or starts shedding tiny bugs across your workbench. Raw driftwood looks ready to use, but it almost never is. Knowing how to preserve driftwood for crafts is the difference between a project that lasts years and one that falls apart in days.
Salt, moisture, and hidden organisms all work against you the moment that wood leaves the water. The good news? Preservation is simple once you know the steps. This guide walks you through cleaning, drying, treating, and sealing driftwood so your finished pieces stay strong, beautiful, and ready for any craft you have in mind.
Why Preserving Driftwood Matters
Skip preservation and you waste time, money, and a great piece of wood. Untreated driftwood holds salt, moisture, and living organisms deep inside its fibers. Those problems surface later — as cracks, mold spots, white salt crystals, or wood-boring insects that spread to other materials.
Preserving driftwood protects your investment. You spend hours collecting and crafting, so a few extra steps keep that work intact. Treated wood resists rot, holds glue and paint better, and won’t warp once you bring it indoors.
For DIYers, this skill pays off fast. You avoid ruined projects and costly replacements. You build confidence with each piece. And you extend the life of every driftwood lamp, shelf, or wall hanging you make — turning a free beach find into lasting natural wood craft.
Tools and Materials You’ll Need
Gather your supplies before you start. Most are inexpensive and easy to find.
- Stiff scrub brush – removes sand, salt, and loose debris
- Mild dish soap – breaks down grime without damaging the wood
- Large bucket or tub – soaks pieces fully in fresh water
- Distilled water – rinses out salt without adding minerals
- White vinegar or bleach – kills mold, mildew, and organisms
- Protective gloves and eyewear – keeps chemicals off your skin and eyes
- Clear wood sealer or polyurethane – locks in durability and finish
- Fine-grit sandpaper (220+) – smooths rough spots before sealing
- Clean rags and brushes – apply sealer evenly
- Optional: a food dehydrator or low-temp oven – speeds drying for small pieces and kills insects fast
That last item saves days of air-drying time. Worth it if you craft often.
Step-by-Step Guide on How to Preserve Driftwood for Crafts
Step 1 – Inspect and Sort Your Driftwood
Start by looking closely at each piece. You want to catch problems before they spread to your workspace.
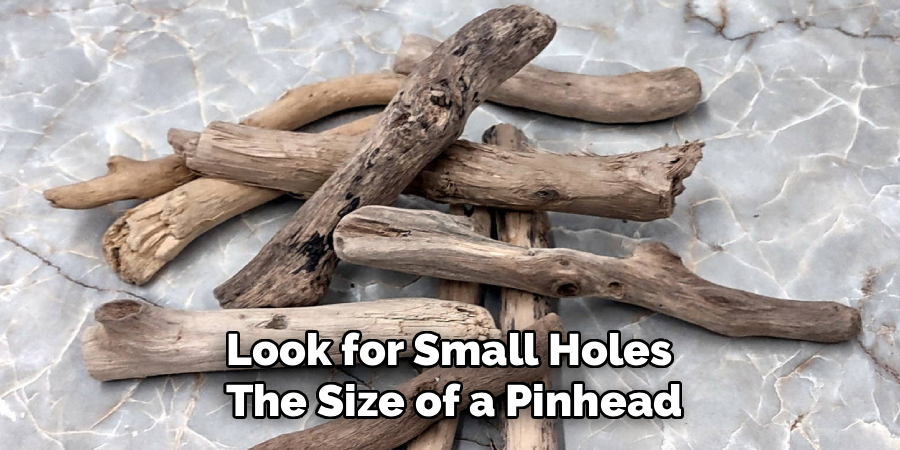
Run your fingers along the surface. Soft, spongy spots mean rot — those areas may crumble later. Look for small holes the size of a pinhead, a sign of wood-boring insects. Tap the wood against a hard surface and listen. A hollow, papery sound often signals decay inside.
Check for green or black mold, white salt crusts, and any lingering sea smell. Set aside pieces that feel damp or fragile.
Mastering how to preserve driftwood for crafts begins here, with honest sorting. A solid, dense piece with tight grain gives you the best foundation. Toss anything that crumbles when you press it.
Step 2 – Brush Off Loose Debris
Take your stiff brush and work the surface dry first. You’ll hear the scratch of bristles knocking sand from the grain.
Brush in the direction of the wood fibers. Going against them can splinter delicate edges. Pay attention to cracks and crevices where sand, pebbles, and tiny shells hide. Tap the wood firmly to shake loose anything stubborn.
You’ll see fine grit fall away, revealing the true color underneath. The wood feels rougher now, but cleaner. This dry brushing matters because wet sand turns to mud and clogs the grain. Get the bulk of the debris off before water ever touches the piece. A clean surface helps every later step work better.
Step 3 – Soak in Fresh Water
Fill your bucket with fresh water and submerge the driftwood completely. Weigh it down with a rock if it floats — and most pieces will at first.
Let it soak for one to three days. This pulls out salt buried deep in the fibers. You’ll notice the water turn cloudy and slightly brown. That’s the salt and grime leaving the wood.
Change the water once a day. Each fresh batch draws out more salt. Run your fingers across the surface after soaking — it should feel slick, not gritty. White crystals forming as it dries means salt remains and you need another soak. Patience here prevents those ugly salt streaks on your finished craft.
Step 4 – Disinfect to Kill Mold and Organisms
Now you tackle the living threats. Mix a solution of one part white vinegar to four parts water for a gentle approach, or one part bleach to ten parts water for tougher cases.
Put on your gloves and eyewear. Submerge the driftwood or scrub the solution into every surface. You’ll smell the sharp bite of vinegar or bleach as it works. Let it sit for 15 to 30 minutes.
This step kills mold spores, mildew, bacteria, and lingering insects. Watch for green tints to fade and dark spots to lighten. Rinse thoroughly with distilled water afterward. Skipping this disinfecting stage is the top reason driftwood crafts grow mold weeks later indoors.
Step 5 – Rinse and Inspect Again
Rinse the piece with distilled water to wash away every trace of vinegar or bleach. Leftover chemicals can react with sealers and discolor the wood.
Run clean water over the surface until you smell nothing but damp wood. Feel for any slippery residue and keep rinsing until it’s gone.
Then inspect once more in good light. Look for spots you missed — hidden mold in a deep crack, a soft patch you overlooked. Better to catch it now than after sealing. The wood should look uniform, with that classic weathered gray or pale tan tone coming through. A clean, residue-free surface sets you up for proper drying and a flawless finish.
Step 6 – Dry the Driftwood Completely
This step takes the most patience. Wet wood will trap moisture under any sealer and rot from the inside.
Place the driftwood in a dry, well-ventilated spot out of direct sun. Harsh sunlight dries the outside too fast and causes cracking. Air-drying takes one to three weeks depending on size and humidity.
You’ll know it’s ready when the wood feels light and warm to the touch, not cool or damp. Lift it — dry driftwood weighs noticeably less. Tap two pieces together and listen for a clean, hollow knock rather than a dull thud.
For small pieces, a food dehydrator or oven on its lowest setting speeds things up and kills any remaining bugs. Keep temperatures under 200°F.
Step 7 – Sand Rough Spots
Once dry, smooth the areas you’ll handle or attach to other materials. Driftwood’s natural texture is part of its charm, so don’t over-sand.
Use fine-grit sandpaper, 220 or higher. Work gently along the grain. You’ll feel rough fibers give way to a smoother surface, and a fine dust will rise. Focus on splintery edges, jagged ends, and any spots that’ll touch skin or glue.
Wipe the dust away with a dry rag. Run your hand over the wood — it should feel clean and snag-free where it counts, while keeping its weathered character elsewhere. This light sanding helps sealer bond evenly and removes hazards. Leave the beautiful gnarled sections alone.
Step 8 – Seal for Durability
Sealing locks in everything you’ve done and protects the wood for years. Learning how to preserve driftwood for crafts always ends with a good seal.
Choose a clear wood sealer or polyurethane based on your goal. Matte finishes keep that raw, natural look. Glossy finishes deepen the color and add shine. For a softer touch, natural oils like linseed work too.
Apply a thin, even coat with a clean brush. You’ll see the wood drink in the first layer. Let it dry fully, then add a second coat for outdoor or high-use pieces. Watch for drips and pooling in crevices — wipe those before they harden. Two or three light coats beat one heavy one every time.
Common Mistakes to Avoid
The biggest mistake is rushing the drying stage. Driftwood feels dry on the surface long before its core is. Seal it too soon and you trap moisture inside, leading to rot, mold, and warping weeks later. Always confirm the piece is bone-dry by weight and feel before moving on.
Another common error is skipping disinfection entirely. People assume sun and salt water already killed everything. They didn’t. Mold spores and tiny insects survive deep in the grain, then emerge once the wood sits warm and dry indoors. That vinegar or bleach soak isn’t optional.
Many beginners also ignore the salt. Without a proper freshwater soak, salt stays locked in the fibers and crystallizes as white streaks across your finished piece. It also draws moisture from the air, keeping the wood damp.
Over-sanding ruins character. The weathered texture is why driftwood looks special — grinding it smooth makes it look like ordinary lumber. Sand only where you must.
Finally, applying sealer too thick causes drips, cloudy spots, and uneven curing. Thin coats win.
Expert Tips
A few pro habits separate clean results from frustrating ones.
First, freeze small pieces for 48 hours before treating them. The cold kills insects and eggs that vinegar might miss — a trick coastal woodworkers swear by.
Second, test your sealer on a hidden spot. Some finishes darken driftwood dramatically. You want to know before committing the whole piece.
Third, work in batches. Set up your soak, disinfect, and drying stations at once so pieces move through the pipeline efficiently. You’ll save days over the long run.
Finally, save your collecting for after a storm. Fresh-washed pieces are cleaner, denser, and less weathered than wood that’s baked on the beach for months. Better raw material means less work and a stronger finished craft.
Frequently Asked Questions
How Long Does Driftwood Take to Dry?
Driftwood takes one to three weeks to air-dry, depending on size, density, and humidity. Thick or dense pieces need longer. The wood is ready when it feels light, warm, and produces a clean hollow knock when tapped. A low-temp oven or food dehydrator dries small pieces in hours and kills any insects at the same time.
Do I Really Need to Soak Driftwood in Fresh Water?

Yes. Saltwater driftwood holds salt deep in its fibers. Without a freshwater soak, that salt crystallizes into white streaks on your finished craft and draws moisture from the air, keeping the wood damp. Soak pieces one to three days, changing the water daily. The surface should feel slick, not gritty, when the salt is fully flushed out.
Can I Use Bleach on Driftwood?
You can. A solution of one part bleach to ten parts water kills mold, mildew, and insects effectively, and lightens the wood toward a bright, weathered tone. For a gentler option, use one part white vinegar to four parts water. Either way, wear gloves and eyewear, then rinse thoroughly with distilled water to remove all chemical residue before drying.
What’s the Best Sealer for Driftwood Crafts?
Clear polyurethane gives the most durable protection and works for both indoor and outdoor pieces. Choose matte for a natural look or gloss for richer color and shine. For a softer, more organic feel, natural oils like linseed work well. Always apply thin, even coats — two or three light layers protect better than one heavy coat.
Will Preserved Driftwood Still Crack?
Properly preserved driftwood rarely cracks. Cracking usually comes from drying too fast in direct sun or sealing before the core is fully dry. Dry pieces slowly in a shaded, ventilated spot, confirm they’re bone-dry by weight, then seal with thin coats. Done right, your driftwood stays stable through changes in temperature and humidity for years.
Conclusion
Raw driftwood is full of hidden problems — salt, moisture, mold, and insects that ruin crafts weeks down the line. Now you know how to stop all of them. Inspect and sort your pieces, brush off debris, soak out the salt, disinfect, rinse, dry completely, sand lightly, and seal. Follow that order and you turn a fragile beach find into a lasting piece of art.
The payoff is real. You save money by not replacing failed projects. You build skill with every batch. And you create driftwood pieces strong enough to last for years.
Don’t let one skipped step undo your work. Patience during drying and a thorough disinfecting soak make the biggest difference. Mastering how to preserve driftwood for crafts takes a little time up front, but it rewards you with beautiful, durable results every time.
Grab your next piece of driftwood and put these steps to work. Your best craft yet is waiting.
