
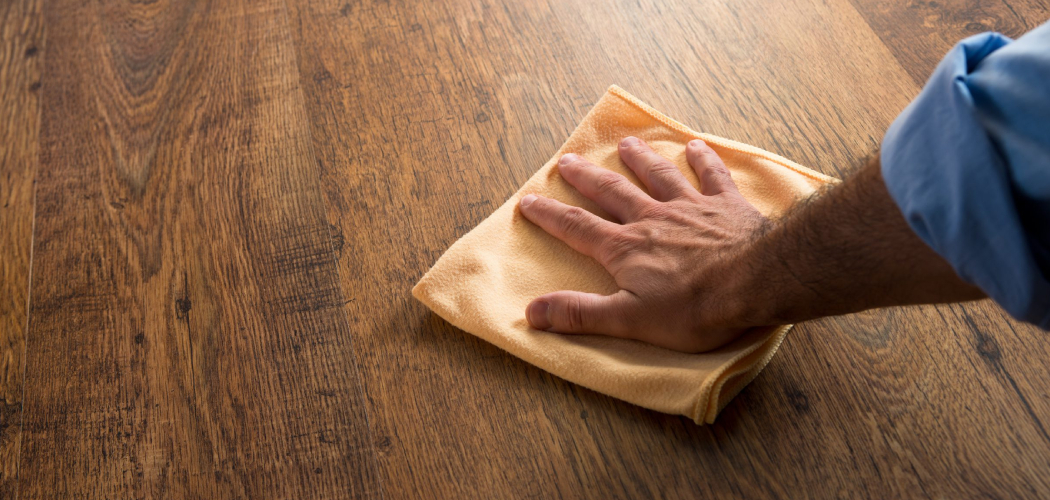
Old wood flooring drags down your room and your budget. Ripping it out yourself fixes both. Learning how to pull up wood floor saves you hundreds in labor costs and puts you in full control of your renovation timeline. The job sounds intimidating. It isn’t. With the right tools and a clear plan, you can clear a room of nailed or glued planks in a weekend.
This skill matters whether you’re chasing water damage, prepping for new tile, or salvaging old hardwood for reuse. You’ll work with pry bars, exposed subfloor, stubborn flooring nails, and tongue-and-groove joints. Each comes with its own quirks. This guide walks you through every step, tool, and common pitfall so you remove your wood floor cleanly, safely, and without wrecking the subfloor beneath it.
Why Removing Wood Flooring Matters
Hiring a contractor to tear out flooring runs $1 to $4 per square foot before disposal fees. Do it yourself and that money stays in your pocket. For a 200-square-foot room, that’s $200 to $800 saved on demolition alone.
The payoff goes beyond cash. Removing your own floor builds real confidence with tools you’ll use again. You learn how your home is built — what’s under the planks, how the subfloor sits, where the joists run. That knowledge prevents costly mistakes on future projects.
You also protect what’s worth keeping. Careful removal salvages reusable hardwood and keeps the subfloor intact for whatever comes next. Rush the job and you damage the layer you need. Take your time and you set up a clean foundation for new flooring.
Tools and Materials You’ll Need
Gather everything before you start. Stopping mid-job to find a tool wastes time and momentum.
- Pry bar (flat and crowbar) — lifts planks and pops nails.
- Hammer or mallet — drives the pry bar and knocks loose stubborn boards.
- Circular saw — scores glued-down or tongue-and-groove planks into liftable sections.
- Reciprocating saw — cuts through nails and tight spots.
- Cat’s paw or nail puller — extracts flooring nails left in the subfloor.
- Floor scraper — removes adhesive residue from glued-down flooring.
- Utility knife — cuts caulk lines and underlayment.
- Safety gear — goggles, gloves, knee pads, dust mask.
- Heavy-duty trash bags or a dumpster — for hauling debris.
- Shop vacuum (optional) — keeps your workspace clear and your footing safe between passes.
Step-by-Step Guide on How to Pull Up Wood Floor
Step 1 – Clear and Prep the Room
Empty the room completely. Move furniture, rugs, and anything resting against the walls. A clear floor gives you room to swing tools and stack debris.
Pry off the baseboards and shoe molding next. Slide a flat pry bar behind each piece, work slowly, and ease them away from the wall. You’ll hear the nails creak and pop as they release. Save undamaged trim if you plan to reuse it.
Pull up any floor vents or thresholds. Then snap a few photos of how the planks run and where they meet doorways. This is the cleanest the room will be — knowing how to pull up wood floor starts with a workspace you can move in freely. Open a window for ventilation before the dust starts.
Step 2 – Find Your Starting Edge
Look for the weakest point in the floor. A doorway, a closet, or a damaged plank gives you a natural entry. Floors lift easier from an edge than from the middle.
Run your hand across the surface and feel for boards that already flex or lift. Those loose planks are your way in. If everything sits tight, use your circular saw to cut a clean line across one plank near the wall. Set the blade depth to match the plank thickness so you don’t bite into the subfloor.
A shallow, accurate cut sounds crisp and clean. A blade set too deep grinds and kicks up subfloor splinters. That gap you create becomes the leverage point for your pry bar.
Step 3 – Lift the First Plank
Slide your pry bar into the gap or under the loose edge. Push down on the handle and let the leverage do the work. The first board fights back — you’ll feel resistance, then a sharp pop as the tongue separates from the groove.
Tongue-and-groove planks interlock along their edges. Once you free one, the rest follow more easily. Work the pry bar along the length of the board, lifting a few inches at a time. Don’t yank. Steady pressure protects both the plank and the subfloor.
Listen for the difference. A clean release gives a single firm crack. A splintering, tearing sound means you’re pulling against an unbroken joint — back off and reposition your bar.
Step 4 – Work Across the Floor in Rows
With the first plank out, follow its row. Each board you remove exposes the tongue or nails of the next, making the work faster as you go. Move in the same direction the floor was laid.
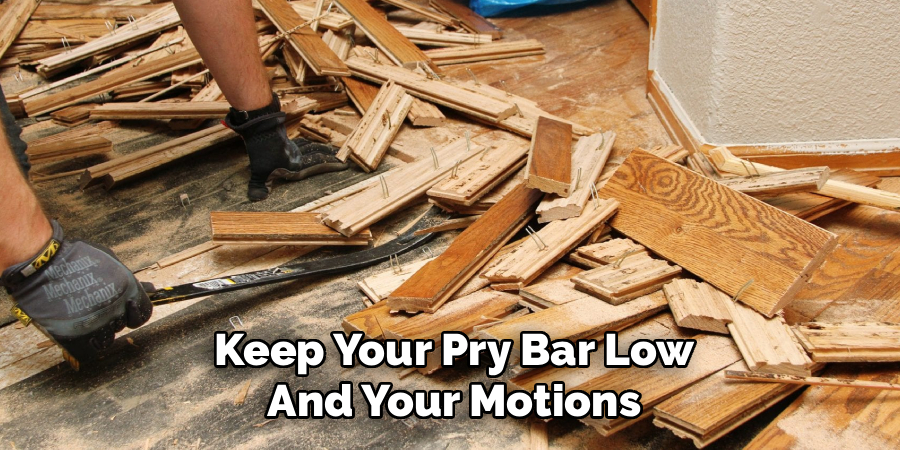
Keep your pry bar low and your motions controlled. Slide it under each board, lift, and shift to the next leverage point every six to eight inches. You’ll settle into a rhythm — pry, lift, pull, repeat. The boards come up cleaner this way.
This middle stretch is where learning how to pull up wood floor pays off. Drop your boards into trash bags as you clear each section. A tidy work zone keeps you from tripping and gives you solid footing on the exposed subfloor.
Step 5 – Handle Glued-Down Flooring
Glued-down flooring doesn’t pop free like nailed planks. The adhesive holds tight, so you cut your way through instead.
Set your circular saw to the plank’s thickness and score the floor into manageable squares — roughly two feet across. These smaller sections break the adhesive’s grip and lift in pieces rather than fighting you as one stubborn sheet.
Wedge a stiff floor scraper or flat pry bar under each square. Tap it forward with a mallet. You’ll feel the glue release in sticky, uneven tugs. Some sections lift clean; others leave a film behind. That’s normal. Push through the resistance section by section, and don’t expect the smooth release you get from nailed hardwood.
Step 6 – Remove Leftover Nails and Staples
Pulling up the planks almost always leaves nails and staples behind in the subfloor. Each one is a hazard and an obstacle for your new floor. Clear them all.
Grab a cat’s paw or nail puller. Hook the head of each nail, rock the tool back, and pull straight up. Stubborn nails snap off — for those, use a reciprocating saw or nail set to drive them flush below the surface.
Run your hand across the subfloor when you think you’re done. Any nail you can feel will catch underlayment or damage new flooring later. Sharp metal points hide easily against wood grain, so check in good light and sweep the area twice.
Step 7 – Scrape Off Adhesive Residue
Glued floors leave behind a hardened layer of adhesive. New flooring needs a flat, clean base, so this residue has to go.
Use a long-handled floor scraper and push it across the surface at a low angle. The adhesive peels away in curls and flakes. For tough spots, a heat gun softens the glue and makes scraping easier. Work in small sections so you can see your progress.
Run your palm over the cleared area. It should feel smooth, not tacky or ridged. Lingering high spots will telegraph through your next floor. Vacuum up the debris as you go to keep the surface visible and your footing secure.
Step 8 – Inspect and Prep the Subfloor
Now you can finally see what you’re working with. Walk the entire subfloor and look for damage. Water stains, soft spots, mold, or warping all signal trouble that needs fixing before you lay anything new.
Press down with your foot in different areas. A solid subfloor stays firm and silent. A spongy or squeaky spot points to rot or loose fasteners underneath.
Drive screws into any loose panels to lock them down. Replace damaged sections entirely. Then give the whole surface a final sweep and vacuum.
A clean, flat, secure subfloor is the real finish line. Skip this inspection and every flaw beneath becomes a flaw in your new floor.
Common Mistakes to Avoid
The biggest mistake is rushing the job. Speed feels productive, but yanking planks hard splinters wood, gouges the subfloor, and scatters nails everywhere. Steady, controlled pressure removes boards faster in the long run and leaves a cleaner surface behind.
Skipping safety gear comes next. Exposed nails, flying splinters, and fine dust are constant. Goggles, gloves, knee pads, and a dust mask aren’t optional. One staple through your palm ends your weekend fast. Protect yourself before the first board comes up.
Many beginners forget the baseboards. Pulling planks while the trim is still attached chips both the molding and the wall. Remove baseboards and thresholds first, and you save trim worth reusing while protecting your walls.
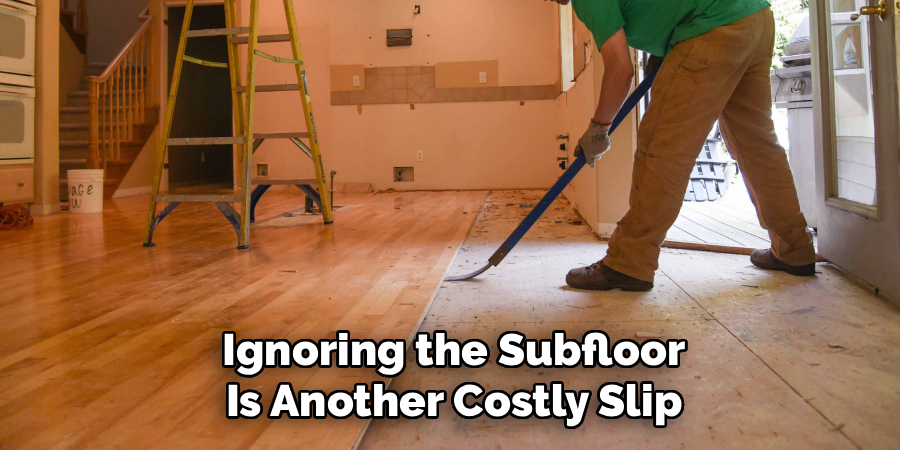
Ignoring the subfloor is another costly slip. People clear the planks, declare victory, and lay new flooring over leftover nails, adhesive, or soft spots. Those hidden flaws push straight through the new surface. Inspect, repair, and clean the subfloor every time.
Finally, don’t underestimate disposal. Wood, nails, and adhesive pile up fast. Plan your hauling and trash bags ahead, or you’ll be buried in debris with nowhere to put it.
Expert Tips
Tackle one small section before committing to the whole room. A two-foot test patch tells you whether the floor is nailed, glued, or floating — and how hard the fight will be. You adjust your tools and pace before you’re in too deep.
Keep your pry bar angle low. The flatter you work, the more leverage you get and the less you crush the plank edges. High angles snap boards and tire your arms.
Slide a thin scrap of wood under your pry bar where it meets the subfloor. It spreads the load and stops the bar from punching dents into the surface you want to keep.
Bag debris continuously instead of in one big pile. A clear floor means safe footing and faster work. And keep a magnet sweeper handy — it pulls stray nails and staples out of the debris and off the subfloor in seconds.
Frequently Asked Questions
How Long Does It Take to Pull Up a Wood Floor?
A 200-square-foot room takes one to two days for most beginners. Nailed tongue-and-groove planks come up faster — often a single day. Glued-down flooring takes longer because you cut and scrape every section. Your speed depends on the floor type, the subfloor condition, and how carefully you work. Plan for the longer end your first time.
Can I Reuse the Hardwood After Removing It?
Yes, if you remove it carefully. Lift planks slowly with a flat pry bar to protect the tongue-and-groove edges. Salvaged hardwood works well for smaller projects, repairs, or accent walls. Expect to lose some boards to splitting and nail damage. Sort the keepers as you go and pull old nails before storing the wood flat in a dry space.
Do I Need to Remove the Baseboards First?
Yes. Always pull baseboards and shoe molding before lifting any planks. Trim sits on top of or against the flooring, so removing it first prevents chips, cracks, and wall damage. Slide a flat pry bar behind each piece and ease it loose. Careful removal lets you reuse undamaged trim, saving you money on replacement molding later.
What’s the Hardest Part of Wood Floor Removal?
Glued-down flooring and leftover adhesive give beginners the most trouble. The glue holds tight, so you score the planks into squares and pry them up piece by piece. Then you scrape the hardened residue off the subfloor. It’s slow, physical work. Nailed floors come up far more easily once you free that first interlocking board.
Will I Damage the Subfloor When I Remove the Wood?
Not if you work carefully. Keep your pry bar angle low and lift with steady pressure instead of force. Place a wood scrap under the bar to spread the load. The real damage comes from rushing or driving the bar too deep. Go slow, protect the surface, and your subfloor stays flat and ready for new flooring.
Conclusion
Pulling up an old wood floor is well within your reach. You’ve seen the full process — clear the room, find your edge, lift plank by plank, deal with nails and adhesive, and prep a clean subfloor. None of it requires a contractor.
The rewards are real. You save hundreds in labor, gain hands-on skills, and protect the foundation your new floor depends on. Take it slow, wear your gear, and respect the subfloor underneath. That’s how the job turns out clean.
Now you know how to pull up wood floor with confidence. Gather your tools, start with one loose plank, and work your room row by row. Each board you lift brings you closer to a fresh, finished space — built by your own hands. Grab your pry bar and get started this weekend.
