
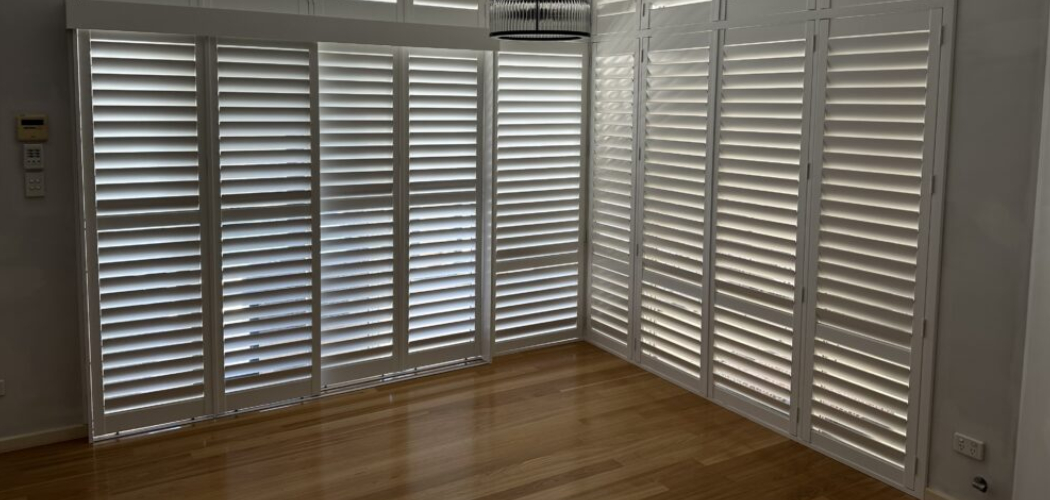
Dusty, grimy shutters drag down a room. The good news: you can fix that without stripping a single fleck of color. Painted wood shutters need a gentle hand, the right products, and a steady routine. Push too hard or grab the wrong cleaner, and you risk dull spots, peeling edges, or worn-down paint that costs you a repaint.
This guide shows you exactly how to clean wooden shutters without removing paint, step by step, using methods any beginner can follow. You’ll learn which tools work, which to skip, and how to spot the difference between a job done right and one heading for trouble.
By the end, you’ll keep your shutters bright, clean, and protected for years. That’s the purpose here: simple, paint-safe shutter care that actually lasts.
Why Clean Painted Shutters Matters
Skip cleaning and dust turns into grime. Grime traps moisture. Moisture lifts paint and rots the wood underneath. That’s how a quick chore becomes a full replacement.
Learning paint-safe cleaning methods saves you real money. A new set of plantation shutters runs hundreds of dollars per window. A repaint job costs time, supplies, and a weekend you won’t get back. Regular wood shutter cleaning prevents both.
There’s a confidence payoff too. Once you know how to handle painted wood without damage, you’ll tackle other wood surface care projects without hesitation. The same gentle approach works on trim, doors, and cabinets.
Clean shutters also work better. Slats move freely. Light filters evenly. Your windows look finished instead of forgotten. This is one of the easiest DIY shutter maintenance skills to master, and it pays off every single day.
Tools and Materials You’ll Need
Gather everything before you start. The right kit keeps the job fast and protects your paint.
- Two microfiber cloths — soft enough to lift dust without scratching the finish
- A soft-bristle brush or clean paintbrush — reaches grooves, louvers, and tight corners
- Mild dish soap — pH-neutral and safe on painted surfaces
- Two buckets — one for cleaning solution, one for clean rinse water
- A vacuum with a brush attachment — clears loose dust before you wet anything
- A small step stool — keeps you steady for upper slats
- Cotton swabs or an old toothbrush — detail tools for stubborn corners
- Distilled white vinegar — cuts grease and water spots when soap alone falls short
- A handheld duster (optional) — speeds up weekly touch-ups between deep cleans
Keep your cloths separate. One stays for washing, one for drying.
Step-by-Step Guide on How to Clean Wooden Shutters Without Removing Paint
Step 1 – Dry Dust the Entire Surface First
Start dry, always. Wetting dusty shutters turns loose grime into a muddy paste that grinds against the paint. Grab your vacuum with the brush attachment and run it gently along each slat, top to bottom.
Listen for that soft, even hum as the bristles glide. No scraping, no clatter. If you hear the plastic edge tapping the wood, you’re too close — back off slightly.
Tilt the louvers one way, dust, then tilt them the other way and repeat. Both faces of every slat collect grime you can’t see straight on.
You’ll know you’re done when a fingertip swipe comes away clean. The surface should feel smooth and look matte-even, with no gray film hiding in the corners.
Step 2 – Mix a Gentle Cleaning Solution
Fill one bucket with warm water and add a few drops of mild dish soap. Swirl it until you see light suds — you want it barely soapy, not foamy. Too much soap leaves a sticky residue that dulls painted wood shutters over time.
Fill your second bucket with plain warm water for rinsing. Distilled works best if your tap water leaves spots.
Dip a cotton swab in the solution and dab a hidden slat near the bottom. Wait a minute. If the paint stays put and the color holds, you’re clear to continue.
This simple test is the heart of how to clean wooden shutters without removing paint — proving your solution is gentle before it ever touches a visible surface.
Step 3 – Wring Your Cloth Until Nearly Dry
Water is the enemy of painted wood. Soak a slat and moisture seeps into seams, swells the grain, and lifts paint at the edges.
Dip your microfiber cloth in the soapy water, then wring it hard. Twist until barely a drop escapes. The cloth should feel damp and cool, never dripping.
Hold it flat against your palm. If water beads or runs down your wrist, wring again.
A properly wrung cloth leaves a thin, fast-drying film — not a wet streak. You’ll see the surface darken slightly, then return to its normal shade within seconds. That quick recovery tells you the moisture level is right and your paint stays safe.
Step 4 – Wipe Each Slat With the Grain
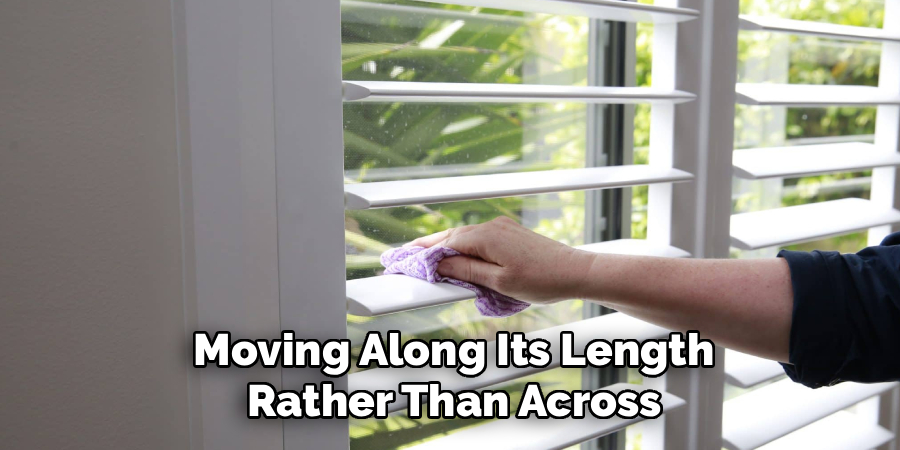
Work one slat at a time, moving along its length rather than across it. Wiping with the grain follows the wood’s natural lines and lifts grime without dragging it into the finish.
Use light, even pressure. Let the damp cloth do the work — pressing hard scrubs the paint, not the dirt.
You’ll feel resistance soften as the grime releases. The slat should look brighter with each pass, the color waking up under your cloth.
Flip to a clean section of the microfiber often. A gray, loaded cloth just smears dirt back across the surface.
Move methodically from the top louver down. Working downward means any drips land on slats you haven’t cleaned yet, not finished ones.
Step 5 – Detail the Corners and Louver Joints
Corners hide the worst buildup. Where slats meet the frame, dust packs into tight seams that a flat cloth can’t reach.
Dip a cotton swab or soft toothbrush in your soapy water, then tap off the excess. Gently work the bristles into each joint with small circular motions.
Listen for a faint, dry scratching as the brush loosens packed grime. Stop the moment the sound smooths out — that means the gunk is gone.
Wipe away the loosened dirt right away with a corner of your damp cloth. Left to sit, it dries back into the seam.
Done right, the joints look crisp and shadow-free. The paint edge stays sharp, with no fuzzy buildup softening the line between slat and frame.
Step 6 – Tackle Stubborn Spots With Vinegar
Some grease and water stains shrug off soap. For those, mix one part distilled white vinegar with three parts water in a small cup.
Dampen a cotton swab — not the whole cloth — and dab the spot directly. Vinegar cuts grime fast, so you rarely need more than a light touch.
Let it sit five seconds, then wipe with your damp microfiber. You’ll see the stain lift and the paint underneath stay untouched.
Never let vinegar pool on the surface. Its mild acidity is safe in small amounts but harsh if it sits.
This targeted approach is central to how to clean wooden shutters without removing paint — treating problem areas precisely instead of soaking the whole slat in something stronger than it needs.
Step 7 – Rinse Away Any Residue
Soap left behind attracts dust and dulls the finish fast. Rinse it off before it dries.
Dip your second microfiber in the plain rinse water and wring it nearly dry, just like before. Wipe each slat again, following the same with-the-grain direction.
You’re chasing that faint slippery feel that soap leaves behind. Run a bare finger across a rinsed slat — it should feel clean and smooth, not tacky.
Change your rinse water the moment it turns cloudy. Dirty water just redeposits the grime you worked to remove.
The slats should look evenly clean now, with a soft natural sheen returning to the paint. No streaks, no soap haze, no dull patches catching the light.
Step 8 – Dry Thoroughly and Inspect
Never leave shutters to air-dry. Standing moisture is exactly what lifts paint over time.
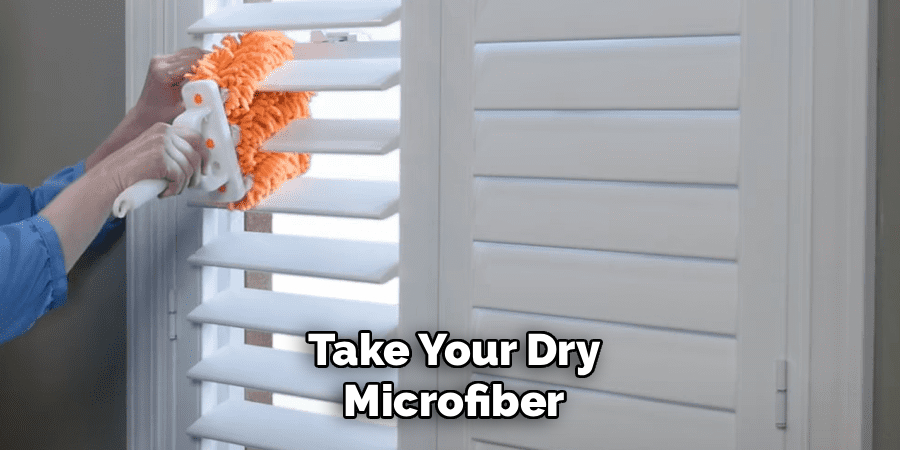
Take your dry microfiber and buff each slat, top to bottom, the same direction you cleaned. The surface should turn smooth and slightly warm under the friction.
Open and close the louvers a few times to shake loose any trapped water in the joints. Listen for a clean, quiet swing — no squeak, no stickiness.
Now inspect in good light. Tilt the slats toward a window and scan for streaks, missed corners, or damp seams. Catch any spots while your tools are still out.
Properly finished shutters look uniform and bright, with the paint crisp and intact. That’s the result you’re after.
Common Mistakes to Avoid
The biggest mistake is soaking the wood. Beginners often spray cleaner straight onto the shutters or use a dripping cloth, thinking more water means a deeper clean. It doesn’t. Excess moisture seeps into seams, swells the grain, and pries paint loose at the edges. Always wring until your cloth is barely damp.
Reaching for harsh chemicals is another trap. Ammonia, bleach, and abrasive all-purpose sprays strip paint and leave it chalky. Mild dish soap handles almost everything painted wood shutters throw at you. Save anything stronger for unpainted surfaces.
Skipping the dry dusting step ruins finishes fast. Wiping a dusty slat with a wet cloth grinds grit across the paint like sandpaper. You’ll see fine scratches show up in raking light. Vacuum or dust first, every time.
Scrubbing too hard wears paint thin, especially on raised edges and corners. Let the damp cloth and a gentle solution lift the dirt — pressure isn’t the answer.
Finally, many people forget to dry. Air-drying leaves water sitting in joints, the exact spot where paint fails first. Buff every slat dry before you walk away.
Expert Tips
Work in sections, not all at once. Clean one window fully — wash, rinse, dry — before moving to the next. This stops soapy water from drying on slats you haven’t reached yet.
Add a few drops of lemon oil to your final dry cloth on rare deep cleans. It conditions the paint’s surface and leaves a light protective layer that repels dust. Use it sparingly — too much turns slats sticky.
Time your cleaning for a dry, low-humidity day. Paint and wood release moisture faster, so your shutters dry quickly and the finish stays tight.
Keep a handheld duster by the window and run it over the slats weekly. Two minutes of regular DIY shutter maintenance means you’ll rarely need a full deep clean — and your paint lasts years longer.
Frequently Asked Questions
Can I Use Water on Painted Wood Shutters?
Yes, but only a little. Use a damp cloth wrung nearly dry, never a soaking one. Water in small, controlled amounts is safe and effective. The danger comes from excess moisture pooling in seams and joints, where it swells the wood and lifts paint. Always dry each slat right after cleaning to keep the finish intact.
How Often Should I Clean My Wood Shutters?
Dust them weekly with a dry cloth or duster, and do a full wet clean every two to three months. High-traffic rooms, kitchens, and homes with pets may need deeper cleaning more often. Regular light maintenance prevents grime buildup, which means each deep clean stays quick and gentle — and your paint avoids the wear that hard scrubbing causes.
Will Vinegar Damage the Paint on My Shutters?
Diluted vinegar is safe for spot-cleaning when used correctly. Mix one part vinegar with three parts water and apply it with a cotton swab to stubborn stains only. Never let it pool or sit longer than a few seconds, and always wipe it off promptly. Avoid full-strength vinegar entirely — its acidity can dull or soften paint over repeated use.
What’s the Best Cloth for Cleaning Shutters?
Microfiber wins every time. Its fine fibers lift dust and grime without scratching the painted surface, and they hold just enough water to clean without soaking. Keep two on hand — one for washing, one for drying. Avoid paper towels, which shed and leave lint, and rough rags, which can scuff the finish on raised edges and corners.
How Do I Clean Between Tight Shutter Slats?
Use a cotton swab, a soft toothbrush, or a clean paintbrush dipped in your soapy solution. Work the bristles gently into each joint with small circular motions, then wipe the loosened grime away immediately. A handheld duster or a cloth wrapped around a butter knife also reaches narrow gaps. Detail these corners last, since they hide the heaviest buildup.
Conclusion
Clean shutters come down to a simple rule: gentle wins. Dust dry first, wash with a barely damp cloth and mild soap, rinse, then buff dry. Treat stubborn spots with diluted vinegar and a cotton swab, and detail those grimy corners with a soft brush. That’s the whole method — no harsh chemicals, no soaking, no scrubbing the color off.
Master this routine and your painted wood shutters stay bright, smooth, and protected for years. You’ll save the cost of repainting, dodge the moisture damage that ruins finishes, and build the confidence to handle other wood surface care projects around your home.
Now you know how to clean wooden shutters without removing paint, and the work takes less time than you’d think. Grab your microfiber cloths, mix that gentle solution, and start with one window. Once you see the difference, you’ll keep your shutters looking their best with just a few minutes of care each week.
